Loading ...
Loading ...
Loading ...
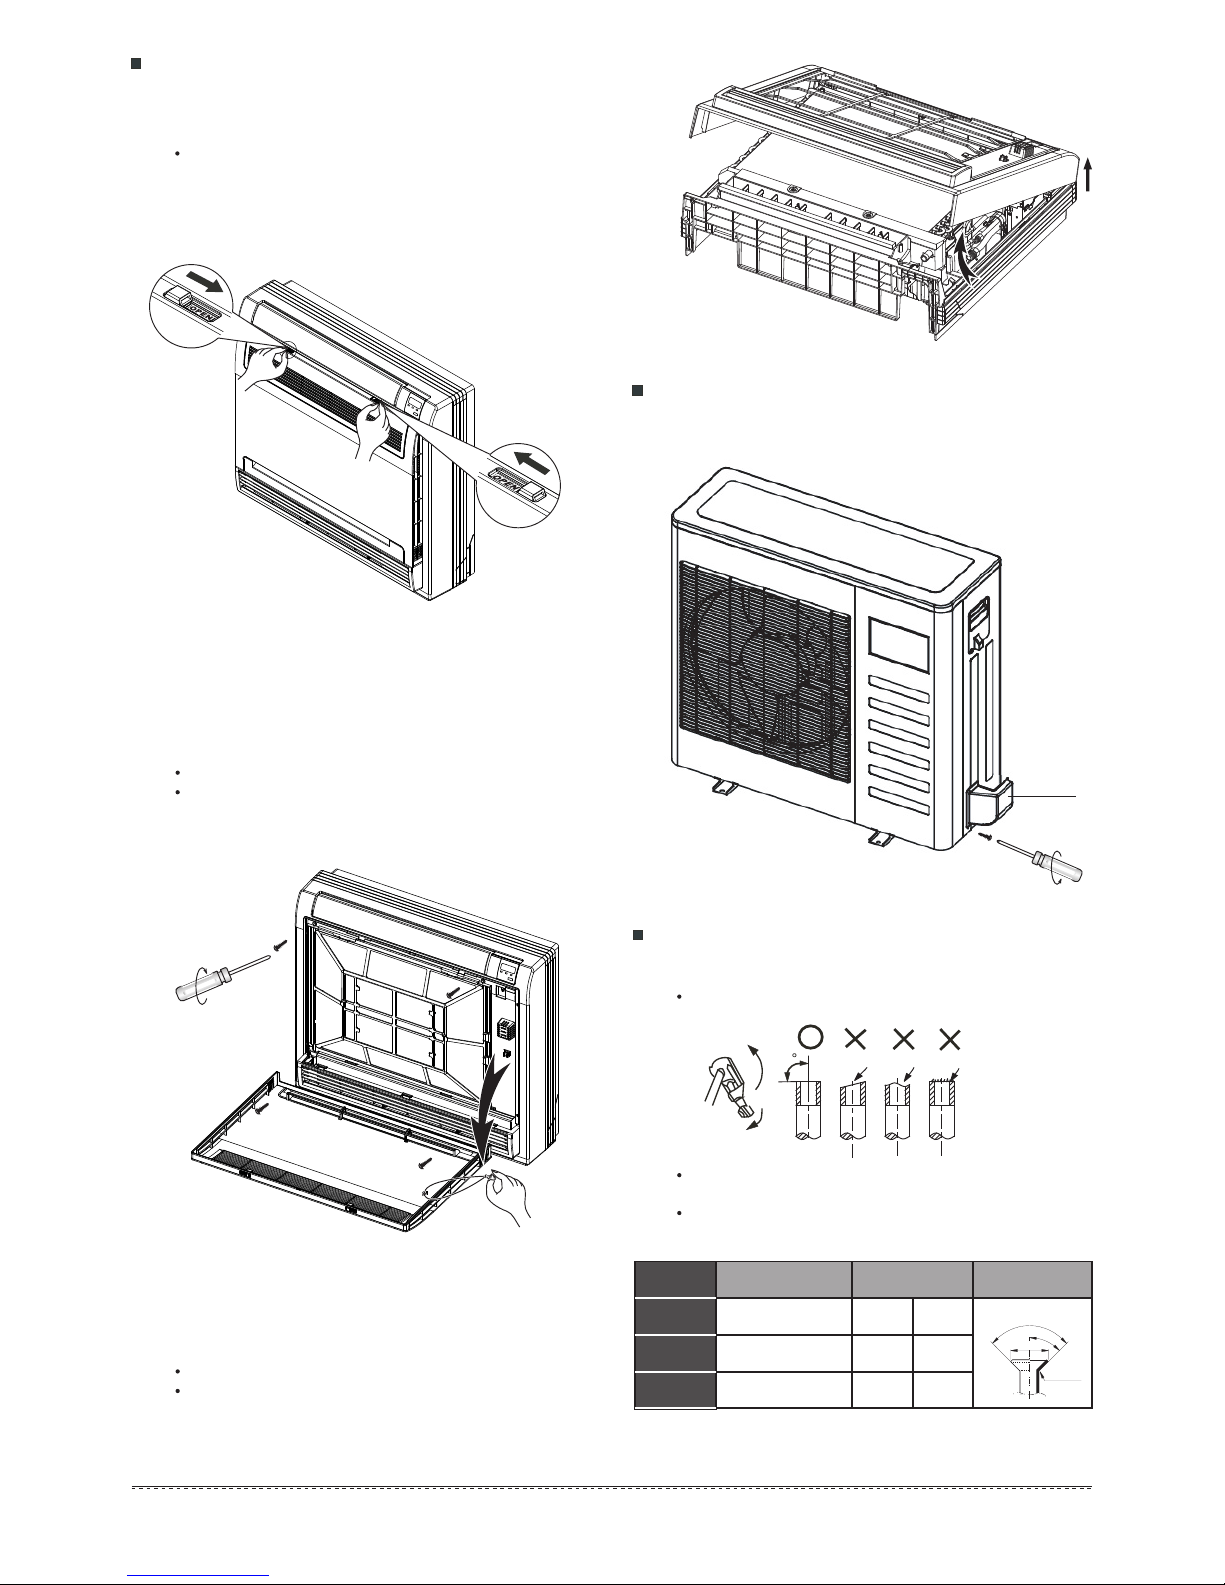
Fig.7-1
Open the front panel
1
Slide the two stoppers on the left and right sides inword
until they click .(Refer to Fig.7-1)
How to take indoor unit apart to connect
the pipes
Remove the front panel.
2
Remove the string.(Refer to Fig.7-2)
Allowing the front panel to fall forward will enable you to
remove it.
Remove the face plate .
3
Remove the four screws.(Refer to Fig.7-2)
Open the bottom of face plate to a 30 degree angle, then
you can remove the top of the face plate.(Refer to Fig.7-3)
Fig.7-2
Fig.7-3
How to take outdoor unit apart to connect
the pipes
Remove the water tray(Refer to Fig.7-4)
Flaring
1
Cut a pipe with a pipe cutter. (Refer to Fig.7-5)
Insert a flare nut into a pipe and flare the pipe.
Refer to Table 7-2 for the dimension of flare nut spaces.
90
Lean crude burr
Fig.7-5
Fig.7-4
How to Connect the pipes
Water tray
Table 7-2
0.33/8.3 0.34/8.7
0.47/12.0
0.61/15.4
Ø1/4in/6.35
Ø3/8in/9.52
Ø1/2in/12.7
R0.016~0.031
0.4~0.8
45
°
±
2
90
°
±
4
A
357~367 kgf.cm
(35~36 N.m)
255~265 kgf.cm
(25~26N.m)
153~163 kgf.cm
(15~16 N.m)
(in/mm)
min max
Pipe gauge
Tightening torque
Flare dimensin A
Flare shape
0.48/12.4
0.62/15.8
10
Downloaded from www.ManualsFile.com manuals search engine
Loading ...
Loading ...
Loading ...