Loading ...
Loading ...
Loading ...
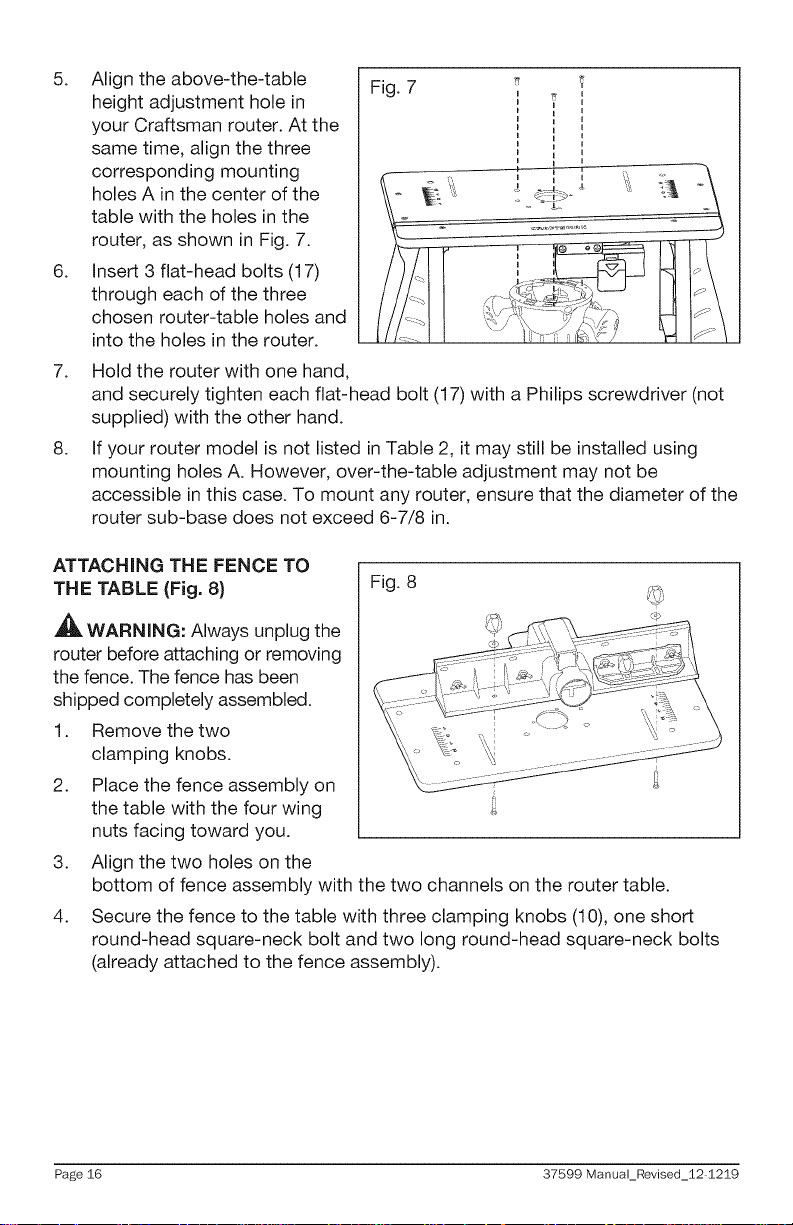
5. Align the above-the-table
height adjustment hole in
your Craftsman router. At the
same time, align the three
corresponding mounting
holes A in the center of the
table with the holes in the
router, as shown in Fig. 7.
6. Insert 3 flat-head bolts (17)
through each of the three
chosen router-table holes and
into the holes in the router.
Fig. 7 _
i ' i
I i
i i
i i i
i i
I i
7. Hold the router with one hand,
and securely tighten each flat-head bolt (17) with a Philips screwdriver (not
supplied) with the other hand.
8. If your router model is not listed in Table 2, it may still be installed using
mounting holes A. However, over-the-table adjustment may not be
accessible in this case. To mount any router, ensure that the diameter of the
router sub-base does not exceed 6-7/8 in.
ATTACHING THE FENCE TO
THE TABLE (Fig. 8)
,_ WARNING: Always unplug the
router before attaching or removing
the fence. The fence has been
shipped completely assembled.
1. Remove the two
clamping knobs.
2. Place the fence assembly on
the table with the four wing
nuts facing toward you.
Fig. 8
3. Align the two holes on the
bottom of fence assembly with the two channels on the router table.
4. Secure the fence to the table with three clamping knobs (10), one short
round-head square-neck bolt and two long round-head square-neck bolts
(already attached to the fence assembly).
Page 16 37599 Manual_Revised_Z2 123_9
Loading ...
Loading ...
Loading ...