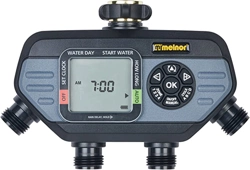
Documents: Go to download!
User Manual
- User Manual - (English, French)
- User manual - (English)
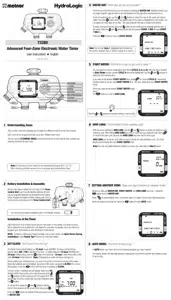
- Installing the Timer
- Programming the Timer
- Changing the Program
- Troubleshooting guide
- SET CLOCK: "Set Current lime and Day"
- WATER DAY: “What days do you want to water”
- START WATER: “What time - of - day do you want to water”
- HOW LONG: “Set the length of each watering cycle”
- SETTING ANOTHER ZONE: "Keep your plants watered on separate cycles."
- AUTO MODE: "Your timer is ready to go."
- OFF MODE: "Stop watering for an extended period."
- MANUAL WATERING: “Fill a bucket, clean the car or wash the dog.”
- TIMER reset
- USEFUL TIPS
Table of contents
User Instructions Four-Zone Electronic Water Timer
Installing the Timer
Note: It is important to complete the installation in this exact order.
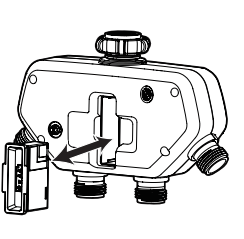
- Plug the wire from the valve unit into the control unit
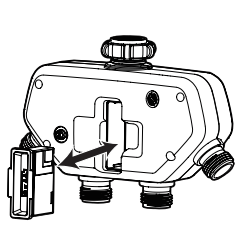
- Install 2AA Alkaline batteries by removing the battery holder from the back of the timer and inserting the batteries as indicated. Replace the battery holder.
- Once installed, the LCD screen will be working with the letters "OFF' flashing beside “MANUAL.”
- Rotate the "L" shaped bracket to the front of the unit.
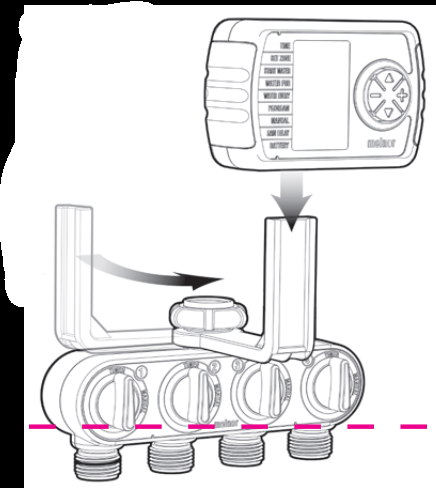
- Slide the control unit onto the bracket.
- Attach the valve unit to an outside faucet
- Ensure the four valve knobs are set to 'TIMER" and turn on the water supply.
- Attach a hose to any of the outlets and then to a sprinkler, soaker hose or other watering tool.
- You can attach up to four hoses.
Programming the Timer
- Press the UP key until the numbers beside 'TIME" are flashing.
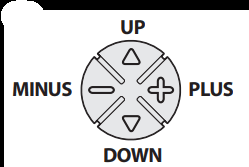
- Set the current time using the PLUS and MINUS keys. By holding the key down the time will change rapidly. A tap will cause a stepped change. Once you have set the correct time, use the DOWN arrow key to move to the next section.
- Use the PLUS and MINUS keys to select the "ZONE" you want to program. Each "ZONE" represents one of the outlets. Use the DOWN key to move to the next section.
- Select when you want to begin watering in the "START WATER" section. Again adjust the time using the PLUS and MINUS keys. Move to the next section. Set how long you wish the water to run in the “WATER FOR" section. This time can be adjusted up to 240 minutes. Move to the next section.
- Select how often you would like to water in the “WATER EVERY' section. This is set in hours or days. Move to the next section.
- Activate the program by adjusting the "PROGRAM" section to ON. Watering will begin at the "START WATER” time.
- The timer is now programmed. "ON" will flash for three seconds and then stop.
- Move back to "ZONE" and select another unprogrammed zone. Repeat the programming steps to set up the remaining watering zones.
- Once you have programmed all desired zones, the timer screen will go blank after five minutes to conserve power. The time and program status, "ON" or “OFF," will remain visible. Pressing any button will “wake" the timer.
Changing the Program
To make a change to the program, simply wake the timer by pressing any button. Move to the sections you with change and adjust as needed: Watering will resume at the "START WATER" time.
Manual Watering:
- There are two ways to water manually with this water timer.
- The first and easiest way is to simply turn the yellow knob above any of the four outlets. This will start the water flow immediately and it will remain on until you manually close the valve.
- The second way is to open the valve with the electronic control unit. This has the advantage of automatically closing the valve.
- Using the UP and DOWN arrows, move to "MANUAL" Using the PLUS button, adjust the time you wish to water. The timer will wait five seconds and begin to water. Manual watering can be up to 240 minutes.
Rain Delay
- In the event of predicted rainfall, you can temporarily suspend automatic watering for up to 3 days (72 hours) from the time you set the delay. Simply move to "RAIN DELAY' and use the PLUS button to select the desired delay. The timer suspends all programs as soon as the RAIN DELAY is activated and begins counting hours (1 day = 24 hours, 2 day = 48 hours, 3 day = 72 hours). The programs resume at the next cycle after the end of the DELAY period.
Soil Moisture Sensor
- This timer will work with AquaSentry®, Mel nods exclusive Soil Moisture Sensor (Automatic Rain Delay). AquaSentry actually monitors the moisture in the soil and delays watering if it is not needed. For more information, visit: www.melnor.com/conservation/aqua-sentry.html.
Disabling the Program
- If you would like to suspend automatic watering for an extended period, simply change the "PROGRAM" line to "OFF." When you are ready to resume watering, switch “PROGRAM" to "ON." Watering will begin at the "START WATER" time. Each '70NE" is disabled or enabled independently.
Program Memory
- This timer has memory. If the battery fails or is removed, even for extended periods, the program will be retained. After installing a fresh battery you simply need to set the 'TIME." The timer will retain the existing program
Troubleshooting guide
Sympton | Possible causes | Possible Corrective Action |
After installing batteries and attaching the timer to the faucet, water is running out of the timer before it is programmed. | Knobs on valve portion are set to MANUAL | Turn knobs to TIMER |
Valve(s) opened during shipment | Remove battery holder. Wait 30 seconds and reinsert. This should close all valves. | |
Use control button to move to MANUAL setting. Set to "5 MIN". Wait 10 seconds and then change setting to OFF to close the valve(s). | ||
Timer shows battery LOW while batteries are fresh. | Batteries not making proper contact. | Remove battery holder, inspect battery contacts and adjust if needed. |
Water does not turn on at programmed time. | PROGRAM set to "OFF". | Set PROGRAM to "ON". |
TIME set incorrectly. | Update the TIME setting to the correct time. | |
Clock malfunction. | Reset by removing battery holder, wait for 30 seconds and reinsert. Set TIME to current time. Previous program will work from memory. | |
Water does not turn off at programmed time. | TIME set incorrectly. | Update the TIME setting to the correct time. |
Clock malfunction. | Reset by removing battery holder, wait for 30 seconds and reinsert. Set TIME to current time. Previous program will work from memory. | |
Timer programmed for once a day does not come on or only comes on once per week. | Misprogrammed. | Confirm programming is correct. WATER EVERY 1 Day = Once per day WATER EVERY 7 Day = Once per week |
Timer programmed for once a week comes on once per day. | ||
Antenna symbol flashes on screen but Soil Moisture Sensor is NOT attached. | Soil Moisture Sensor contacts on bottom of timer are wet. | Wait for contacts to dry. |
Reset by removing battery holder, wait for 30 seconds and reinsert. Set TIME to current time. Previous program will work from memory. |
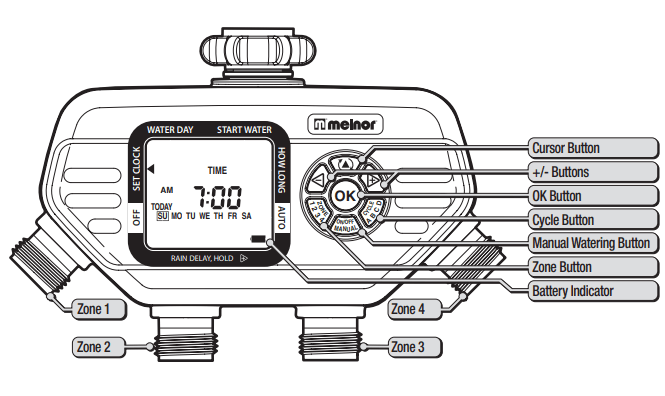
Understanding Zones
- This is a four zone timer allowing you to water four different areas from the same faucet.
- Each zone can be programmed with up to four different start times.
- You can use the PLANNING TABLE provided on the back of fits sheet to help organize your watering schedule for each zone.
Note: Do not use your timer when the air temperature is below 40°F (4.5° C). When storing your timer, be sure it is in a dry place and protected from frost.
Battery Installation & Assembly
- Remove the battery holder from the back of the Timer Control Unit. Insert two AA alkaline batteries (Do not use rechargeable batteries) as indicated on the battery holder. Replace the battery holder, making sure that it is firmly and securely placed in the Timer Control Unit
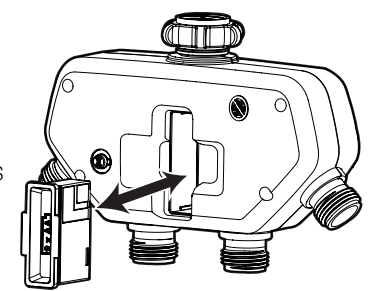
We recommend replacing batteries when the indicator reaches 
Installation of the Timer
- Attach the timer to an outside faucet and turn the water on very slowly. The water must be left on while the timer is attached to the faucet for your timer to operate. You may choose to program your timer before or after attaching it to the faucet.
NOTE: If water is continuously flowing through one or more valves, see Open Valves During Installation in the “Useful Ups” section for more information.
SET CLOCK: "Set Current lime and Day"
- The Water Timer default setting is a 12-hour mode (AM/PM). To ensure correct f ming, look for either AM or PM to the left of the time. To switch between 12-hour (AM/PM) and 24-hour (military time), hold the
 button for 5 seconds. 12-hour mode shows AM or PM while 24-hour mode does not. Note: Changing time mode will erase all programs.
 - Before setting your watering times, you must first set the current f me and day of the week. When the batteries are first installed, the arrow in the screen will point to CLOCK. If it is not in that position, press the
 button until the arrow is pointing to CLOCK.
 - On your screen, a flashing box will appear around the SU. Simply set the timer to the current day by pressing the
 and
and  buttons on the touchpad until the square is on toe correct day. Once the correct day has been indicated, press the
  button.
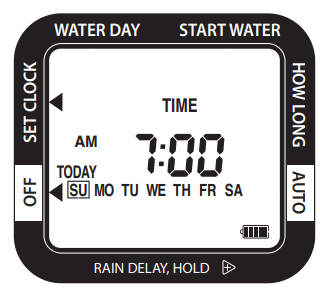
- To set the time, press the
 and
and  buttons until the correct time appears on the screen, and then press
- Press
 the button (at the top of the touch pad) to move to WATER DAY.
WATER DAY: “What days do you want to water”
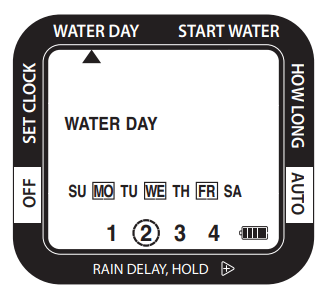
- Check to be sure that the arrow on the screen is pointing to WATER DAY. With this setting, you can select specific days to water or an interval period of the day when watering will occur.
- To set the watering day, use the
 and
and  buttons to select the day-of-ttie-week you wish to water. Press the
  button when the desired day-of-the-week is highlighted on the screen. You can select as many days as you like. The days selected will have a square around them.
 - To water at preset intervals, press the
 button on the buttonpad to navigate past the days of fie week. Press the
  and
and  buttons to set the f me period (EVERY 1 DAY through EVERY 7 DAY(s)).
 - Press the
 button to move to START WATER.
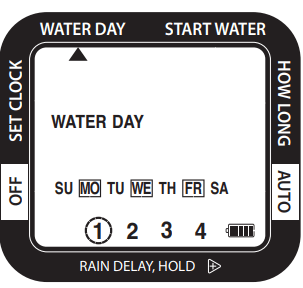
Note: You will see Zone 1 highlighted at the bottom of the screen; program Zone 1 before moving on to Zone 2.
START WATER: “What time - of - day do you want to water”
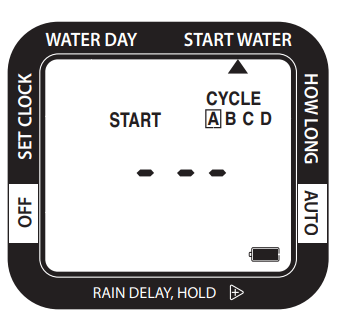
- You can select up to tour independent start times (CYCLE A, B, C, D). With the arrow pointing to Start water on your screen, CYCLE A should be highlighted, use the
 and
and  buttons to select the first watering time.
 - If you want to set another START WATER time, press
 to move to CYCLE B. Repeat the process above to set the next START WATER f me. You may select up to tour START WATER times.
 - When you have set all desired START WATER times, press the
 button to move to HOW LONG.
Hold the  and
and  buttons to advance settings more quickly.
HOW LONG: “Set the length of each watering cycle”
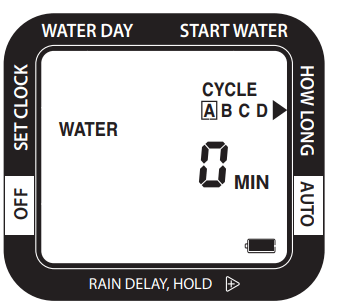
- With the arrow pointing to HOW LONG, use the
 and
and  buttons to select the length of each watering cycle. After setting HOW LONG you want to water during a selected cycle, press
  to move to the next cycle. Repeat until HOW LONG has been set for each cycle.
 - HOW LONG can be set for up to 360 minutes (6 hours) for each watering cycle. The Cycle length cannot overlap the next START WATER time.
Note: You can only select Watering Cycles if you have set a start time in Step 5 above.
SETTING ANOTHER ZONE: "Keep your plants watered on separate cycles."
- When you have set WATER DAY, START WATER, and HOW LONG for Zone 1, press the button
 back to WATER DAY.
 - Press
 to select another zone, and repeat steps 4-6 above on up to four individual zones. When all desired zones are set, press the
  button to enter AUTO mode.
AUTO MODE: "Your timer is ready to go."
- In AUTO Mode, your timer will run the watering program you have entered.
- The screen display will alternate between showing the current f me and the next watering cycle of each zone.
RAIN DELAY: "Prevent watering when rain is in the forecast."
- If there is rain in the forecast, you can temporarily suspend your watering program on all zones for up to 7 days using the RAIN DELAY feature. After the selected delay has ended, your watering program will automatically resume.
- To set the Rain Delay, check to make sure the arrow on the screen is pointing to AUTO.
- Hold the
 button until the word DELAY appears. Now press the
  button to set the duration the delay. You can reduce or deactivate the delay period with the
  button.
 - Once the delay time is selected, press the
 button and wait for the number to stop flashing.
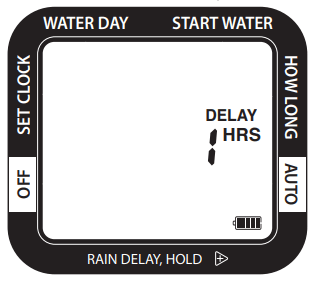
- All other functions, including MANUAL WATERING and OFF are on hold during RAIN DELAY. To cancel RAIN DELAY, press the
 button until DELAY is set to “0”.
Note: In the RAIN DELAY mode, the screen will alternate between the current time and the remaining delay time.
OFF MODE: "Stop watering for an extended period."
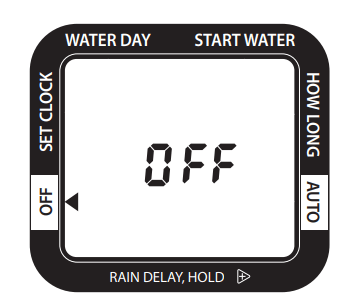
- To stop watering indefinitely, press the
 button until the arrow on the screen points to OFF. The timer will not water while in this mode. The screen will display the word OFF.
 - To start watering automatically again, press
 the button until the arrow on the screen points to the AUTO. The program will begin watering at the next previously scheduled START WATER Time.
Note: Watering will be stopped for all zones when this feature is activated.
MANUAL WATERING: “Fill a bucket, clean the car or wash the dog.”
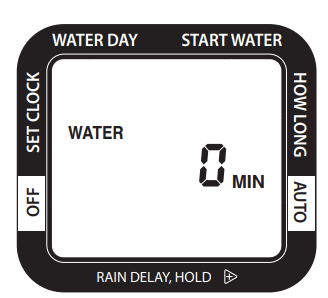
- To use a hose or other watering tool, simply press the (manual) button. Then using the
 button select which zone you want to use.
 - Using the
 button, select the length of time you wish to water. After a few seconds, the valve will open, and then automatically close when the selected time is reached.
Note: The timer will hold the last manual time in its memory. To reset the manual time back to “0”, press the  and
and  buttons to adjust the time.
TIMER reset
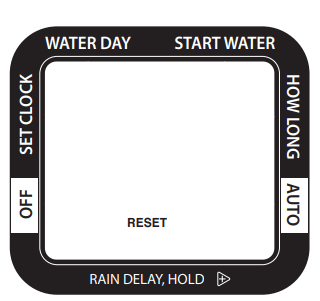
- To completely erase all settings in the timer and return to the original factory settings, press and hold the
 button for 7 seconds. The screen will display RESET.
 - You will need to press and hold the
 button a second time to change the clock format.
Note: All programming will be lost when the timer is RESET. After RESET You may need to change the time setting between 12-hour (AIWF’M) and 24-hour (military time). See Step 4 for further instructions.
USEFUL TIPS
Open Valves During Installation
- Shaking during transportation can cause valves to be open, if this occurs, water may run continuously through one or more valves during installation.
- Turn the water off.
- Remove the batteries. Wait for the screen to go blank. Reinsert the batteries.
- Note: Removing the batteries will not erase any existing watering schedules.
- Turn the water back on.
- If the problem persists, turn off the water. Use the Manual feature to open and close each valve 3 times.
Cleaning Your Timer
- You should clean your timer periodically. Debris or sediments commonly found in water can build up in your timer.
- Turn off the water. Remove the timer from the faucet and check that the filter washer is dear. If you notice any debris, remove the filter washer and clean it out with water.
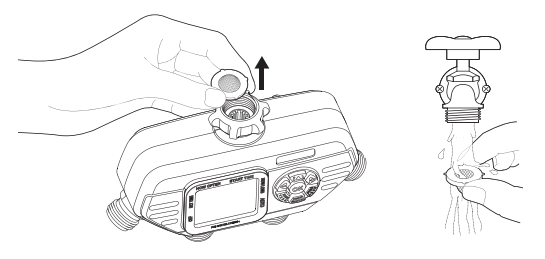
- Activate the MANUAL mode by pressing the MANUAL button. Open all of the valves and spray water through each valve and the faucet connection to flush out any built-up sediments or debris.
Seasonal Storage
- Freezing temperatures can cause water in the timer to freeze and expand, damaging the timer.
- At the end of the season or when there is frost in the forecast, turn off the water and remove your timer from the faucet.
- Remove the batteries.
- Be sure to store the timer indoors, away from freezing temperatures.
Tips for Battery Life
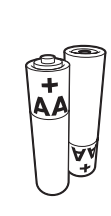
- Make sure to use fresh alkaline batteries.
- Remove the batteries at the end of the season before storing.
- Batteries should last about one season. A schedule with more frequent watering times can cause the batteries to drain faster.
Warning: Intended for outdoor use only. Severe electrical shock could result if water is sprayed into outlets or sources of electrical current. Do not use water more than 115°F (46°C). Do not use when the ambient air temperature is less than 40°F (4.5°C). When not in use, remove batteries, drain and store indoors away from freezing temperatures.
See other models: 15439-HDC 73100 9580 65035-AMZ XT4200-IN
