
Loading ...
Loading ...
Loading ...
8
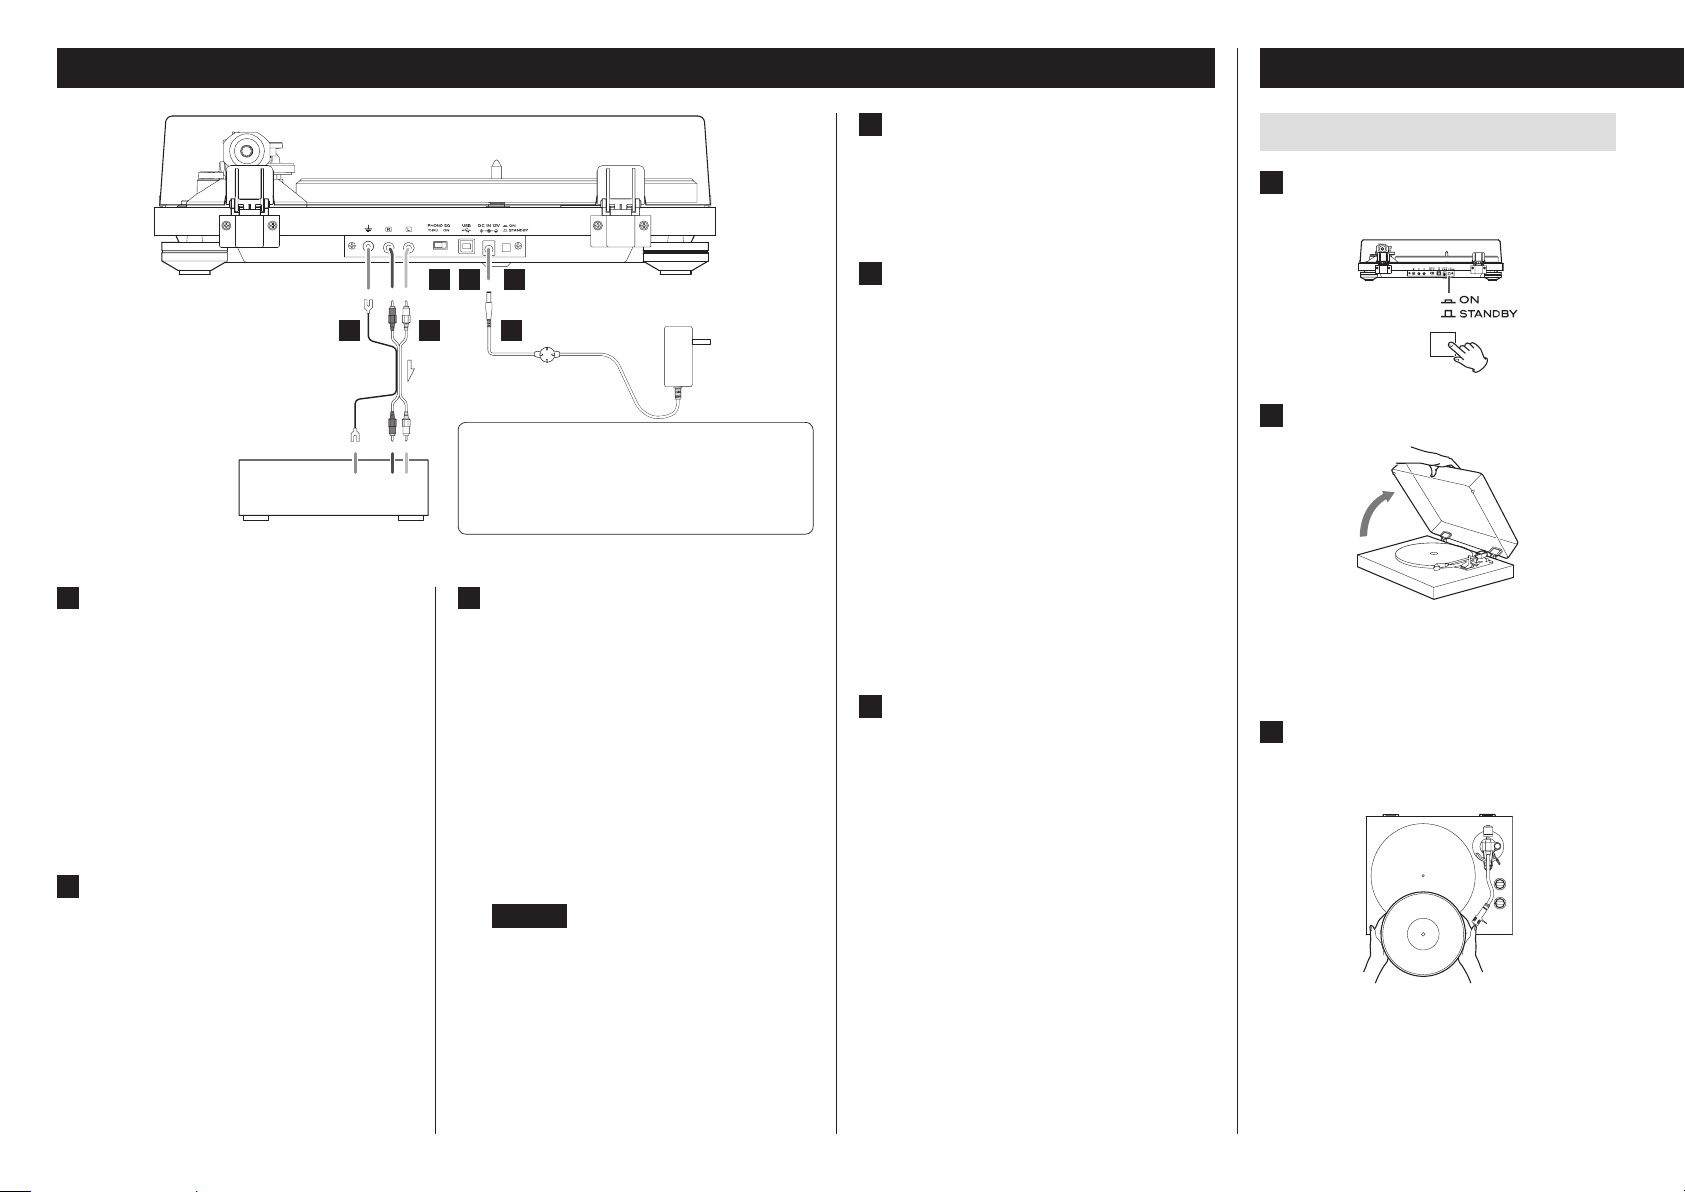
Connections
A
Grounding terminal (|)
Use the grounding wire of the included RCA audio cable
to connect this connector to the grounding terminal of
the amplifier, for example.
o This is NOT an electrical safety ground.
If noise from speakers is conspicuous
If connecting the grounding wire of the audio cable
to the grounding terminal of this unit does not reduce
noise, disconnect the grounding wire and check the
sound again. Use the method (connected/disconnected)
that has the least noise.
B
Analog audio output connectors (L/R)
These output analog audio signals.
The PHONO EQ switch setting changes the type of out-
put signal.
Use the included audio cable (or commercially-available
ones) to connect other equipment to the output connec-
tors of this unit.
C
PHONO EQ (audio output setting) switch
ON
Signals that have been amplified by the built-in
equalizer amp are output from the analog audio out-
put connectors (L/R).
THRU
The MC or MM cartridge signal is output directly
through the analog audio output connectors (L/R).
Connect to a device with phono inputs, such as a
phono equalization preamplifier or an amplifier with
phono input connectors.
o When shipped new from the factory, this is set to ON.
o Set this to ON if a device is connected to the USB
port.
CAUTION
When set to ON, if connected to the PHONO inputs of
an amplifier, for example, the output from speakers and
headphones will be very loud, which could damage
equipment or harm hearing.
C D
E
A B
F
LR|
When PHONO EQ is ON
Connect to line input connectors of
amplifier, etc.
When PHONO EQ is THRU
Connect to phono input connectors of
amplifier, etc.
Included
AC adapter
V
Precautions when making connections
o Do not plug the unit in until after making all connections.
o Carefully read the manuals of the devices that you are
connecting and follow their instructions when making
connections.
D
USB port (USB B type)
The sound of the record is converted to digital (resolution
up to 48 kHz/16-bit) and output. Recording on a com-
puter is possible by connecting this to a USB port on the
computer using a USB cable (page 9).
E
DC input connector
After completing all other connections, connect the
included AC adapter to this connector.
Confirm that the power plug of the AC adapter is
plugged into a power outlet.
o Do not use any AC adapter other than the one included.
V
Be sure to connect the power cord to
an AC outlet that supplies the correct
voltage. Connection to an outlet that
supplies incorrect voltage could cause
fire or electric shock.
V
Hold the power plug when plugging it
into an outlet or unplugging it. Never
pull or yank on the power cord.
V
Unplug the power cord from the outlet
when you are not planning to use the
unit for an extended period of time.
F
STANDBY/ON button
Press the STANDBY/ON button to turn the unit on or put
it in standby.
Basic operation
Playing records
1 Press the STANDBY/ON button on the
back of the unit to turn it on.
2 Open the dust cover slowly.
V
Be careful not to pinch your hand, for
example, when opening and closing the
dust cover.
3 Place a record on the turntable (platter).
When playing a 45 RPM large-hole single record, use the
included adapter.
Loading ...
Loading ...
Loading ...