Loading ...
Loading ...
Loading ...
ENGLISH
5
Precautions for use
o Do not leave records in places that are exposed to direct
sunlight or are very hot or very humid. Leaving a record in
such a condition for a long time could result in warping,
mold growth or other damage.
o Do not stack multiple records or place heavy objects on top
of them. Do not leave records at an angle for long amounts
of time either. Doing so could result in warping or other
damage.
o Do not allow hard objects to directly touch the audio
grooves. Doing so could cause scratches.
o After you finish playing a record, always put it back into
its sleeve for storage. Leaving a record unprotected could
result in warping or scratching.
o Do not use cracked records.
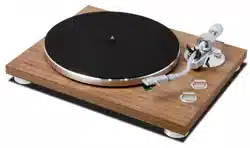
Preparing the record player
Keep the unit in standby while setting it up (
F
on page 8).
1 Place it on a at surface.
Place it on a flat surface so that the record can be accurately
traced.
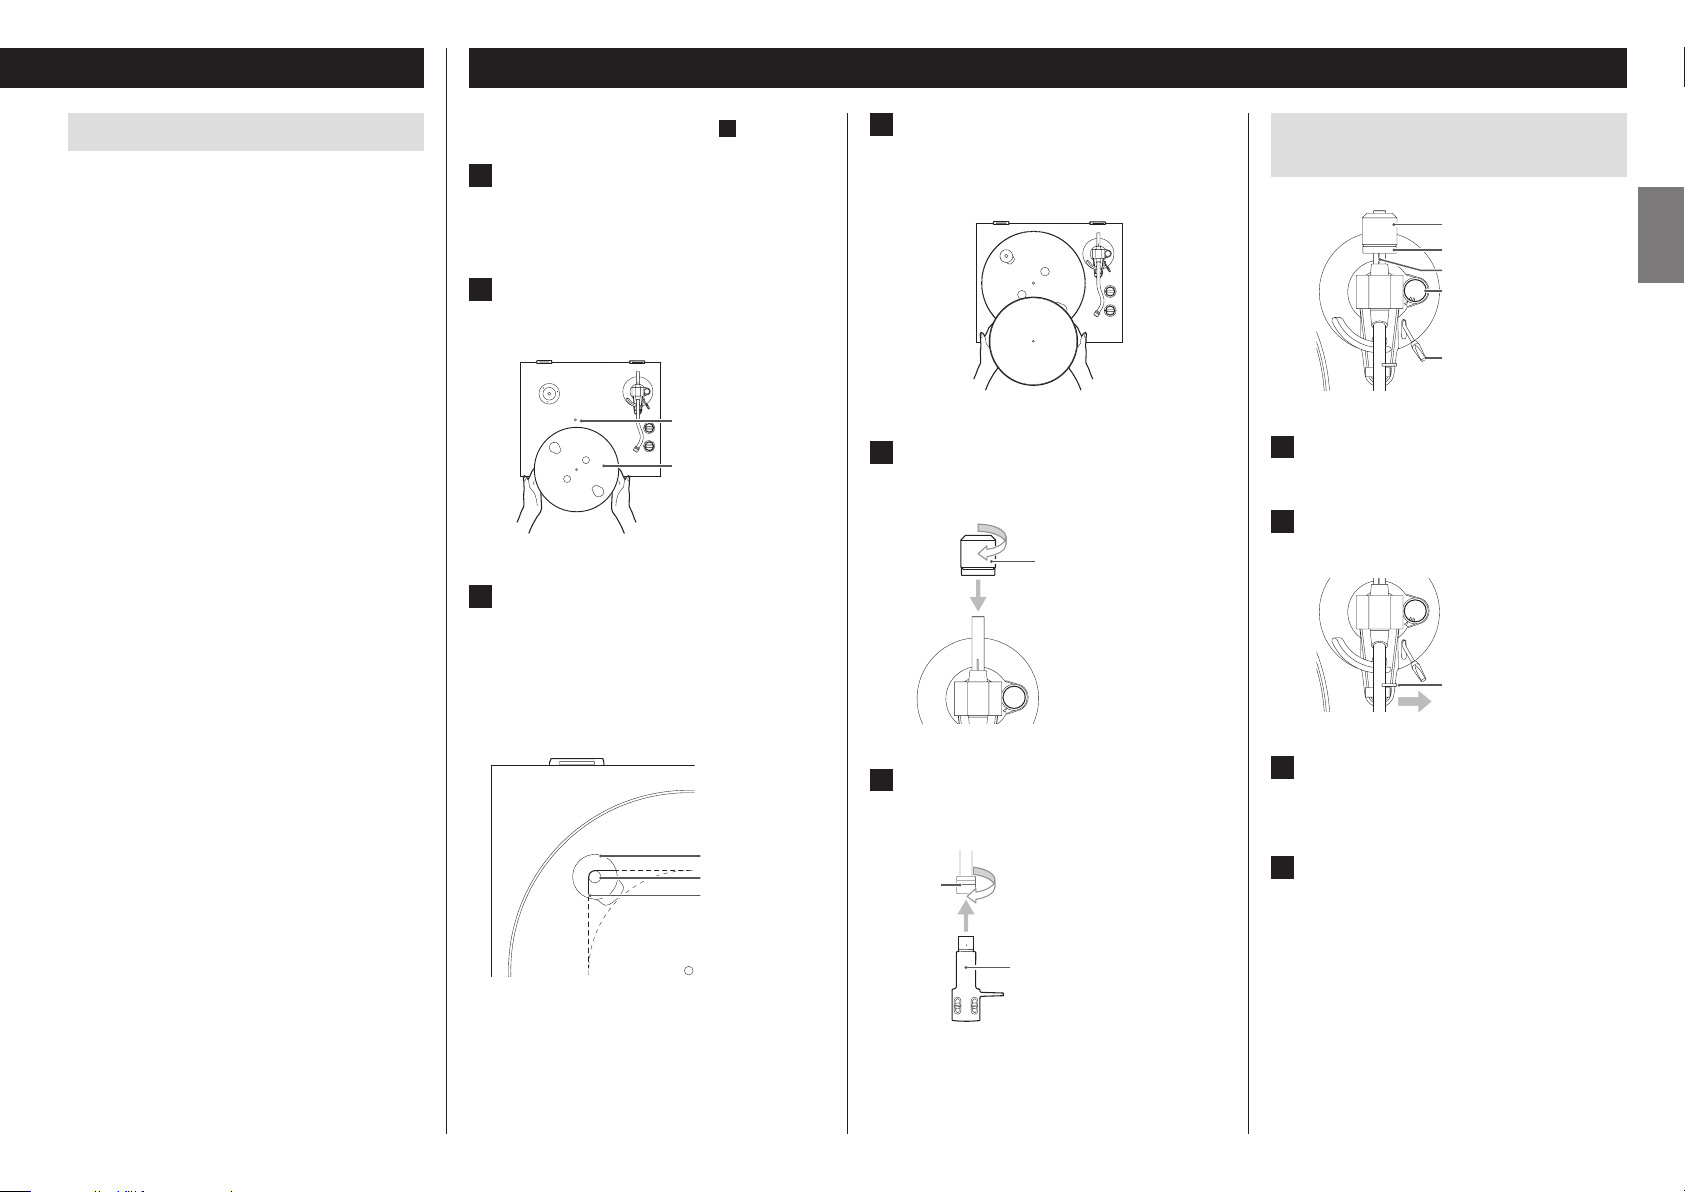
2 Install the turntable (platter).
Align the turntable (platter) with the center shaft and
install it.
Center shaft
Turntable (platter)
3 Loop the belt around the motor pulley.
The rubber belt is wrapped around the sub-platter. Use a
finger to pull the rubber belt through the round opening.
o Be careful not to let the rubber become twisted.
o Rotate the turntable (platter) several times to make
sure that the rubber belt is secure.
Motor pulley
Rubber belt
Round opening
4 Place the felt mat on the turntable
(platter).
Place the included felt mat on the turntable (platter)
before using it.
5 Install the counterweight.
Place the counterweight over the end of the tone arm,
and press it gently as you turn it right to attach it.
Counterweight
6 Install the headshell.
Insert the headshell on the end of the tone arm and turn
the nut to secure it in place.
Headshell
Nut
Balancing the tone arm and adjusting
the stylus pressure
A
N
T
I
–
S
K
A
T
I
N
G
3
0
Anti-skating dial
Arm lifter lever
Counterweight
Stylus pressure adjustment ring
Center line
1 Set the anti-skating dial to zero.
2 Slide the tone arm clasp to the right to
remove it.
Clasp
A
N
T
I
–
S
K
A
T
I
N
G
3
0
3 Raise the arm lifter lever and shift the
tone arm to the left slightly.
4 Lower the arm lifter lever.
Continued on the next page e
Loading ...
Loading ...
Loading ...