
Loading ...
Loading ...
Loading ...
6
5 Turn the counterweight and adjust so
that the tone arm is level.
A
N
T
I
–
S
K
A
T
I
N
G
3
0
o Remove the protective cap from the cartridge stylus
before adjusting.
o Be careful not to let the cartridge stylus touch the
unit.
6 Return the tone arm to its original posi-
tion, and use the clasp to lock it.
7 Turn the stylus pressure adjustment
ring so that the center line aligns with 0
on the scale.
A
N
T
I
–
S
K
A
T
I
N
G
3
0
o Only turn the ring. Be careful not to let the counter-
weight turn.
Preparing the record player (continued)
8 Turn the counterweight so that the
stylus pressure adjustment ring scale
matches the stylus pressure specified
for the cartridge.
o The stylus pressure of the included cartridge is 2.0 g.
So, turn it to 2.0 on the counterweight scale when
using the included cartridge.
A
N
T
I
–
S
K
A
T
I
N
G
3
0
o Turn it right from 0 in the direction of 0.5 and 1.0.
9 Adjust the anti-skating dial.
Start with it set at 2.0 and adjust it during record playback
(page 8) to the position where the left and right vol-
umes are balanced.
A
N
T
I
–
S
K
A
T
I
N
G
3
0
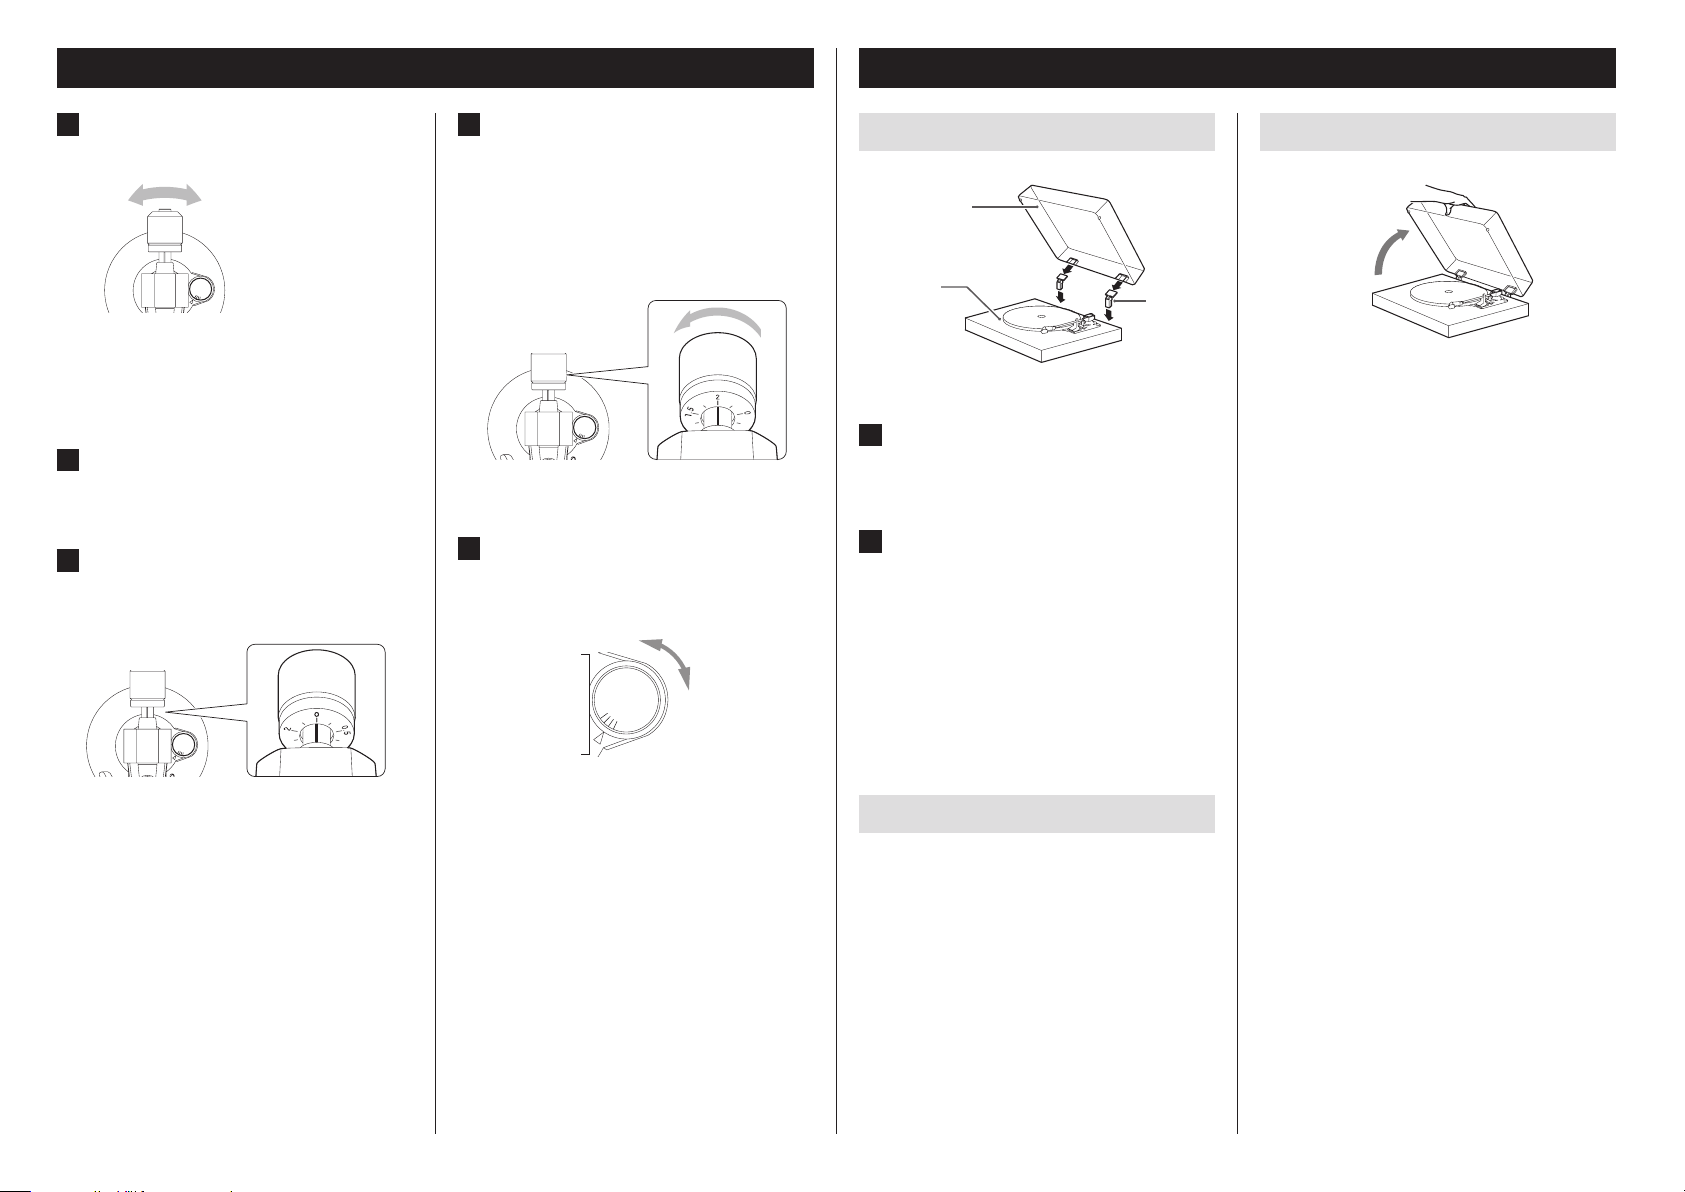
Attaching the dust cover
Hinge
Main unit
Dust cover
1 Insert the hinges completely into the
hinge holders at the left and right ends
of the back of the main unit.
2 Align the tops of the hinges with the
dust cover hinge holders and insert
them.
o Close the dust cover during playback. Since doing this pre-
vents skipping caused by unintended contact and blocks
external sound pressure, it makes noise less likely to occur.
o Do not open or close it when a record is playing. Doing so
could, for example, cause the stylus to skip.
o Keep it closed whenever possible to keep dust out.
Removing the dust cover
Hold both edges of the dust cover and lift it slowly to remove it
along with the hinges from the unit. Then, remove the hinges
from the dust cover.
Dust cover
Opening and closing the dust cover
Open
Opening
Hold the front edge of the dust cover and gently lift it open
completely until it stops.
The dust cover will stay open in this position.
Closing
Gently lower the dust cover until it is closed.
V
Be careful not to pinch your finger, for
example, when opening and closing the
dust cover.
Loading ...
Loading ...
Loading ...