Loading ...
Loading ...
Loading ...
130
Setup
Network Connection
1. A conrmation screen asking you whether to agree to the privacy statement
is displayed during network setting. If you agree, select "Accept" and press
Enter.
2. Select the type of connection to the network. To use the Chromecast built-in
function to connect, select "Yes" and press Enter. The Google Home app is
required to use the Chromecast built-in function. Download the Google Home
app from Google Play or the App Store to your smart phone or tablet.
• Google Home app can be used on the following operating systems. (As of
April 2020)
Android™: Android 4.4 or later.
iOS: iOS 10.0 or later. Compatible with iPhone
®
, iPad
®
, and iPod touch
®
.
Wi-Fi
11 2
2
If you select "No", you can connect using either wired LAN or Wi-Fi.
"Wired": Use a wired LAN to connect to a network.
"Wireless": Wi-Fi connection using an access point such as a wireless LAN
router.
• There are two methods for Wi-Fi connection.
"Scan Networks": Search for an access point from this unit. Find out the
SSID of the access point beforehand.
"Use iOS Device (iOS7 or later)": Share the Wi-Fi settings of your iOS
device with this unit.
• If you select "Scan Networks", there are another two types of connection
methods. Check the following.
"Enter Password": Enter the password (or key) of the access point to
connect.
"Push Button": If the access point is equipped with an automatic setting
button, you can connect without entering the password.
• If the SSID of the access point is not displayed, select "Other..." with the
cursor on the SSID list screen, press Enter, and then follow the on-screen
instructions.
Keyboard Input
To switch between upper and lower cases, select "A/a" on the screen, and press
Enter on the remote controller.
To select whether to mask the password with "" or display it in plain text, press
Memory on the remote controller. Pressing Clear on the remote controller will
delete all the input characters.
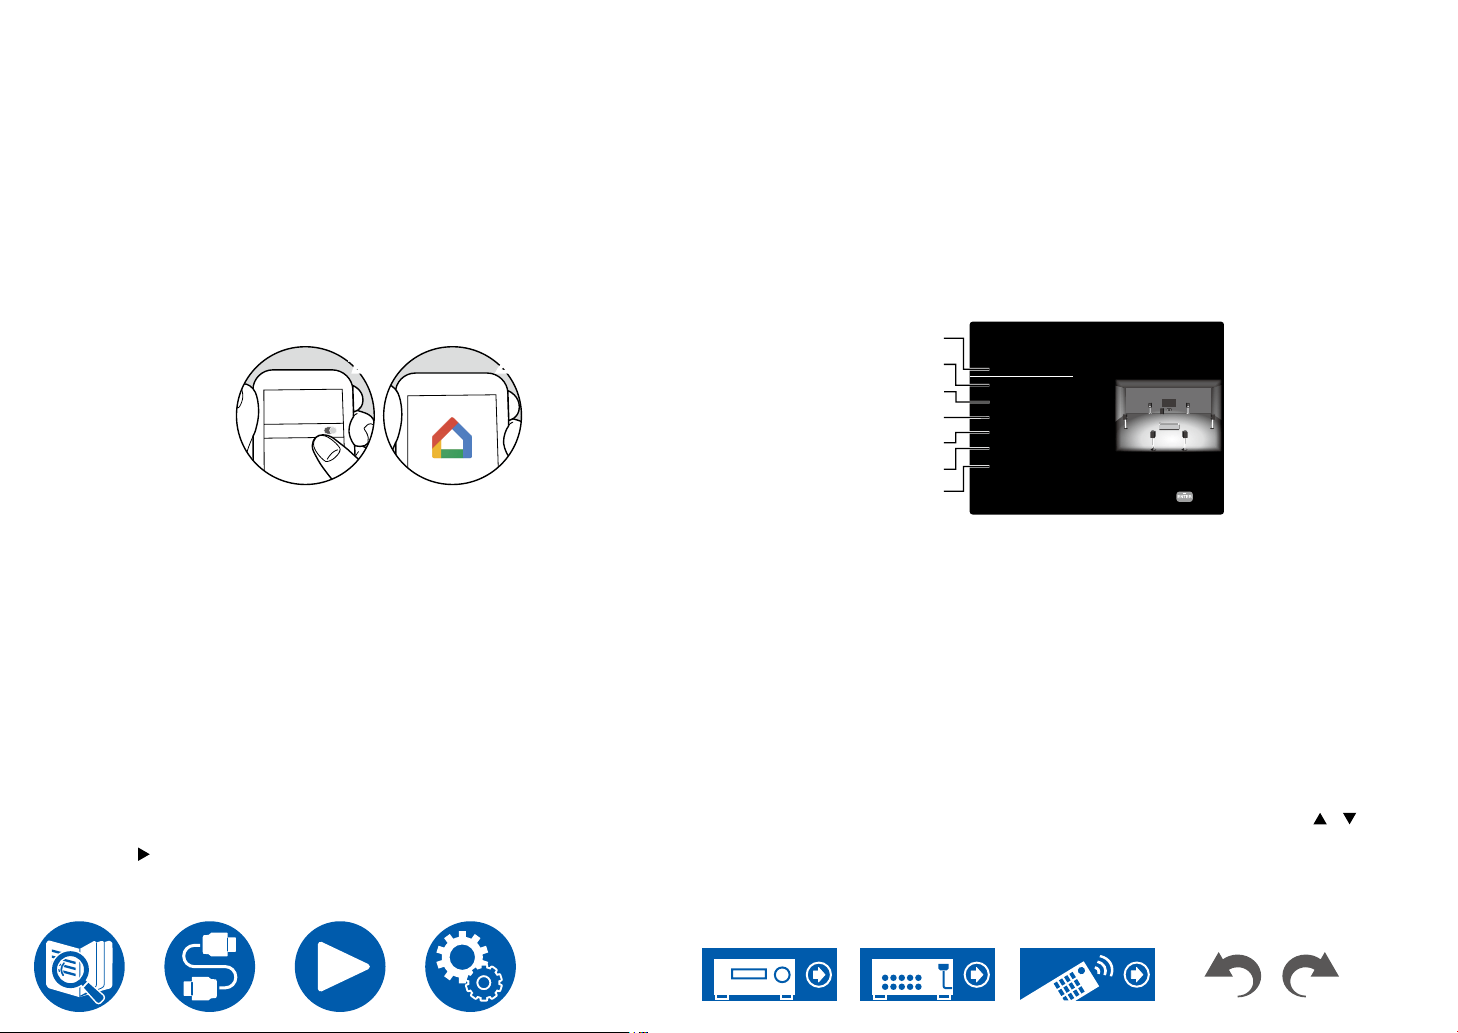
1. Speaker Setup
1. Select the connected speaker conguration and press Enter.
Note that the image on the screen changes each time you select the number
of channels in "Speaker Channels".
Speaker Setup
Speaker Channels
Subwoofer
Height Speaker
Zone Speaker
Zone 2 Preout
Bi-Amp
Speaker Impedance
Select how many speakers you have.
Next
7.1 ch
< >
Yes
---
No
Zone 2
No
6ohms or above
1 Select to suit the number of speaker channels connected.
Set whether a subwoofer is connected or not.
3 Set the speaker type if height speakers are connected to the HEIGHT
terminals.
Set the connection of speakers to Zone 2 speaker terminals.
Set an output destination of the audio output from ZONE 2 PRE/LINE OUT/
ZONE B LINE OUT jack.
Set whether the front speakers are bi-amp connected.
7 Set the impedance of the connected speakers.
2. The speaker combination selected in step 1 is displayed. "Yes" is displayed
for the selected speakers. If the setting is correct, press Enter.
3. Select "Next" and press Enter. Then a test tone is output from each speaker
to conrm the connection. Selecting each speaker with the cursors / will
output the test tone. Press Enter after conrmation.
4. If there is no problem with the speaker connection, select "Next" and press
Enter. To return to "Speaker Setup", select "Back to Speaker Setup" and
press Enter.
Loading ...
Loading ...
Loading ...