Loading ...
Loading ...
Loading ...
8 CLEAN BATTERY AND TERMINALS
Corrosion and dirt on the Battery and Terminals cause
the Battery to "leak" power and hinders the operation of
the charger
a. Remove the Battery from the Tractor and wash with
four tablespoons of baking soda to one gallop of water,
NOTE: BE CAREFUL NOT TO GET THE SODA
SOLUTION INTO THE CELLS. Rinse the Battery with
plain water, dry and reinstall on Tractor°
b Clean terminals and cable ends w_th a wire brush until
bright, Replace Battery Cables Coat terminal connec-
tions with Vasoline
Ev= v5@ H=u =
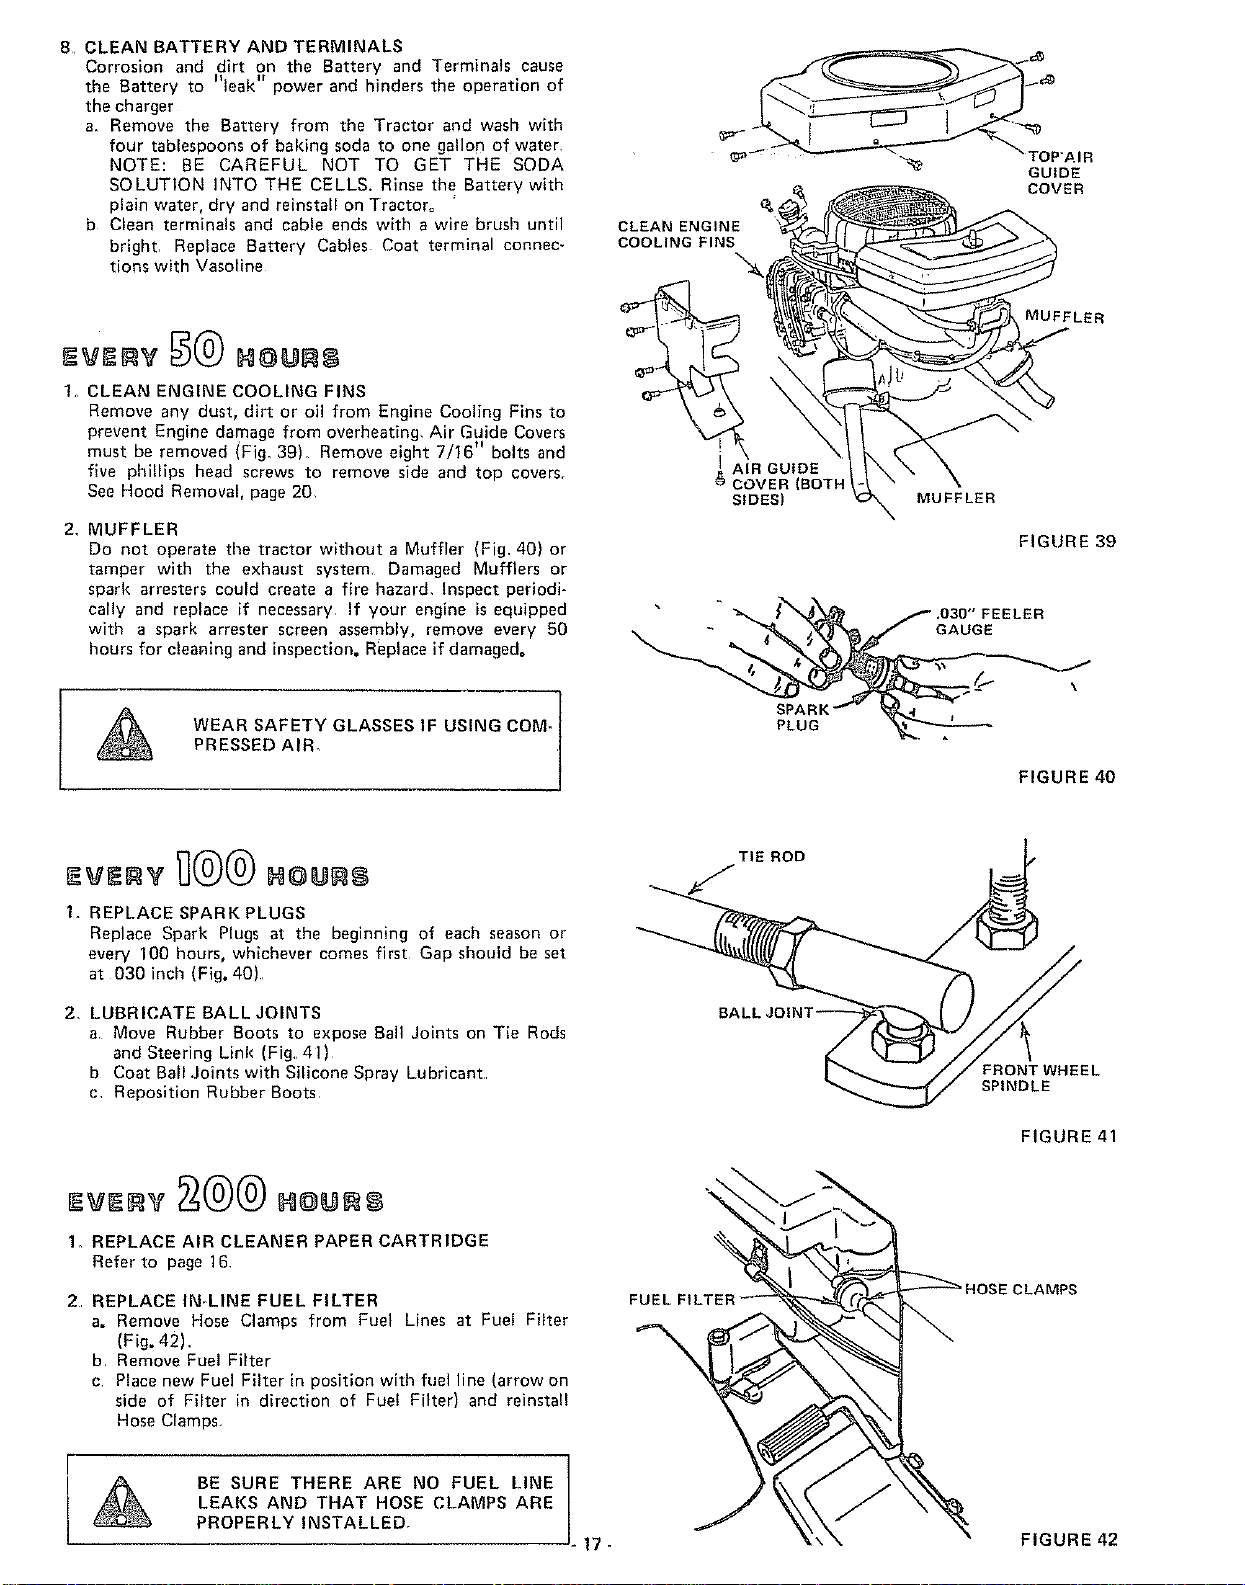
1. CLEAN ENGINE COOLING FINS
Remove any dust, dirt or oil from Engine Cooling Fins to
prevent Engine damage from overheating. Air" Guide Covers
must be removed (Fig. 39) Remove eight 7/16" bolts and
five phillips head screws to remove side end top covers_
See Hood Removal, page 20
2. MUFFLER
Do not operate the tractor without a Muffler (Fig, 40) or
tamper with the exhaust system Damaged Mufflers or
spark arresters could create a fire hazard. Inspect periodi-
cally and replace if necessary If your engine is equipped
with a spark arrester screen assembly, remove every B0
hours for cleaning and inspection. Replace if damaged°
WEAR SAFETY GLASSES IF USING COM-t
PRESSED AIR_
CLEAN ENGINE
COOLING FINS
"a.
I AIR GUIDE
$ COVER (BOTI*
SIDES)
MUFFLER
GUIDE
COVER
MUFFLER
FIGURE 39
• " .ozo" FEELER
- _ _ GAUGE
,
FIGURE 40
1o REPLACE SPARK PLUGS
Replace Spark Plugs at the beginning of each season or
every 100 hours, whichever comes first Gap should be set
at 030 inch (Fig. 40)
2. LUBRICATE BALL JOINTS
a Move Rubber Boots to expose Ball Joints on Tie Rods
and Steering Link (Fig, 41)
b Coat Ball .Joints with Silicone Spray Lubricant
c Reposition Rubber Boots
1. REPLACE AIR CLEANER PAPER CARTRIDGE
Refer to page 16
2 REPLACE IN-LINE FUEL FILTER
a. Remove Hose Clamps from Fuel Lines at Fuel Filter
(Fig. 42),
b. Remove Fuel Filter
c Place new Fuel Filter in position with fuel line (arrow on
side of Filter in direction of Fue! Filter) and reinsta!!
Hose Clemps_
]
BE SURE THERE ARE NO FUEL LINE |
LEAKS AND THAT HOSE CLAMPS ARE
PROPERLY INSTALLED.
17-
TIE ROD
FRONT WHEEL
SPINDLE
FIGURE 41
FIGURE 42
Loading ...
Loading ...
Loading ...