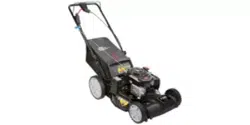
User Manual Craftsman 247377051 Lawn Mower

Craftsman 247377051 Lawn Mower - Use Manual - Use Guide PDF.
Documents: Go to donwload!
  • Owner's manual - (English)

file thumbnail

User manual Lawn Mower for Craftsman 247377051

Table of contents

  • Safety Instructions
  • Slope Guide
  • Unpacking
  • Assembly
  • Adjustments
  • Operation
  • Service and Maintenance
  • Off-Season Storage
  • Troubleshooting
  • Español.

Attaching Side Discharge Cover

Your mower is shipped as a mulcher. To convert to side discharge, make sure grass catcher is off of the unit and rear discharge door is closed.

  • On the side of the mower, lift the mulch cover. See Figure 9.
  • Slide two hooks of side discharge cover under hinge pin on mulching cover assembly. Lower mulching cover. Do not remove side mulching cover at any time, even when you are not mulching.

Cutting Height

There is a cutting height adjustment lever located above the front and rear right wheel.

  • Pull the height adjustment lever outward towards wheel (unit will tend to fall when lever is moved outward). See Figure 10.
  • Move lever to desired position for a change in cutting height. See Figure 10.
  • Release lever towards deck.

IMPORTANT: All wheels must be placed in the same position. For rough or uneven lawns, move each height adjustment lever to a higher position. This will prevent you from cutting the grass too close to the ground.

Handle Pitch (If Equipped)

For convenience of operation, you may adjust the pitch of the handle as follows:

  • Remove wing nuts and carriage bolts from handle. See Figure 11.
  • Position the handle in one of the three positions that is most comfortable. See Figure 11 inset.
  • Secure into position with wing nuts and carriage bolts removed in Step 1.

Drive Control - Bail or Single Lever (If Equipped)

  • The drive control is located on top of the upper handle and is used to engage the drive. Squeeze it against the upper handle to engage the drive; release it to slow down or stop mower from propelling.

Drive Control - Dual Lever (If Equipped)

  • The drive controls are located on top of the upper handle and are used to engage the drive. Squeeze the right, left, or both right and left controls against the upper handle to engage the drive; release it/them to slow down or stop mower from propelling.

Cutting Height Adjustment Lever

  • One adjustment lever is located on the right rear wheel and one is located on the right front wheel. Both levers have to be at the same position to ensure a uniform cut. To adjust the cutting height, refer to the Assembly Section.

Side Discharge Cover (If Equipped)

  • Your mower is shipped as a mulcher. To discharge the grass clippings to the side instead, follow the instructions in the Assembly section to attach the side discharge cover.

Grass Catcher (If Equipped)

  • The grass catcher, located at the rear of the mower, is used to bag the grass clippings for disposal at another site. Once the bag is full, remove it up through the handles and empty it before any further mowing.

Mulch Cover (If Equipped)

  • The mulch cover is used for mulching purposes. Instead of collecting the grass clippings in a grass catcher or using the side discharge chute, some mower models have the option of recirculating the clippings back to the lawn. This is called mulching.

Trail Shield (If Equipped)

  • The trail shield is attached to the rear of the mower and is there to protect the operator from flying debris. Do not use the mower unless the shield is fully functional and in place.

Deck Wash (If Equipped)

  • Your mower’s deck is equipped with a water port on its surface as part of its deck wash system. Use the deck wash to rinse grass clippings from the deck’s underside.

Recoil Starter

  • The recoil starter is attached to the right upper handle. Stand behind the unit and pull the recoil starter rope to start the unit.

Oil Fill Cap/Dipstick

  • Refer to the Engine Operator’s Manual packed with your mower for detailed oil filling, checking and changing instructions.

Electric Starter Push Key (If Equipped)

  • The electric starter push key is located on the right side of the upper handle. It is both a removable key and push button and is only provided on electric start models.

Using as Mulcher

  • For mulching grass, remove the grass catcher or side discharge chute from the mower. When you remove the grass catcher from the mower, the rear discharge door will close. When you remove the side discharge chute, the mulching cover will close. For effective mulching, do not cut wet grass. If the grass has been allowed to grow in excess of four inches, mulching is not recommended. Use the grass catcher to bag clippings instead.

Using Grass Catcher (If Equipped)

You can use the grass catcher to collect clippings while you are operating the mower.

  • Attach grass catcher following instructions on page 9 in the Assembly section. Grass clippings will automatically collect in bag as you run mower. Operate mower until grass bag is full.
  • Stop engine completely by releasing the blade control. Make sure that the unit has come to a complete stop.
  • Lift discharge door and pull grass bag up and away from the mower to remove the bag. Dispose of the grass clippings and reinstall the bag when complete.

Clean Engine

  • Daily or before every use, clean grass, chaff or accumulated debris from engine. Keep linkage, spring, and controls clean. Keep area around and behind muffler free of any combustible debris.
  • Keeping engine clean allows air movement around engine.
  • Engine parts should be kept clean to reduce the risk of overheating and ignition of accumulated debris.

Cleaning Deck

Clean underside of the mower deck once a season to prevent build-up of grass clippings or other debris. Follow steps below for this job.

  • Allow the engine to run until it is out of fuel. Do not attempt to pour fuel from the engine. Disconnect spark plug wire. Refer to Engine Operator’s Manual.
  • Tip mower so that it rests on the housing, keeping the muffler side down. Hold mower firmly.
  • Scrape and clean the underside of the deck with a suitable tool. Do not spray with water. IMPORTANT: Do not use a pressure washer or garden hose to clean your unit. These may cause damage to bearings, or the engine. The use of water will result in shortened life and reduce serviceability.
  • Put the mower back on its wheels on the ground.


Newest Added: 917377843 358795521 32010005 315275100 917376650

Also, These documents are for others Craftsman models: 247.39767*, 247.37787*, 247.37705*, 247.37747*, 247.37441*, 247.37744*

Tags: Craftsman Z510 Parts Manuel, CRAFTSMAN Z 510 LAWN TRACTOR MANUAL, Craftsman Storage Shed, Engine Manual Craftsman Mower, Craftsman 247377051, Craftsman Storage Manual, Craftsman Side Shoot

Craftsman 247377051 | Pages: 21 | Created on: 2017-11-17 | File type: PDF | Filename: 84509948_247377051.pdf | Size: 1.87 MB | Language: English

Download User Manual

Product Infomation and Reviews - 247377051 photo

247377051 Photo

T: @manualsFile

https://manualsFile.com