Loading ...
Loading ...
Loading ...
ON I OFF SWITCH PANEL (FIG. S)
The "ON I OFF" switchhas a removable, yellow
plastickey.With the key removed from the switch,
unauthorizedand hazardous use bychildrenand
otheris minimized.
1. To turnthe drillpress "ON', insertkey (1) intothe
slotof theswitch(2), aqd movethe switchupward
to the"ON" position
2. To turnthedrillpress"OFF', movethe switch
downward.
3. To lockthe switchinthe =OFF"position, graspthe
end,or yellowpart,of the switchtoggle, and pullit
out.
4. Withthe switchkey removed, theswitchwillnot
operate.
5. If theswitchkey is removedwhilethe drillpress is
running,itcan beturned "OFF"butcannotbe
restartedwithoutinsertingthe switchkey.
6. To turnthe worklight"ON", pressthe rockerswitch
(3).
7. Never leavethe drillpressunattended. Turn the
lightswitchand powerswitch"OFF" and waituntilit
comesto a completestop.
Rg. S
f
m
_3
--2
BI
ALWAYS lock theswitch"OFF" when the drill press is
not in use. Remove the key and keep it in a safe place.
In the event of a power failure, blown fuse, or tripped
circuit breaker, turn the switch "OFF" and remove the
key, preventing an accidental startup when power comes
on.
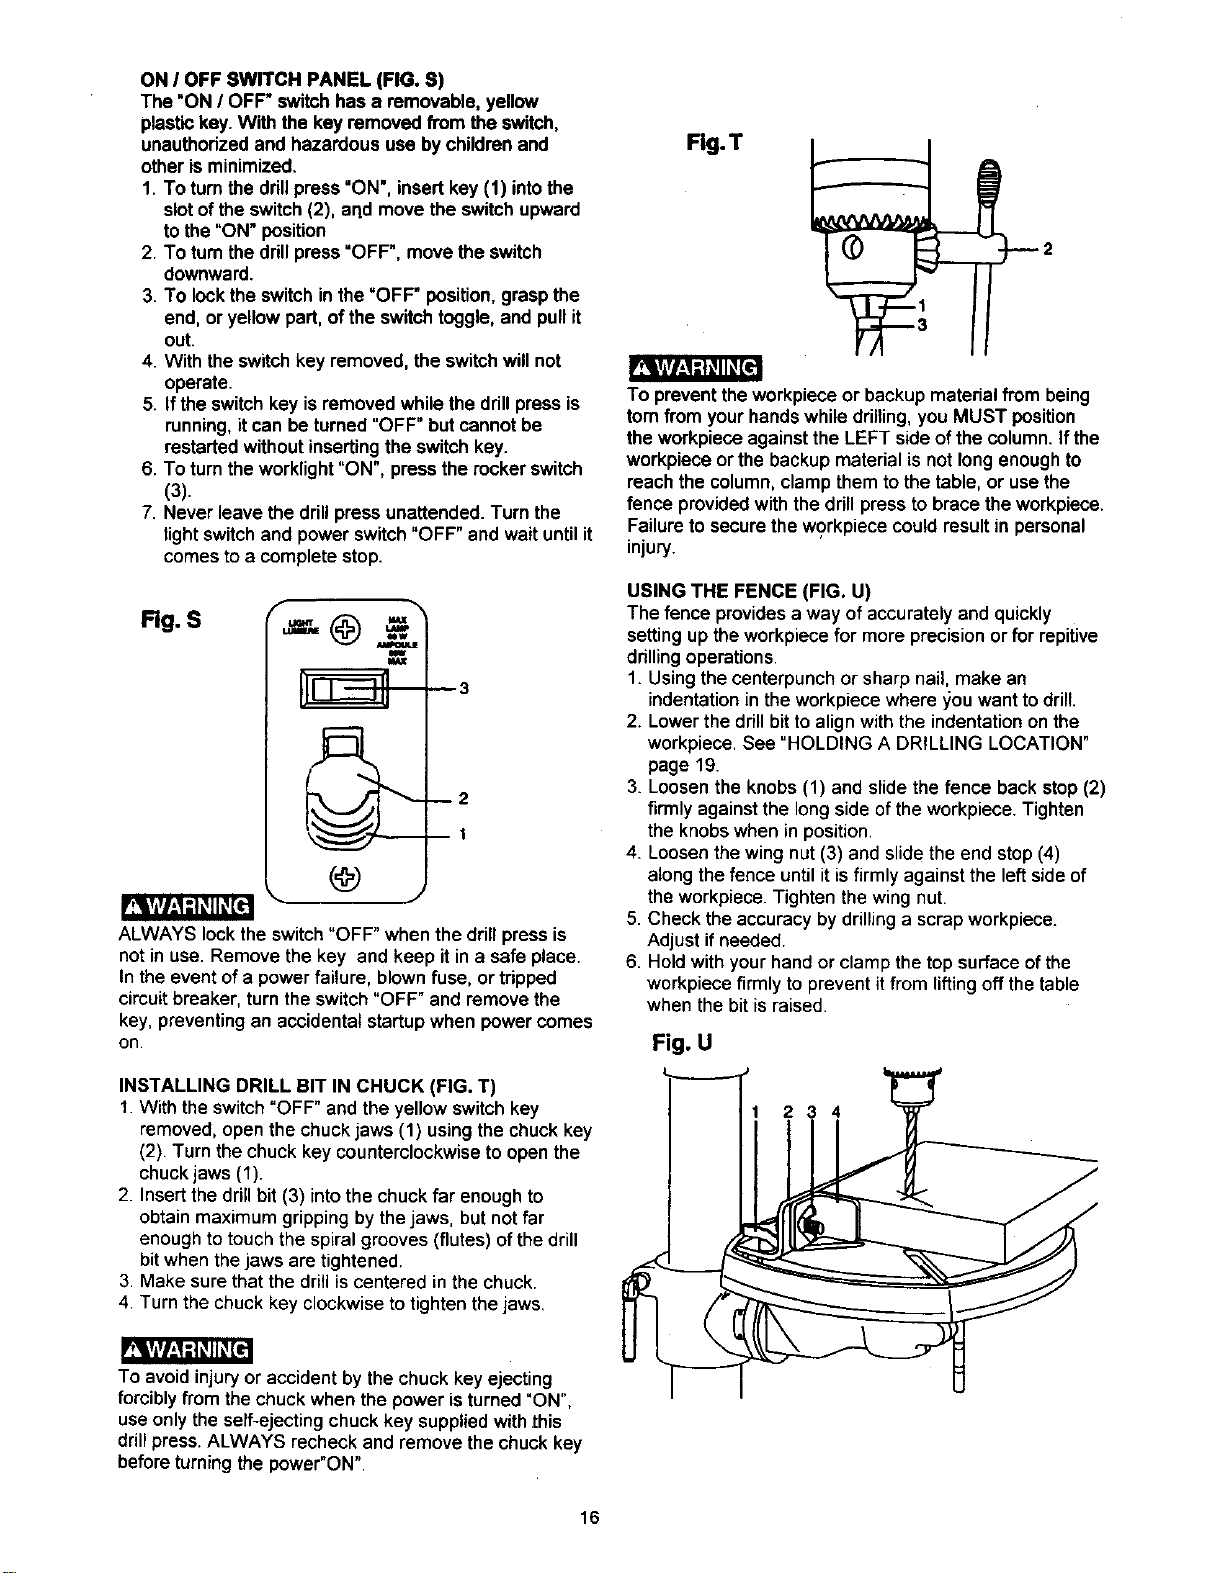
INSTALLING DRILL BIT IN CHUCK (FIG. T)
1.With theswitch"OFF"and the yellow switchkey
removed, openthe chuckjaws (1) usingthe chuckkey
(2). Turn thechuck key counterclockwiseto openthe
chuckjaws (1).
2. Insertthe drillbit (3) into the chuck far enoughto
obtainmaximum grippingbythejaws, butnot far
enoughtotouchthe spiralgrooves(flutes) ofthedrill
bitwhenthe jaws are tightened.
3. Make surethat the drillis centered inthe chuck.
4. Turn the chuckkey clockwiseto tightenthejaws.
To avoidinjury or accident by the chuckkey ejecting
forcibly from the chuck when the power is turned "ON",
use only the self-ejecting chuck key supplied with this
drill press.ALWAYS recheck and remove the chuck key
before turning the power"ON".
Fig.T
To preventthe workpieceor backup materialfrom being
tom from your hands while drilling, you MUST position
the workpiece against the LEFT side of the column. If the
workpiece or the backup material is not long enough to
reach the column, clamp them to the table, or use the
fence provided with the drill press to brace the workpiece.
Failure to secure the workpiece could result in personal
injury.
USING THE FENCE (FIG. U)
The fence provides a way of accuratelyand quickly
settingup the workpiecefor more precisionorfor repitive
drillingoperations.
1. Usingthecenterpunchor sharpnail, make an
indentationin the workpiecewhere _ou wantto drill.
2. Lowerthe drillbit toalignwith the indentationon the
workpiece.See "HOLDING A DRILLING LOCATION"
page 19.
3. Loosenthe knobs(1) and slidethe fence backstop (2)
firmly againstthe longside ofthe workpiece.Tighten
the knobswhen inposition.
4_ Loosenthe wingnut (3) and slidethe end stop(4)
alongthe fence untilitisfirmly againstthe leftsideof
the workpiece.Tightenthe wing nut.
5. Check the accuracybydrillinga scrapworkpiece.
Adjust ifneeded.
6. Holdwithyourhandor clamp thetop surface ofthe
workpiecefirmly toprevent it from liftingoff thetable
when the bit is raised.
Fig. U
234
16
Loading ...
Loading ...
Loading ...