Loading ...
Loading ...
Loading ...
12 www.dimplex.com
Installation
WARNING:
Mounting of the infrared heater and its connection to the
electric mains should be carried out only by qualied professionals according
to the Electrical Installation Regulations and Power System Safety Standards
and comply with all national and local electrical codes.
1. Open the package and carefully remove the heater.
2. Remove the packing paper sheet from the end of heater.
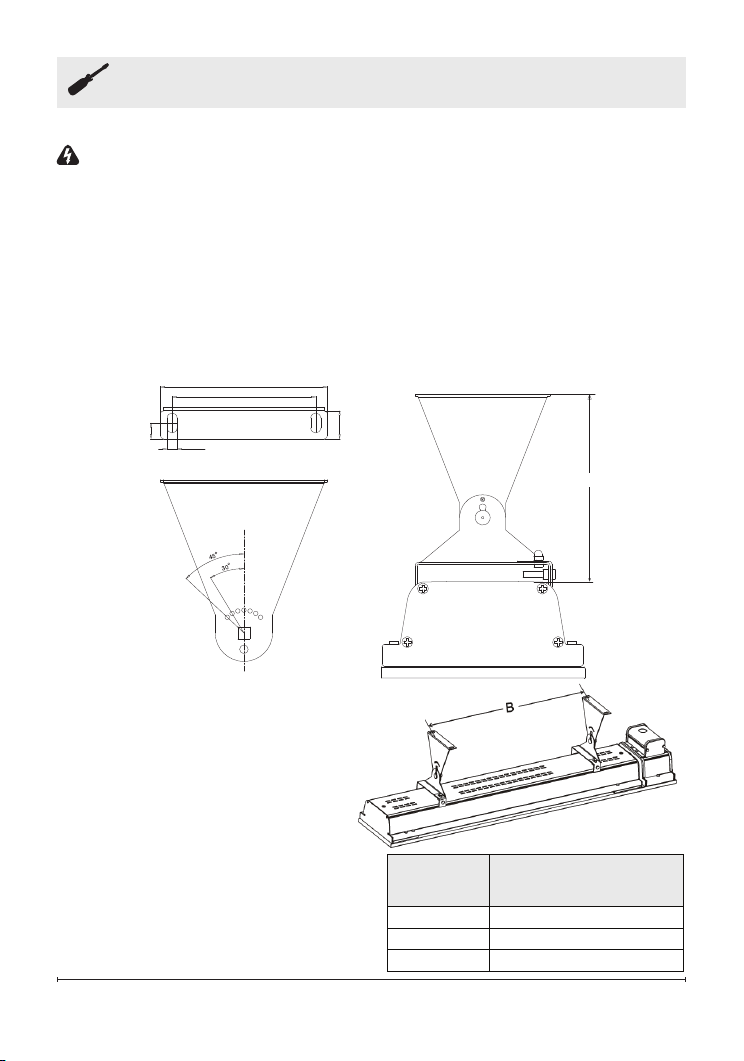
Model
Number
“B”
MINIMUM DISTANCE
DIR15A10GR
500 mm ±50 (19.7 in)
DIR18A10GR
500 mm ±50 (19.7 in)
DIR22A10GR
500 mm ±50 (19.7 in)
4. Use the above diagrams as a
guideline for proper installation.
Select the heater location on
the ceiling or wall by locating
the stud or structural beams to
ensure secure fastening of the
heater. Ensure that all minimum
clearances are achieved.
5. Install two brackets on the
ceiling or wall with the following
minimum recommended bracket
distance “B”. Ensure brackets are
level and not slanted diagonally.
165mm
(6.5")
117mm (4.6")
100mm (3.9")
11mm
(0.4")
7mm (0.3")
20mm
(0.8")
3. Take out one pair of mounting brackets. These adjustable brackets allow
direct ceiling or wall mount, and come with preset angle options of parallel,
30°, 45° and height 170 mm (6.7 in).
Loading ...
Loading ...
Loading ...