Loading ...
Loading ...
Loading ...
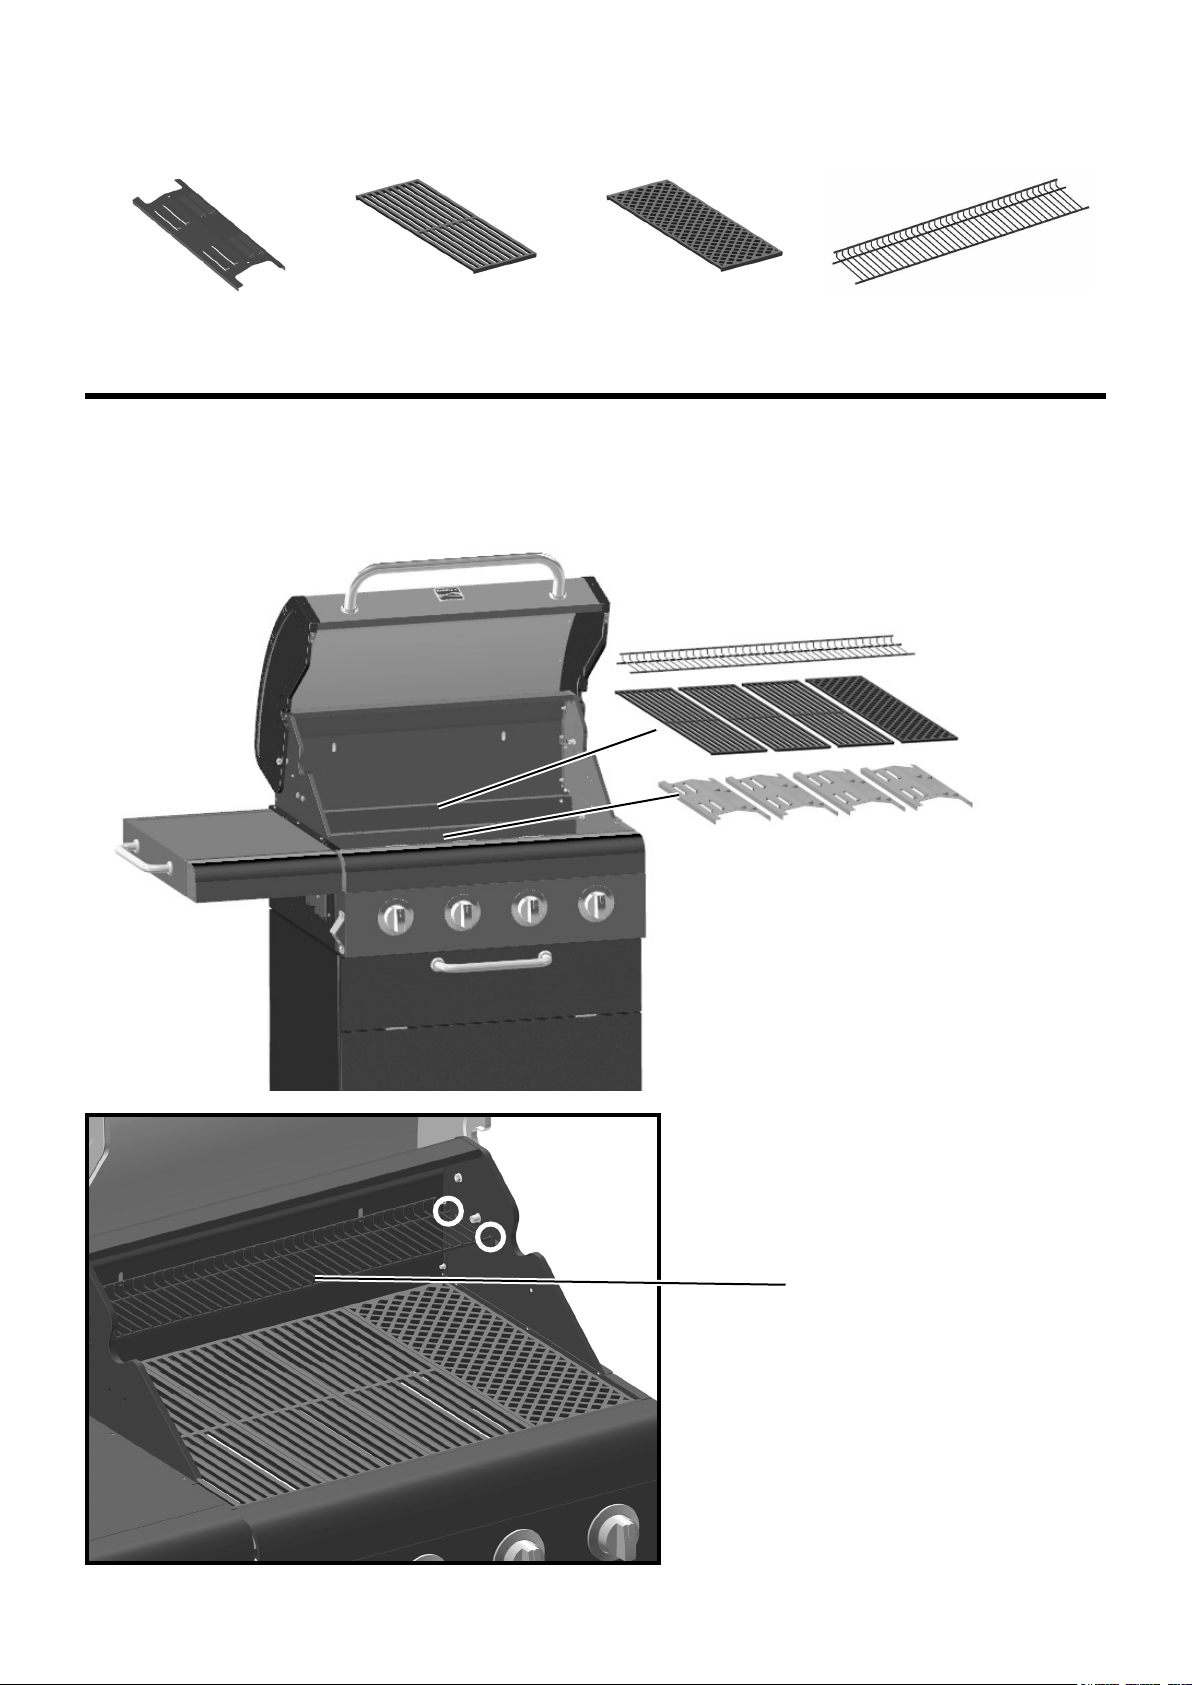
Warming Rack
Assembly Step 9
15
1. Fit vaporising bars (x4) into position as shown.
2. Fit cooking grates (x3) and searing grate into position as shown.
3. Fit warming rack into position as shown.
Note: As a convenience feature, there is a bottle opener on the left side of the rebox.
1.
2.
3.
Vaporising Bar (x4) Cooking Grate (x3) Searing Grate Warming Rack
Note: The Searing Grate must be
positioned over the Searing Burner. For
searing purposes the Searing Burner
(14000 BTU) is hotter than the other
three burners (11700 BTU). The Searing
Grate design is also dierent than the
other three grates. Its diamond check
pattern will sear into the surface of the
meat.
Loading ...
Loading ...
Loading ...