Loading ...
Loading ...
Loading ...
14
Check High Pressure Hose
The high pressure hose can develop leaks from wear, kinking,
or abuse. Inspect the hose each time before using it. Check for
cuts, leaks, abrasions or bulging of cover, damage or movement
of couplings. If any of these conditions exist, replace the hose
immediately.
WARNING The high pressure stream of water that this
equipment produces could cut through skin and
its underlying tissues, resulting in serious injury
and possible amputation.
• NEVER repair high pressure hose. Replace it.
• Replacement hose rating MUST equal or exceed maximum
pressure rating of unit.
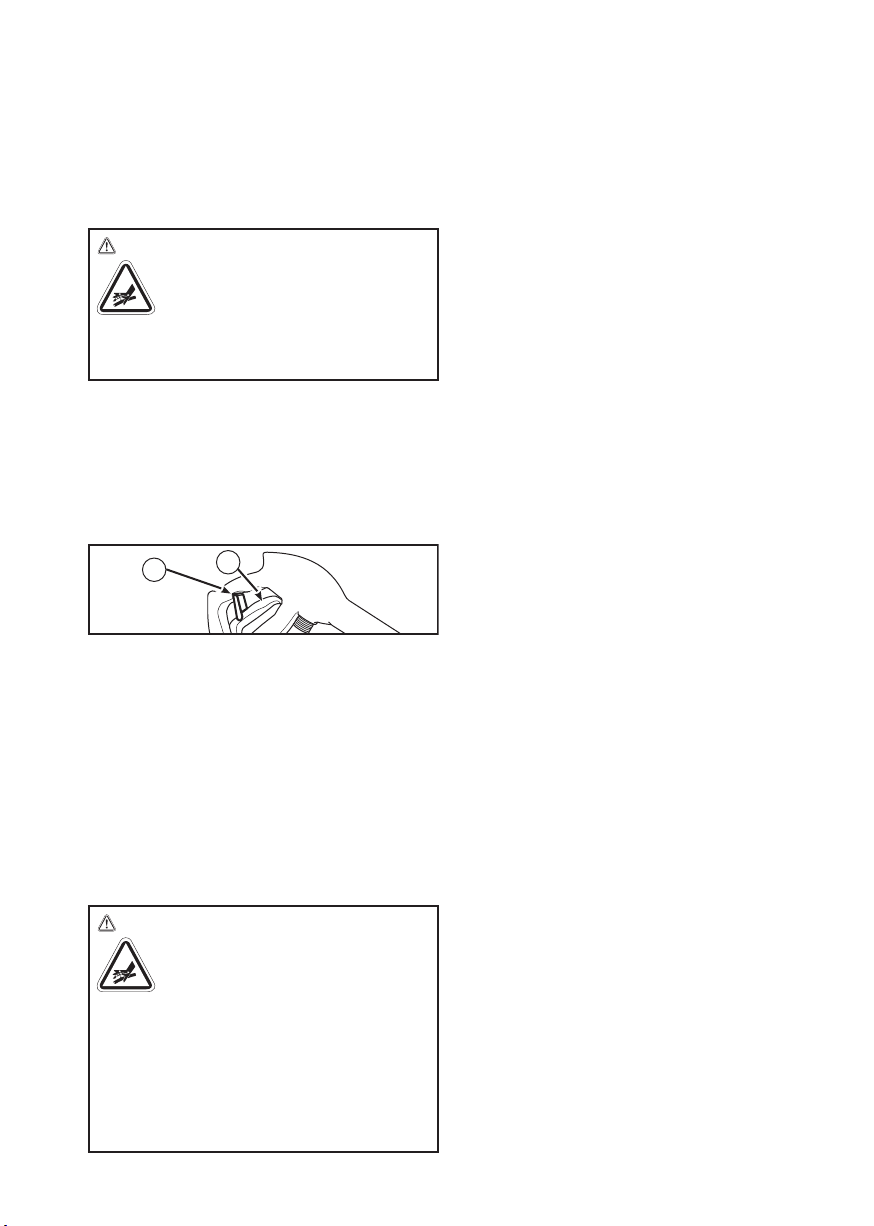
Check Spray Gun
Examine the hose connection to the spray gun and make sure it
is secure. Test the trigger (A) by open trigger lock small lever (B)
and making sure the trigger “springs back” into place when you
release it. You should not be able to press the trigger without
pressing the trigger lock button. Replace spray gun immediately
if it fails any of these tests.
B
A
Spray Tip Maintenance
Excessive pump pressure can cause a pulsing sensation felt
while squeezing the spray gun trigger. The principal cause of
excessive pump pressure is a spray tip clogged or restricted
with foreign materials such as dirt, etc. A clogged spray tip
could lead to pump cycling ON/OFF or not turning on even
when there is some flow.
1. Press the master ON/OFF switch to the OFF (0) position.
Remove power cord plug from electrical outlet.
2. Disconnect water supply at the electric pressure washer.
3. ALWAYS point spray gun in a safe direction, open trigger
lock small lever and squeeze spray gun trigger to release
retained high water pressure.
WARNING The high pressure stream of water that this
equipment produces could cut through skin and
its underlying tissues, resulting in serious injury
and possible amputation.
Spray gun traps high water pressure, even when motor is
stopped and water is disconnected, which could result in
serious injury
• Keep high pressure hose connected to pump and spray gun
while system is pressurized.
• ALWAYS point spray gun in safe direction, squeeze spray
gun trigger to release high pressure, every time you turn off
pressure washer.
4. Remove spray tip from end of spray wand.
5. Use a small paper clip to free any foreign material clogging
or restricting any of the spray tips.
6.Using a garden hose, remove additional debris by back
flushing water through spray wand. Back flush between
30 to 60 seconds.
7.Reinstall spray tip into spray wand.
8.Make sure garden hose is connected to water inlet.
Check that high pressure hose is connected to spray
gun and pump. Turn on water.
9. Plug power cord into electrical outlet and press the
master ON/OFF switch to the ON ( | ) position.
10.Test the electric pressure washer by operating with the
wand.
Pump and Motor Maintenance
The electric pressure washer does not require any maintenance
to the pump or motor. Both assemblies are pre-lubricated and
sealed, requiring no additional lubrication ever.
After Each Use
Water should not remain in the unit for long periods of time.
Sediments or minerals can deposit on pump parts and “freeze”
pump action. Follow these procedures after every use:
1.Fill detergent tank with clean water (if used).
2. Run the electric pressure washer with foamer spray tip.
Flush for one or two minutes.
3. Press the master ON/OFF switch to the OFF (0) position.
4.Turn off water supply, point gun in a safe direction, and
squeeze trigger to relieve trapped pressure, and let engine
cool.
5. Disconnect hose from spray gun and high pressure outlet on
pump. Drain water from hose, spray gun, and spray wand.
Use a rag to wipe off the hose.
6.Drain water from pump by tipping unit to the side (water
inlet / outlet facing down) for two minutes.
7.Wrap high pressure hose and store using the strap
on the back of the dashboard.
8. Coil power cord.
9.Store spray gun/wand in gun holster.
Store spray tips in holes on dashboard.
10. Store unit in a clean, dry area.
11.If storing for more than 30 days see Winter or Long
Term Storage.
Loading ...
Loading ...
Loading ...