Loading ...
Loading ...
Loading ...
50
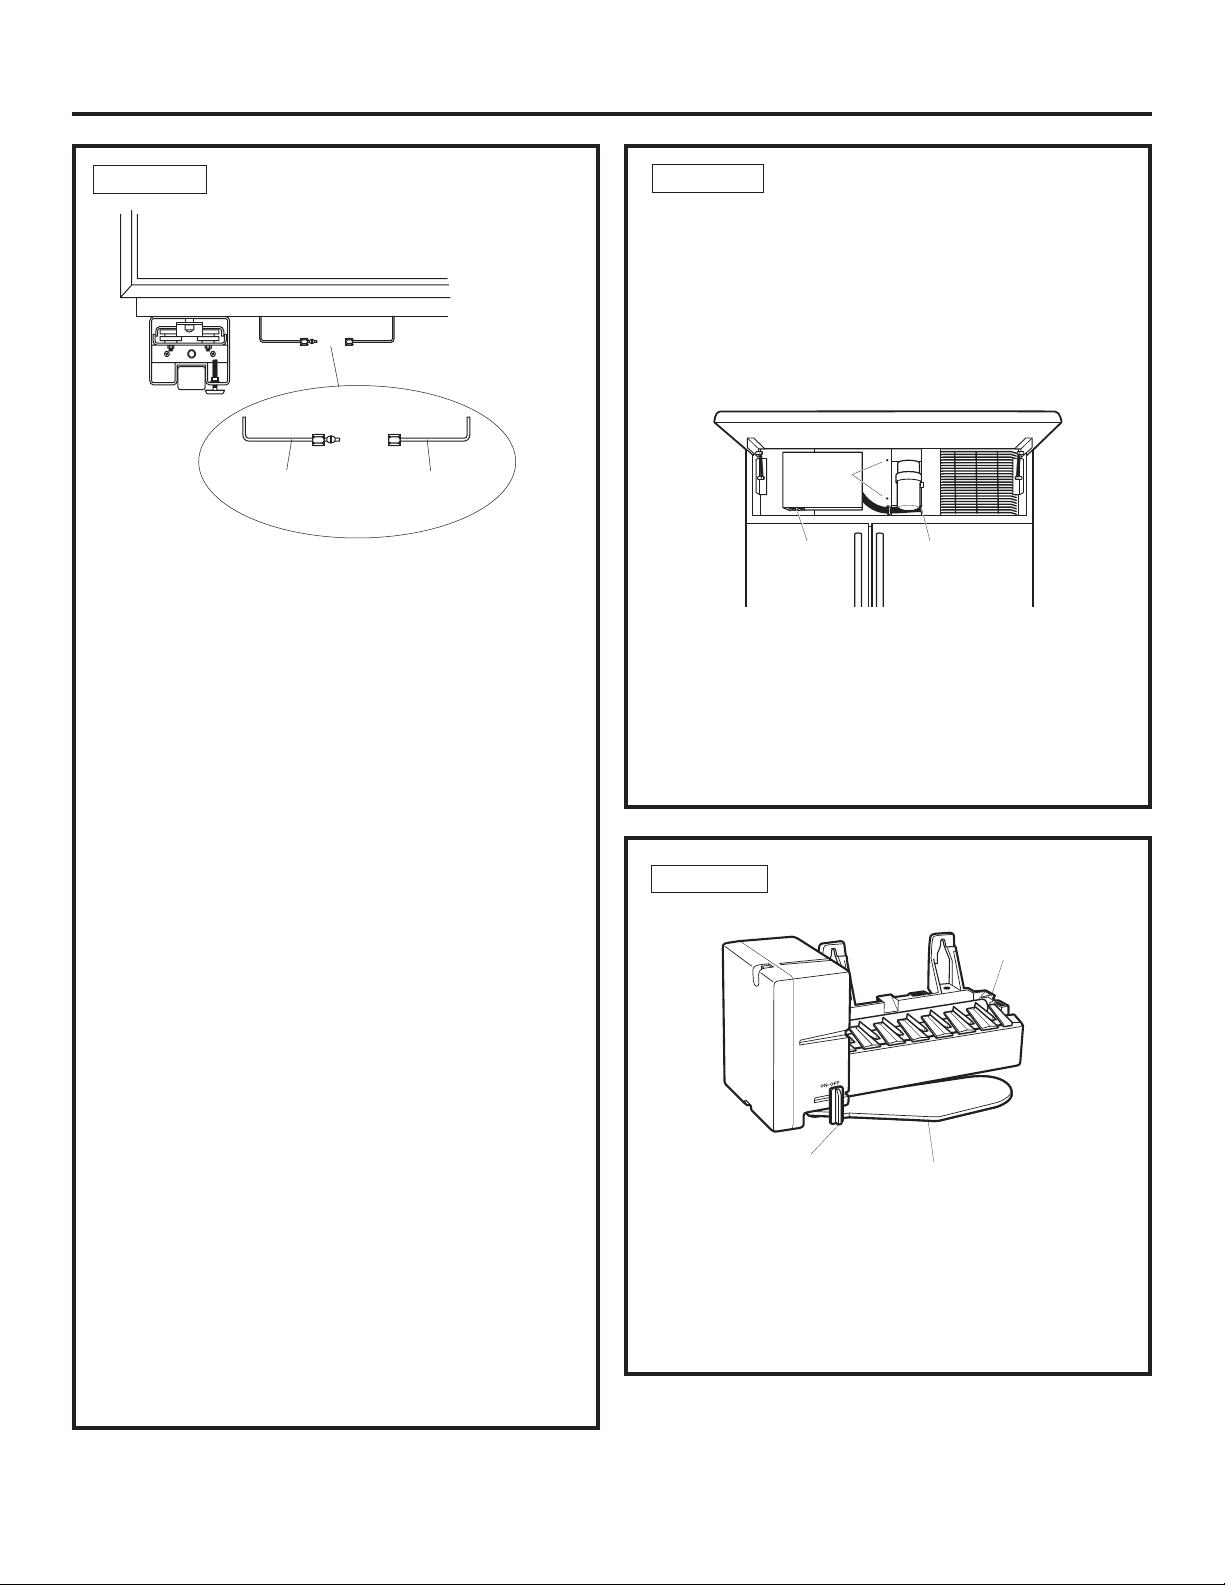
STEP 10 CONNECT WATER SUPPLY
• Locate and bring the tubing to the front of the
cabinet.
• Turn the water on to flush debris from the line. Run
about a quart of water through the tubing into a
bucket, then shut off the water.
Copper Tubing:
• Slip a 1/4” nut and ferrule (provided) over both ends
of the copper tubing. Insert the tube into the union
fitting on the unit and tighten the nut to the union.
• Turn on the water to check for leaks.
SmartConnect
™
Tubing:
NOTE: The only GE Appliances-approved plastic
tubing is supplied in the SmartConnect
™
Refrigerator
Tubing kits. Do not use any other plastic water supply
line because the line is under pressure at all times.
Other types of plastic may crack or rupture with age
and cause water damage to your home.
SmartConnect
™
Refrigerator Tubing Kits are available
in the following lengths:
2’ (.6 m) WX08X10002
8’ (2.4 m) WX08X10006
15’ (4.6 m) WX08X1 0015
25’ (7.6 m) WX08X10025
• Insert the molded end of the tubing into the
refrigerator connection. Tighten the compression nut
until it is just hand tight.
• Tighten one additional turn with a wrench.
Overtightening can cause leaks!
• Turn on the water to check for leaks.
NOTE: Make sure excess tubing length does not
interfere with the toekick installation.
Refrigerator
Water Supply
House
Water Supply
Installation Instruction - Stainless Steel Installation
STEP 12 START ICEMAKER
• Slide the switch to ON. The icemaker will begin
operation automatically.
• Be sure nothing interferes with the sweep of the
feeler arm.
• Discard the first full bucket of ice cubes.
• To turn the icemaker off, slide the switch to OFF.
STEP 11 CONNECT POWER, CLOSE
GRILLE PANEL
• Open the grille panel.
• Plug in the power cord (if necessary) by reaching
into the opening next to the water filter. If access
is too tight, remove the 2 screws holding the water
filter bracket and move aside. Plug in the power
cord and secure the bracket with the original
screws.
• Check to make sure power to refrigerator is on by
opening refrigerator door to see if interior lights are
on.
• The temperature controls are preset at 37°F for the
fresh food section and 0°F for the freezer.
• Allow 24 hours to stabilize before making
adjustments.
Master Light
Switches
Electrical
Outlet Access
Bracket
Screws
Icemaker
Feeler Arm
Power
Switch
Loading ...
Loading ...
Loading ...