Loading ...
Loading ...
Loading ...
SET-UP
Moving The Riding mower Manually
Yourridingmower'stransmissionisequippedwitha hydrostaticrelief
valvefor occasionswhenit isnecessaryto movethe ridingmower
manually.Openingthisvalvepermitsthe fluid inthe transmissionto
bypassitsnormalroute,allowingthe reartiresto "freewheel."Toopen
the hydrostaticreliefvalve,proceedas follows:
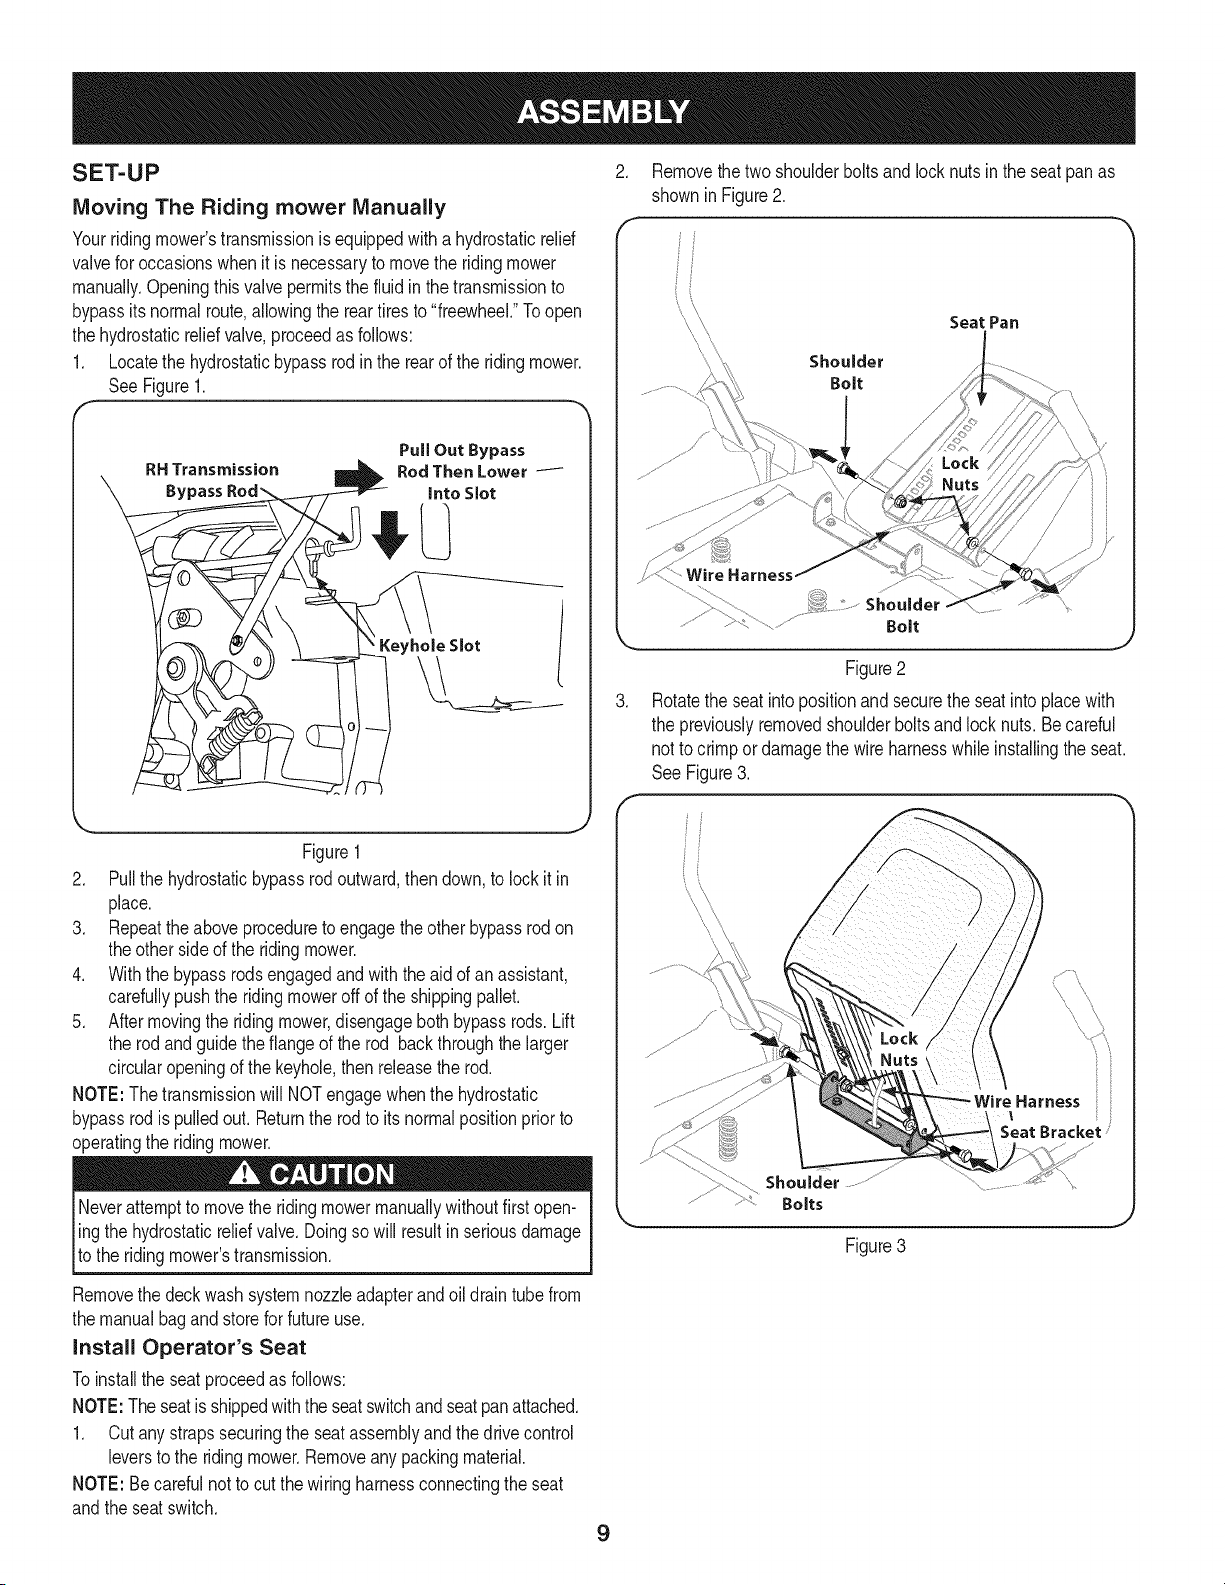
1. Locatethe hydrostaticbypassrod inthe rear of the ridingmower.
SeeFigure1.
RH Transmission
Bypass
PullOut Bypass
Rod ThenLower
Into Slot
Keyhole Slot
Figure1
2. Pullthe hydrostaticbypassrod outward,then down,to lock it in
place.
3. Repeattheaboveproceduretoengagethe otherbypassrod on
theother sideof the ridingmower.
4. Withthe bypassrodsengagedand with the aid of an assistant,
carefullypushthe ridingmoweroff of the shippingpallet.
5. Aftermovingthe ridingmower,disengageboth bypassrods. Lift
the rodandguidethe flangeof the rod backthroughthe larger
circularopeningof the keyhole,then releasethe rod.
NOTE:The transmissionwill NOTengagewhenthe hydrostatic
bypassrodis pulledout. Returnthe rodto itsnormalpositionpriorto
operatingthe ridingmower.
Neverattemptto movethe ridingmowermanuallywithoutfirstopen-
ling the hydrostaticr,elief valve.Doingso will resultin seriousdamage
[to the ridingmowers transmission.
Removethe deckwashsystemnozzleadapterandoil drain tube from
the manualbagand store forfuture use.
Install Operator's Seat
Toinstallthe seatproceedas follows:
NOTE:Theseatis shippedwiththe seatswitchandseatpanattached.
1. Cutanystrapssecuringthe seatassemblyand thedrivecontrol
leversto the ridingmower.Removeanypackingmaterial.
NOTE: Becarefulnotto cut thewiring harnessconnectingtheseat
andthe seat switch.
.
9
Removethe twoshoulderboltsand lock nuts in the seatpan as
shownin Figure2.
Shoulder
Bolt
Seat Pan
Shoulder
Bolt
Figure2
Rotatethe seatintopositionand securethe seatinto placewith
the previouslyremovedshoulderboltsand locknuts.Becareful
not to crimpordamagethe wire harnesswhile installingthe seat.
See Figure3.
iHarness ii
Seat Bracket /
Shoulder
Bolts
Figure 3
Loading ...
Loading ...
Loading ...