Loading ...
Loading ...
Loading ...
LUBRiCATiON
Usinga pressurelubricatinggun, lubricatethe frontcastorwheel
axlesandthe front pivot axlewith No.2 multipurposelithium
greaseafterevery 10 hoursof service.
Periodicallylubricateall otherpivotpointswitha qualitylubricat-
ingoil.
GENERAL BATTERY iNFORMATiON
Shouldbatteryacidaccidentallysplatterinto theeyesor ontothe
skin, rinsethe affectedareaimmediatelywithcleancold water.If
thereis any furtherdiscomfort,seekpromptmedicalattention.If acid
spillsonclothing,first diluteit withcleanwater,then neutralizewitha
solutionof ammonia/wateror bakingsoda/water.
NEVERconnect(ordisconnect)batterychargerclipstothebatterywhile
thechargeris turnedon,asitcancausesparks.Keepallsourcesofignition
(cigarettes,matches,lighters)awayfromthebattery.Thegasgenerated
duringchargingcanbecombustible.Asafurtherprecaution,onlycharge
thebatteryina wellventilatedarea.Alwaysshieldeyesandprotectskin
_andcothngwhenworkngnearbatteres.
Batteriescontainsulfuricacidandmayemitexplosivegases.Useextreme
cautionwhenhandlingbatteries.Keepbatteriesoutofthereachofchildren.
Battery Maintenance
The batteryis filled withbatteryacid andthensealedat the factory.
However,evena "maintenancefree" batteryrequiressomemainte-
nanceto ensureits properlife cycle.
Spraytheterminalsandexposedwire witha batteryterminalsealer,
orcoatthe terminalswith a thincoat of greaseor petroleumjelly,to
protectagainstcorrosion.
Alwayskeepthe batterycablesandterminalscleanand freeof
corrosion.
Avoidtipping.Evena sealedbatterywill leak electrolytewhentipped.
BATTERY REMOVAL
leadcompounds.Washhandsafterhandling.
The batteryis locatedonthe right/rearof the ridingmowerbeneaththe
seatbox frame.To removethe battery:
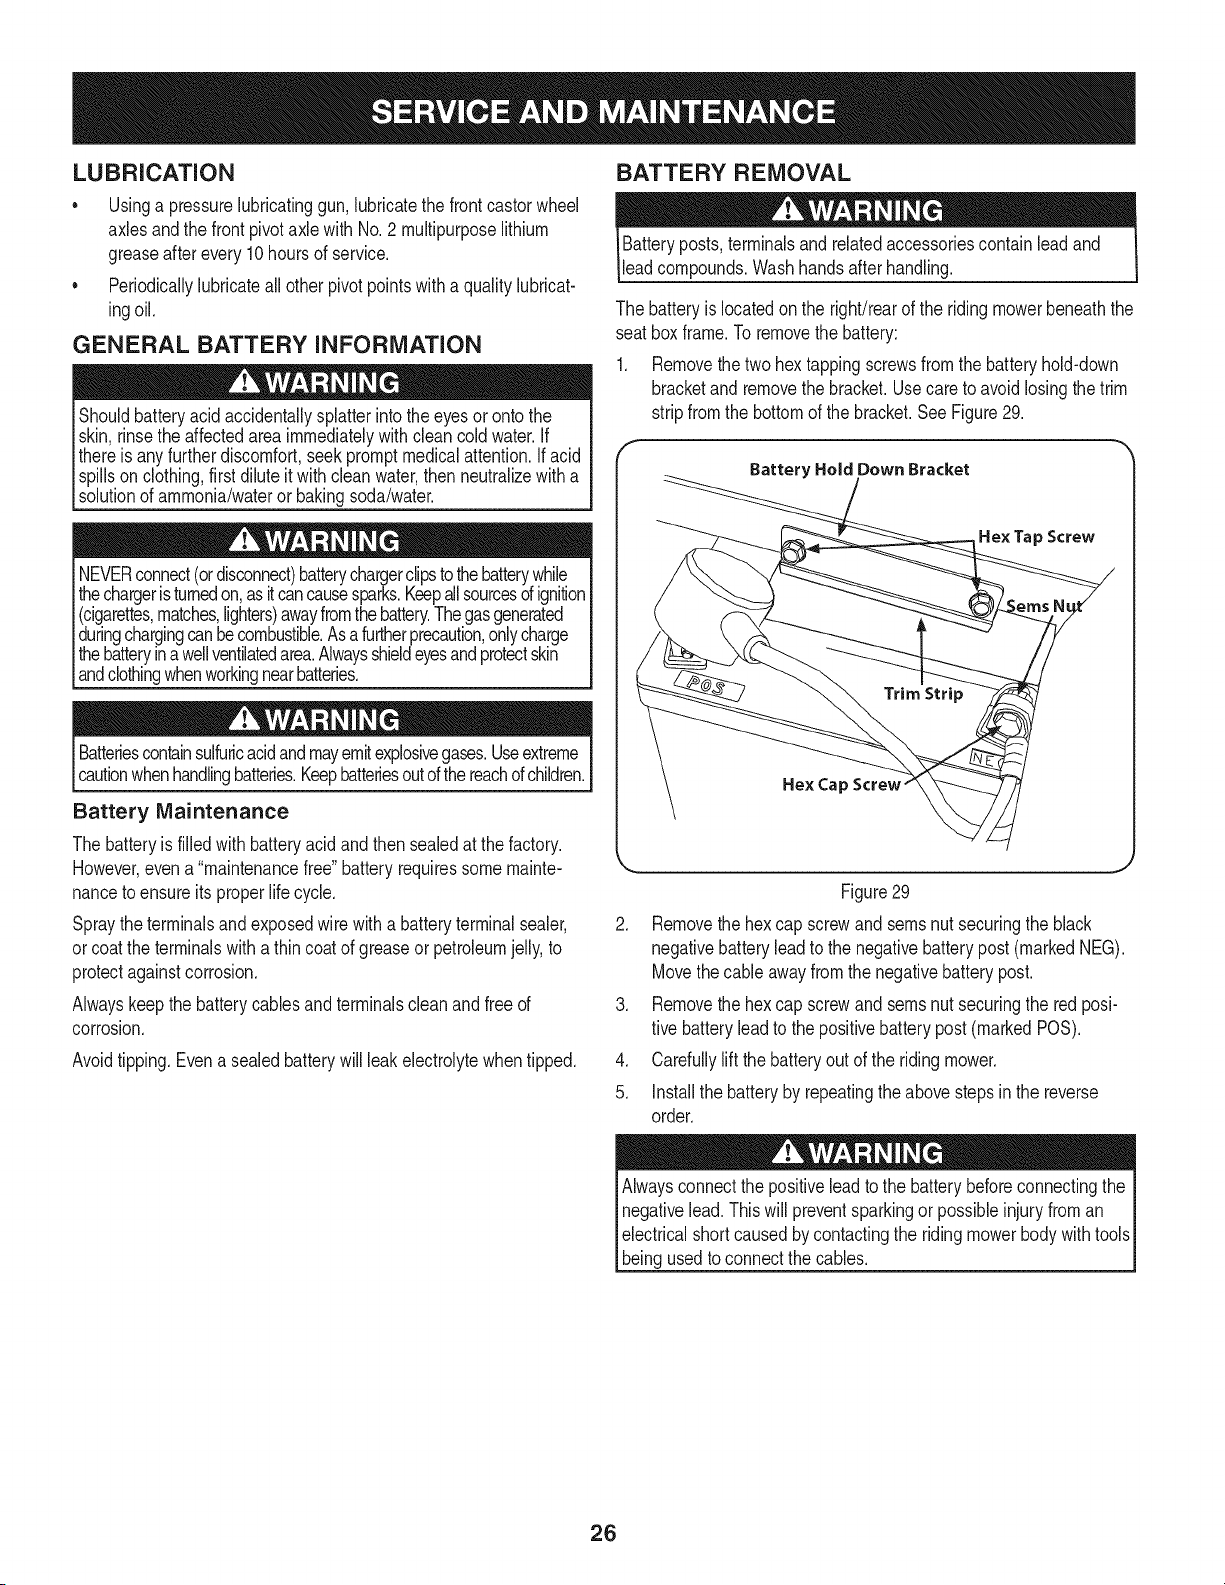
1. Removethe two hextappingscrewsfrom thebatteryhold-down
bracketand removethe bracket.Usecareto avoidlosingthe trim
stripfromthe bottomof thebracket.SeeFigure29.
f
Battery Hold Down Bracket
Hex Tap Screw
Hex Cap Screw"
Figure29
2. Removethe hexcap screwand seresnut securingthe black
negativebatteryleadto the negativebatterypost (markedMEG).
Movethecable awayfromthe negativebatterypost.
3. Removethe hexcap screwand seresnut securingthe red posi-
tive batteryleadto the positivebatterypost (markedPOS).
4. Carefullylift the batteryout of the ridingmower.
5. Installthe batteryby repeatingthe abovestepsin the reverse
order.
Alwaysconnectthe positiveleadto the batterybeforeconnectingthe
negativelead.Thiswill preventsparkingor possibleinjuryfrom an
electricalshortcausedbycontactingthe ridingmowerbodywithtoolsI
I bengusedto connectthe cab es. j
26
Loading ...
Loading ...
Loading ...