Loading ...
Loading ...
Loading ...
9
INSTALLATION INSTRUCTIONS
INSTALL THE DUCTWORK (DUCTED
HOODS ONLY)
1 Decide where the ductwork will run between the hood and
the outside.
6"
ROUND DUCT
ROOF CAP
ROUND
ELBOW
26" MIN. ABOVE
COOKING SURFACE
WALL
CAP
HOOD
DECORATIVE
FLUE
2 A straight, short duct run will allow the hood to perform
most efciently.
3 Long duct runs, elbows and transitions will reduce the
performance of the hood. Use as few of them as possible.
Larger ducting may be required for best performance with
longer duct runs.
4 Install wall cap or roof cap. Connect round metal ductwork
to cap and work back towards the hood location. Use duct
tape to seal the joints between ductwork sections.
DAMPER/ADAPTER PREPARATION FOR
SHC3062FS, SHC3662FS, SHC3042FS -
DUCTED INSTALLATION ONLY:
Install both damper aps inside the blower exhaust opening,
ensuring the pins are top oriented. See illustration below.
Pins on top
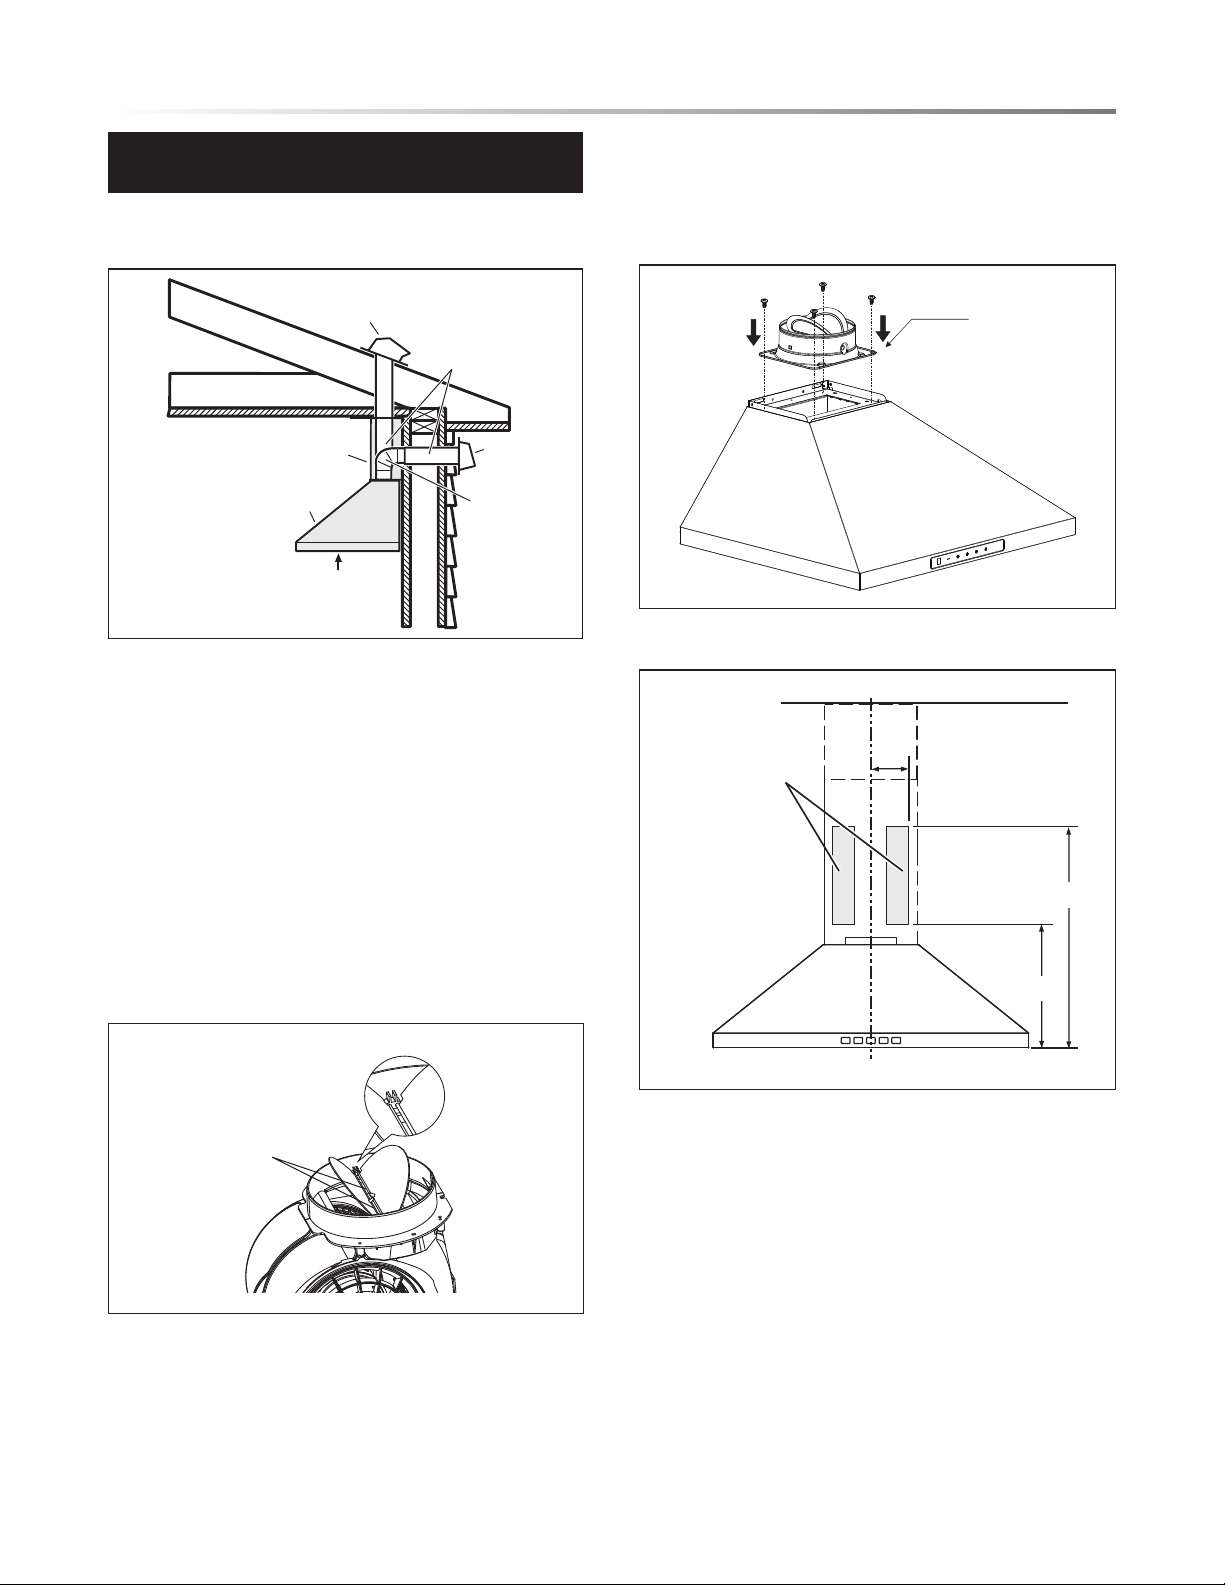
DAMPER/ADAPTER PREPARATION
FOR SHC2432FS:
Damper is packed in side carton separately. Use four Mounting
Screws (no. 8 x
3
/8" Pan Head) to x the damper as shown in
the picture below.
Damper
INSTALL THE WIRING
4”
22”
11”
LOCATE
ELECTRICAL
OUTLET
WITHIN THESE
AREAS.
(Verify location
will not interfere
with duct,
mounting
brackets,
and flue.)
HD1250A
GROUNDING INSTRUCTIONS
• This appliance must be grounded. In the event of an
electrical short circuit, grounding reduces the risk of
electric shock by providing an escape wire for the electric
current.
• This appliance is equipped with a cord having a grounding
wire with a grounding plug.
• The plug must be plugged into an outlet that is properly
installed and grounded.
NOTE: A recessed “clock” outlet is recommended.
• Position the electrical outlet within the space covered by
the decorative ue and where it will not interfere with the
round duct. Make sure the outlet does not interfere with the
mounting bracket fastening area, ductwork, or where the
decorative ue touches the wall.
Loading ...
Loading ...
Loading ...