Loading ...
Loading ...
Loading ...
EN
30
Configuration menu
www.bora.com
6 Configuration menu
Closing the menu
i
When navigating the menu, after the last menu item there
is an option
End
to close the menu.
X
Turn the knob ring to
End
X
Tap to confirm the selection.
O
The menu is closed and the standard display appears.
i
If no settings are changed in a menu or submenu item for
2 minutes, the configuration menu is closed automatically
and the display goes out. The settings made are saved
automatically.
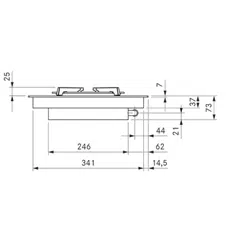
6.2 Initial operation
6.2.1 Gas configuration menu items
i
The burner nozzles, gas type, gas pressure and gas
characteristic curve may only be changed by a certified
engineer or BORA service technician. They also assume
responsibility for the proper gas installation and
commissioning.
i
Correct settings are important for the safe, problem-free
operation of the gas cooktop.
Menu item
CE
: GPU configuration
i
Under menu item
CE
(GPU) the minimum power of each
burner and gas type/pressure is regulated.
Setting Gas type and gas pressure
0
G20, 20 mbar
G25, 20 mbar
(Factory setting)
4
G30, 29 mbar
G30/G31, 37 mbar
5
G30, 50 mbar
G30/G31, 50 mbar
A
G20, 13mbar
b
G25, 25 mbar
G25.3, 25 mbar
C
G20, 25mbar
Tab. 6.2 Setting the gas type and gas pressure
Special settings for Australia and New Zealand:
Setting Gas type and gas pressure
1 G20, 10 mbar
9 G31, 27.5 mbar
Tab. 6.3 Setting the gas type and gas pressure (AU/NZ)
X
Select the correct setting.
Menu overview
Gas configuration menu
CE
GPU configuration
CF
Gas burner characteristic curves
Ch
GPU reset
Tab. 6.1 Gas conguration menu
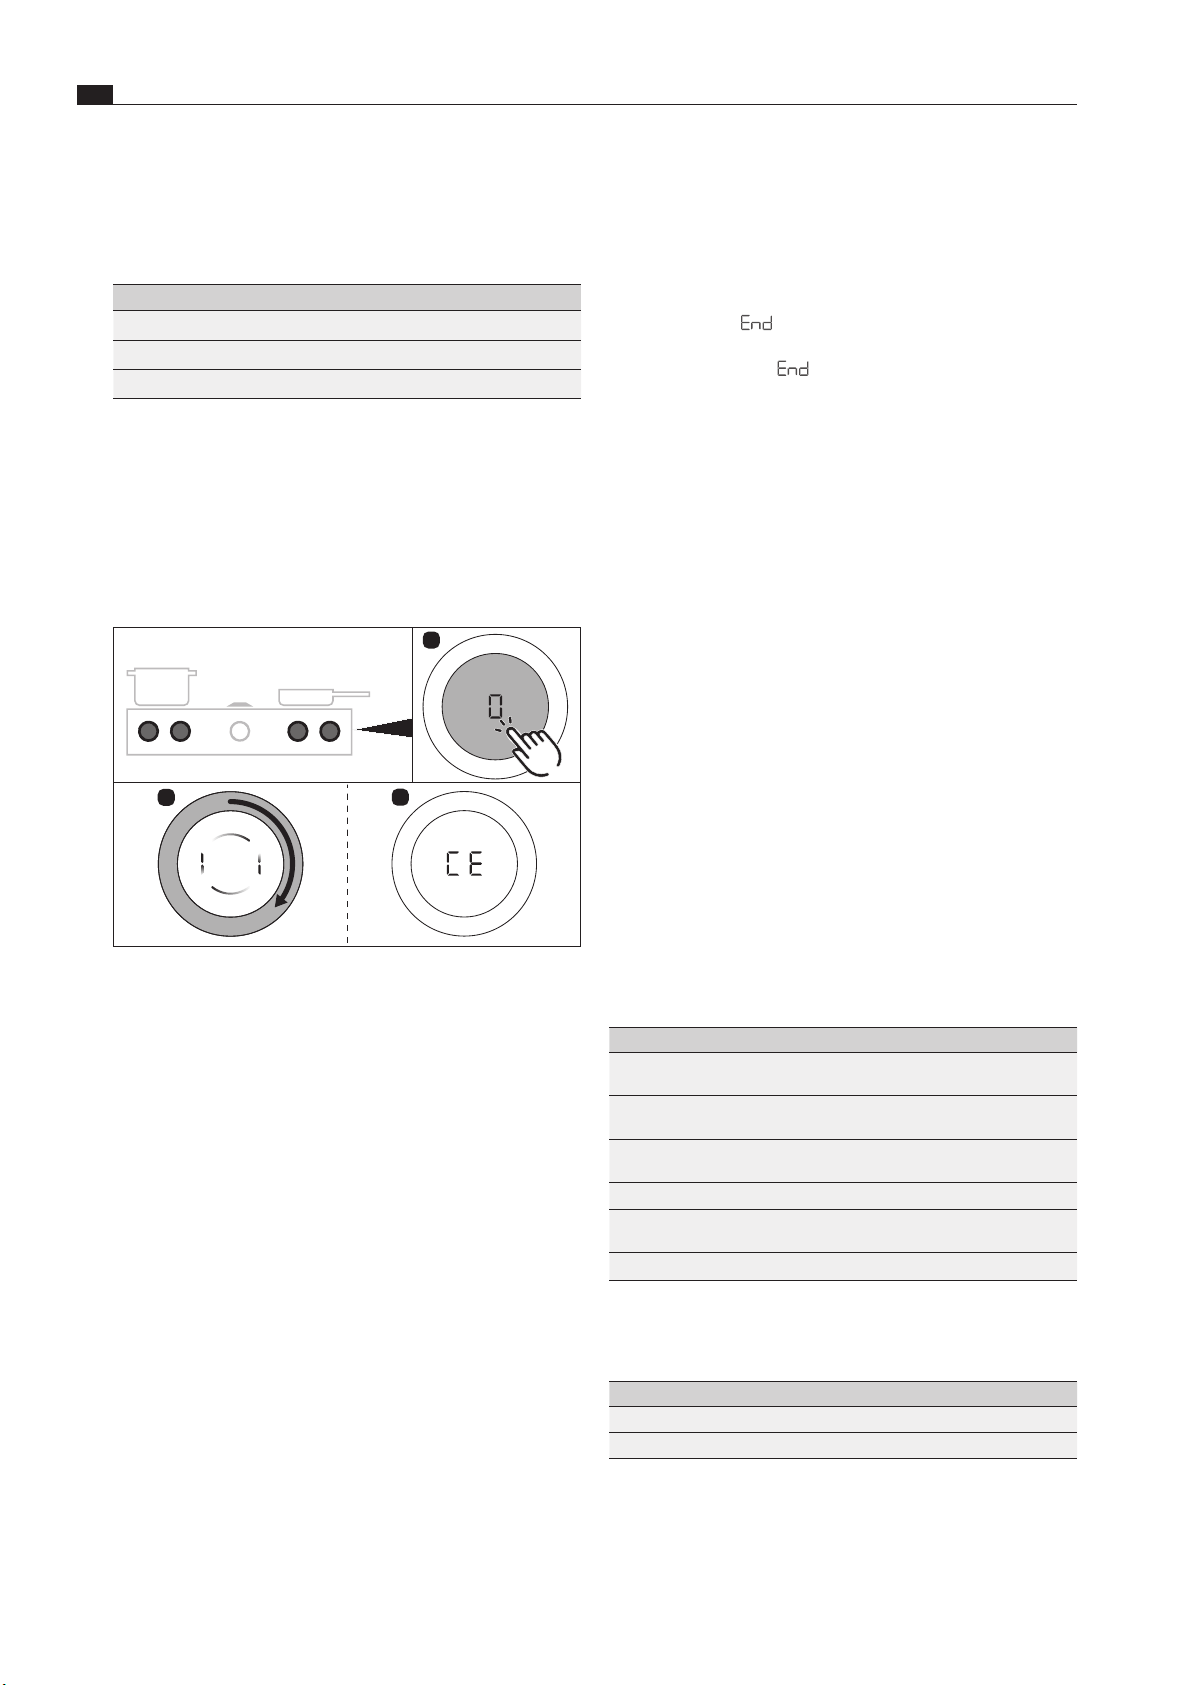
6.1 How to use the menu
Calling up the menu
i
The menu can only be called up when the appliances are
switched on but are inactive (= power level 0).
5s
1
2
3
Fig. 6.38 Calling up the menu
X
Extralong press on a control knob on the gas cooktop
O
An animation appears (= prompt to turn)
X
Turn the ring on the control knob clockwise
O
The menu is called up and the first menu item is displayed.
Explanation of the menu item display (e.g. C23):
Number in middle segment = menu item (100% brightness)
Number in right-hand segment = current setting (50% brightness)
Selecting and confirming menu items
X
Turn the knob ring to the required menu item
(see “Menu overview”).
X
Tap to confirm.
Making, confirming and saving settings
X
Turn the knob ring to the desired setting (for setting options
see “Description of menu items”).
X
Tap to confirm the setting.
i
The system adopts and saves the settings made when
you exit the corresponding menu item or the menu itself.
Loading ...
Loading ...
Loading ...