Loading ...
Loading ...
Loading ...
34
Single Zone High Efciency, Standard, Extended Pipe and Mega Wall Mount Installation Manual
Due to our policy of continuous product innovation, some specifications may change without notification.
©LG Electronics U.S.A., Inc., Englewood Cliffs, NJ. All rights reserved. “LG” is a registered trademark of LG Corp.
GENERAL INSTALLATION GUIDELINES
Union
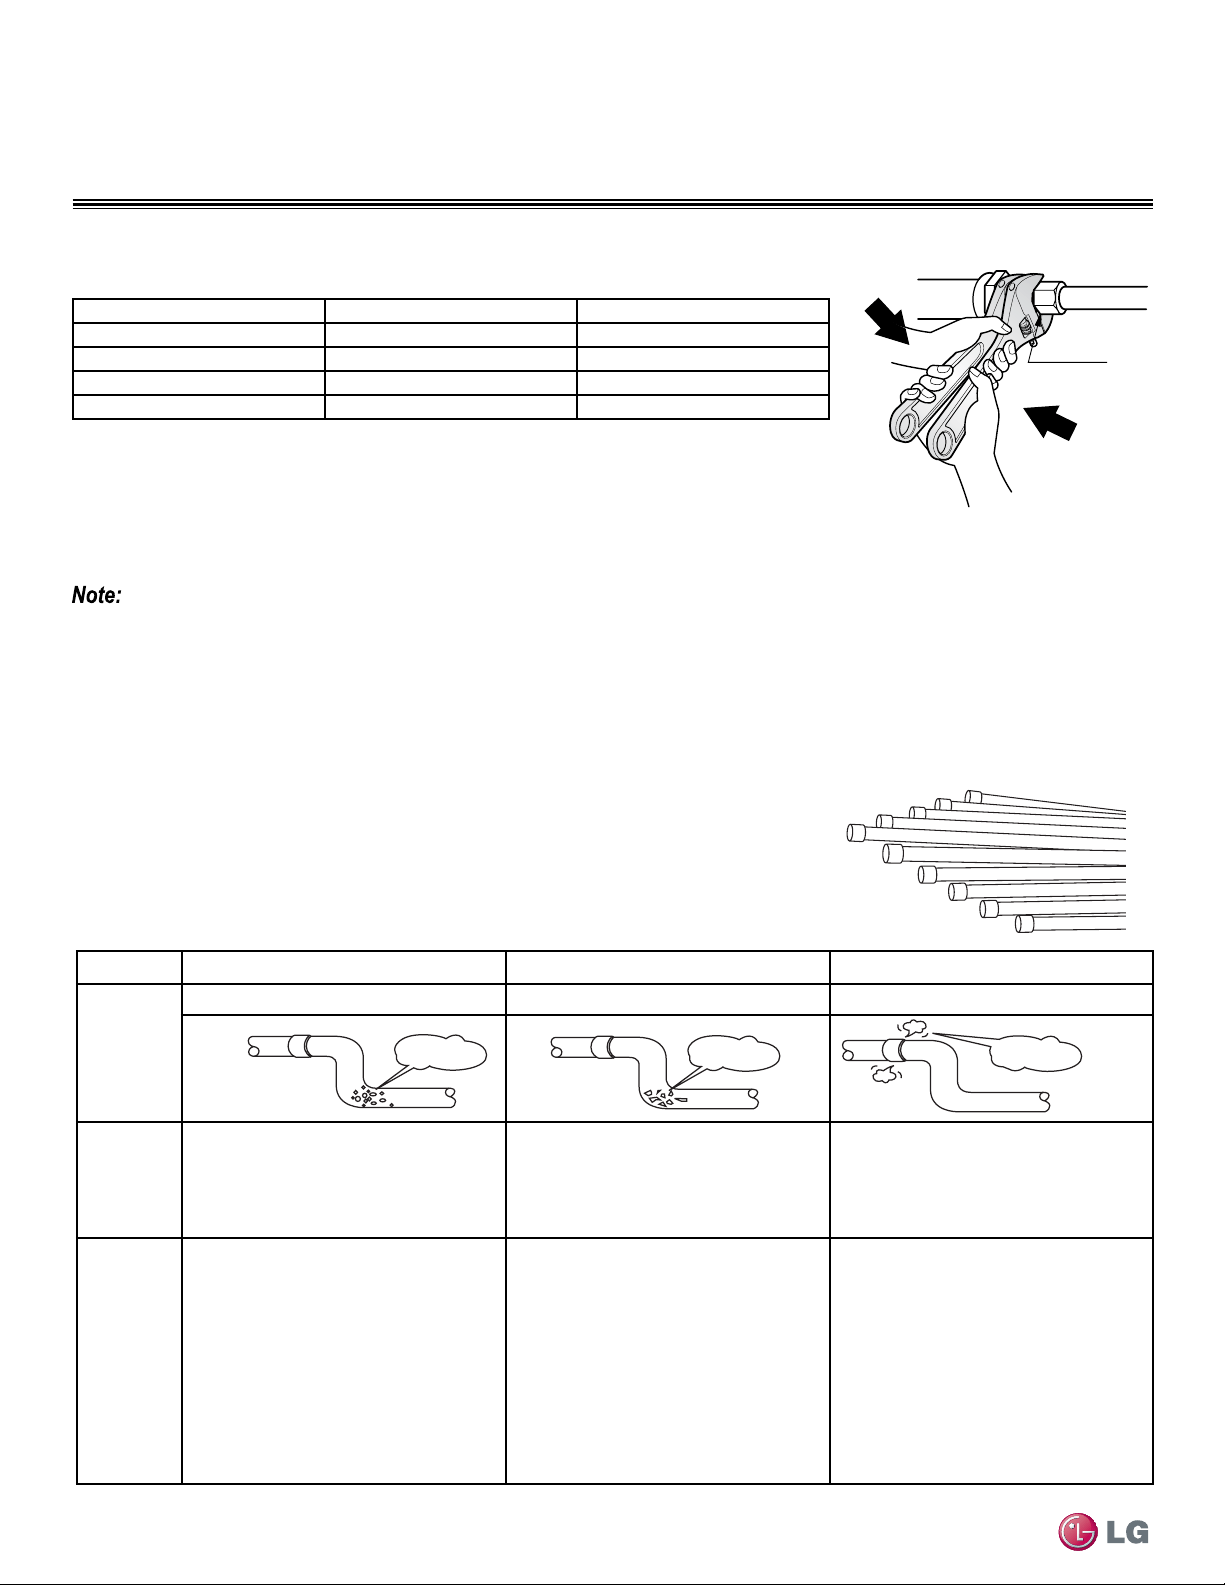
Figure 27: Tightening the Flare Nuts.
Pipe size (Inches O.D.) Tightening torque (ft-lbs) Width of the are (A [inches])
1/4Ø 13.9 - 18 1/8
3/8Ø 24.5 - 30.3 1/8
1/2Ø 39.7 - 47.7 1/8
5/8Ø 45.5 - 59.2 1/16
Table 12: Tightening Torque for Flare Nuts.
Tightening the Flare Nuts
1. When connecting the flare nuts, coat the flare (inside and outside) with polyvinyl ether (PVE)
refrigeration oil only.
2. Initially hand tighten the flare nuts using three (3) or four (4) turns.
3. To finish tightening the flare nuts, use both a torque wrench and a backup wrench.
4. After all the piping has been connected and the caps have been tightened, check for refrigerant gas leaks.
Loosening the Flare Nuts
Always use two (2) wrenches to loosen the flare nuts.
Do not use polyolyester (POE) or any other type of mineral oil as a thread lubricant. These lubricants are not compatible with PVE oil used in
this system and create oil sludge leading to equipment damage and system malfunction.
Piping Preparation / Piping Materials and Handling
Pipes used for the refrigerant piping system must include the specified thickness, and the
interior must be clean.
While handling and storing, do not bend or damage the pipes, and take care not to contami-
nate the interior with dust, moisture, etc. See Table 13 for care of piping.
Dry Clean Airtight
Principles No moisture should be inside the piping. No dust should be inside the piping. No leaks should occur.
Problems
Caused
- Significant hydrolysis of refrigerant oil.
- Refrigerant oil degradation.
- Poor insulation of the compressor.
- System does not operate properly.
- EEVs, capillary tubes are clogged.
- Refrigerant oil degradation.
- Poor insulation of the compressor.
- System does not operate properly.
- EEVs and capillary tubes become
clogged.
- Refrigerant gas leaks / shortages.
- Refrigerant oil degradation.
- Poor insulation of the compressor.
- System does not operate properly.
Solutions
- Remove moisture from the piping.
- Piping ends should remain capped until
connections are complete.
- Do not install piping on a rainy day.
- Connect piping properly at the unit’s side.
- Remove caps only after the piping is
cut, the burrs are removed, and after
passing the piping through the walls.
- Evacuate system to a minimum of 500
microns and insure the vacuum holds at
that level for 24 hours
- Remove dust from the piping.
- Piping ends should remain capped until
connections are complete.
- Connect piping properly at the side of
the unit.
- Remove caps only after the piping is cut
and burrs are removed.
- Retain the cap on the piping when
passing it through walls, etc.
- Test system for air tightness.
- Perform brazing procedures that comply
with all applicable standards.
- Perform flaring procedures that comply
with all applicable standards.
- Perform flanging procedures that
comply with all applicable standards.
- Ensure that refrigerant lines are pressure
tested to 550 psig.
Moisture
Dust
Leaks
Figure 28: Keep Piping Capped While Storing
Table 13: Three Principles of Refrigerant Piping
Piping Materials and Handling
Loading ...
Loading ...
Loading ...