Loading ...
Loading ...
Loading ...
,_CAUTION:Beforeperforminganyser-
viceoradjustments:
oReleaseoperatorpresencecontrolbar
. Makesurethebladeandallmoving
parishavecompletelystopped.
,'Disconnectsparkplugwirefromspark
p)ugandplacewirewhereitcannot
comeincontactwithplug,
LAWN MOWER
TO ADJUST CUTTING HEIGHT
See "TO ADJUST CUTTING HEIGHT" in
the Operation section of this manual,
REAR DEFLECTOR
The rear deflector, attached between the
rear wheels of your mower, is provided to
minimize the possibility that obiects will
be thrown out of the rear of the mower
into the operator's mowing position Ifthe
deflector becomes damaged, it should be
replaced,
DISCHARGE GUARD (IF EQUIPPED)
The discharge guard, attached tothe side
discharge opening of your lawn mower, is
provided to prevent the possibility of injury'
resulting from objects being thrownout of
the discharge opening intothe operator
mowing position,. Ifthe discharge guard
becomes damaged, itshould be replaced,
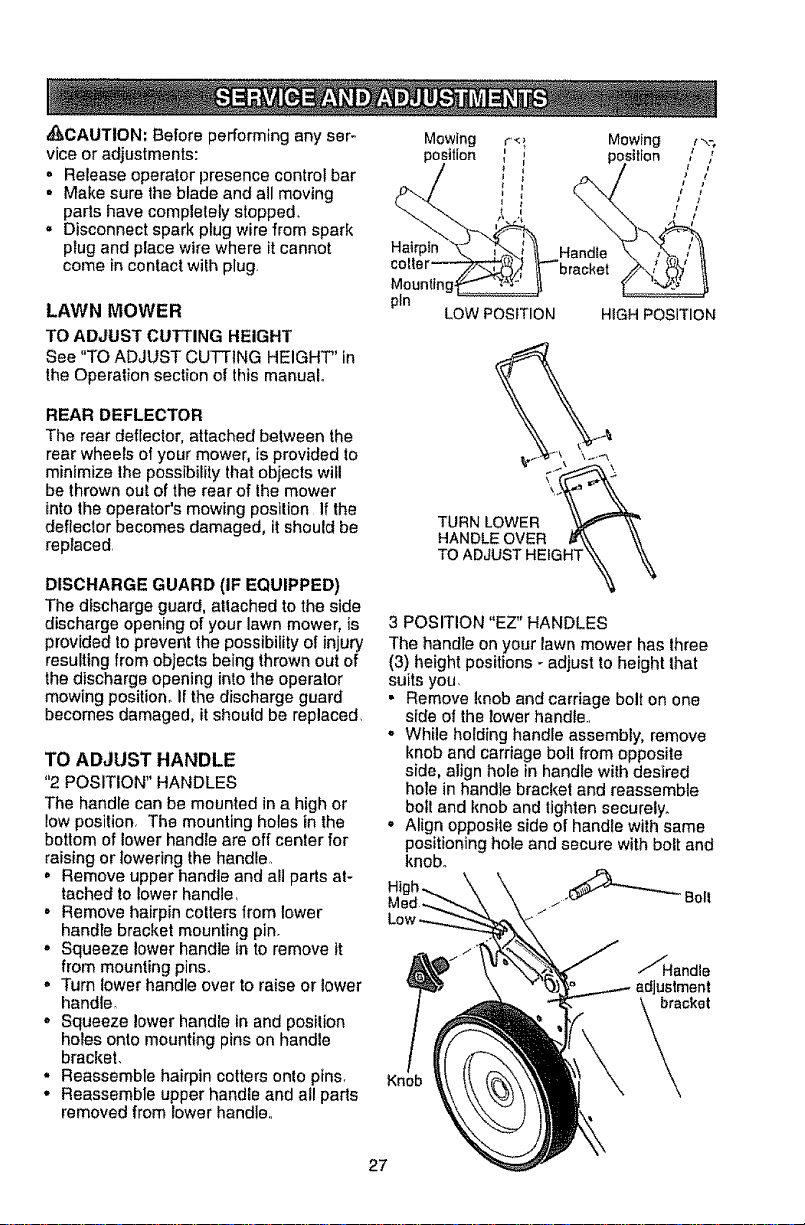
TO ADJUST HANDLE
"2 POSITION" HANDLES
The handle can be mounted in a high or
low position, The mounting holes in the
bottom of lower handle are off center for
raising or towering the handle,
) Remove upper handle and a)l parts at-
tached to lower handle,
• Remove hairpin cotters from lower
handle bracket mounting pin.
° Squeeze lower handle in to remove it
from mounting pins_
- Turn lower handle over toraise or lower
handle_
o Squeeze lower handle in and posilion
holes onto mounting pins on handle
bracket.
- Reassemble hairpin cotters onto pins,
° Reassemble upper handle and all parts
removed from lower handle,,
TURN LOWER
HANDLE OVER
TO ADJUST HEIGHT
3 POSITION "EZ" HANDLES
The handte on your lawn mower has three
(3) height positions +adjust to height that
suits you.
• Remove knob and carriage bolt on one
side of the lowerhandle.,
• While holding handle assembly, remove
knob and carriage boil from opposite
side, align hole in handle with desired
hole in handle bracket and reassemble
bolt and knob and tightensecurely.
" Align opposite side of handle with same
positioning hole and secure with bolt and
knob+
Hi -_ Boll
f
Knob
J/Handte
ustment
_\\iii cket
27
Loading ...
Loading ...
Loading ...