Loading ...
Loading ...
Loading ...
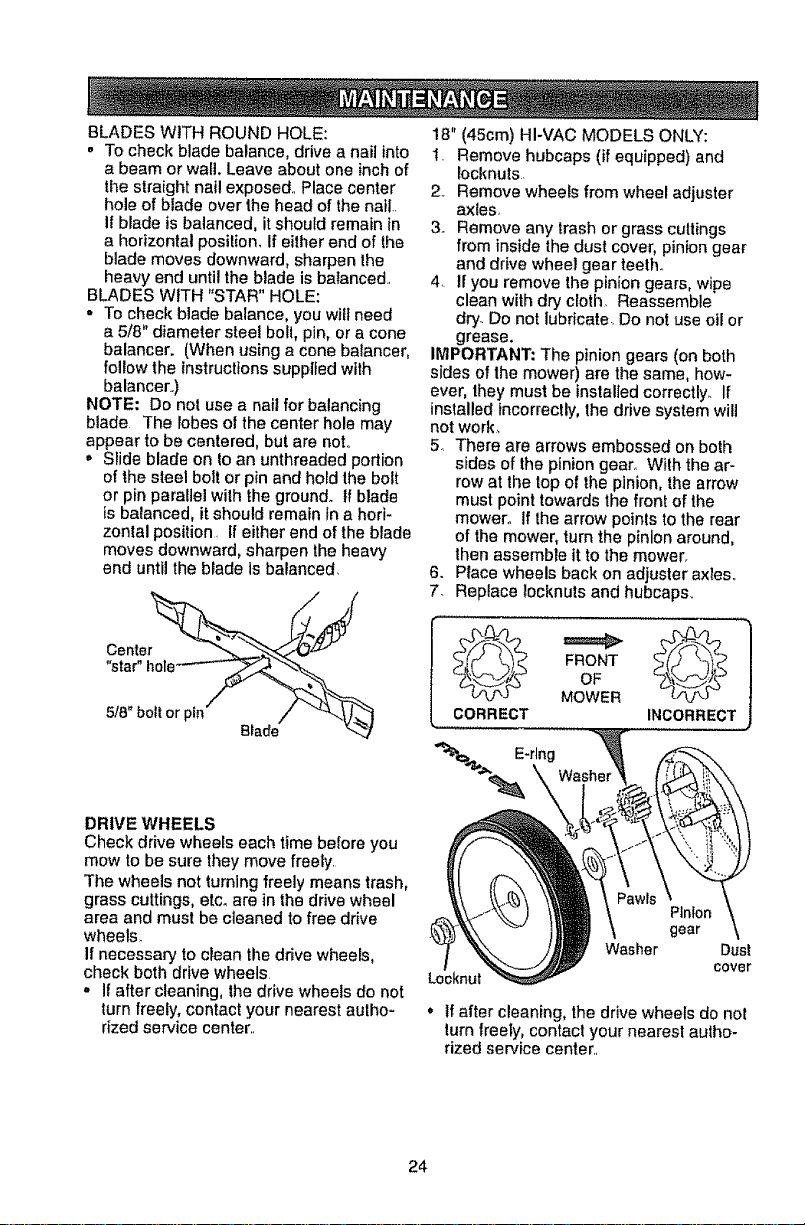
BLADESWITH ROUND HOLE:
" To check blade balance, drive a nail into
a beam or wall. Leave about one inch of
tl_estraight nail exposed.. Place center
hole of blade over the head of the nail..
II blade is balanced, it should remain in
a horizontal position, If either end of the
blade moves downward, sharpen the
heavy end until the blade is balanced..
BLADES WITH "STAR" HOLE:
. To check blade balance, you will need
a 5/8" diameter steel boll, pin, or a cone
balancer. (When using a cone balancer,
follow the instructions supplied with
balancer..)
NOTE: Do not use a nail for balancing
blade The lobes ol the center hole may
appear to be centered, but are noL
o Slide blade on to an unthreaded portion
of the steel bolt or pin and hold the bolt
or pin parallel wilh the ground. If blade
is balanced, it should remain in a hori-
zontal position. If either end of the blade
moves downward, sharpen the heavy
end until the blade Is balanced
DRIVE WHEELS
Check drive wheels each time before you
mow to be sure they move freely.
The wheels not turning freely means trash,
grass cuttings, etc. are in the drive wheel
area and must be cleaned to free drive
wheels.
If necessary to clean the drive wheels,
check both drive wheels
. Ifafter cleaning, the drive wheels do not
turn freely, contact your nearest autho-
rized service center,.
18" (45cm) HI-VAC MODELS ONLY:
I. Remove hubcaps (if equipped) and
locknuts=
2. Remove wheels from wheel adjuster
axles,
3o Remove any trash or grass cuttings
from inside the dust cover, pinion gear
and drive wheel gear teeth..
4. If you remove the pinion gears, wipe
clean with dry cloth Reassemble
dry. Do not lubricate. Do not use oil or
grease.
IMPORTANT: The pinion gears (on both
sides of the mower) are the same, how-
ever, they must be installed correctly_ If
installed incorrectly, the drive system will
not work_
5o There are arrows embossed on both
sides of the pinion gear_ Wilh the ar-
row at the top of the pinion, the arrow
must point towards the front of the
mower., If the arrow points to the rear
of the mower, turn the pinion around,
then assemble it to the mower.
6. Place wheels back on adjuster axles,.
7. Replace locknuts and hubcaps.
FRONT
OF
MOWER
CORRECT INCORRECT
Plnton
gear
Locknut
Washer Dust
Cover
• If after cleaning, the drive wheels do not
turn freely, contact your nearest autho-
rized service center..
24
Loading ...
Loading ...
Loading ...