Loading ...
Loading ...
Loading ...
46
Shooting Functions
3
You can select an autofocus mode when shooting with Live View.
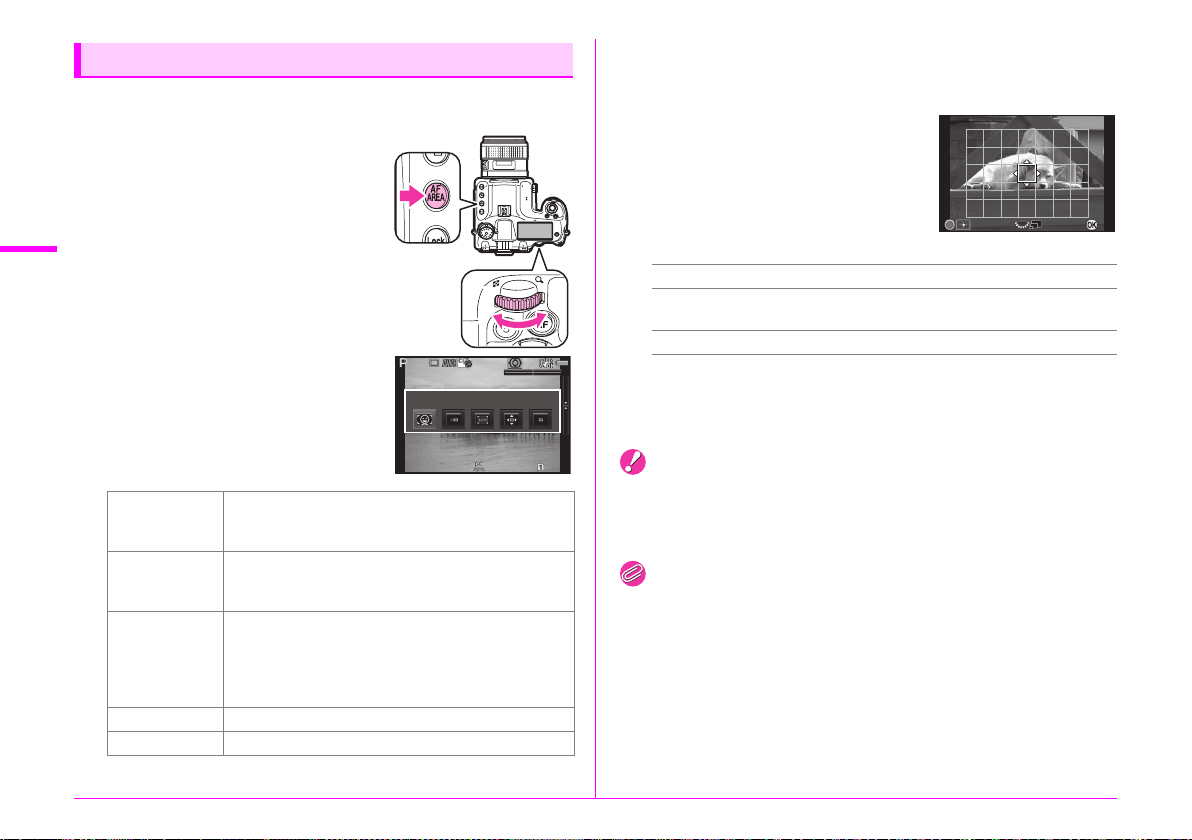
1 Turn R while pressing 6.
The screen for selecting an autofocus
mode appears.
Proceed to Step 2 if g or h is selected.
2 Press c.
The screen to set the AF area is displayed.
3 Select the AF area.
Use the frame that appears on the
monitor to change the position and size
of the AF area.
Available operations
4 Press E.
The AF area is set.
Caution
• When f is selected, the focus lock operation (composition
adjustment with the half press of the shutter release button)
does not work.
Memo
• You can also select an autofocus mode for Live View in [Contrast
AF] of [Live View] in the A3 menu or [Contrast AF] in the control
panel. (
w p.R18)
• When [Focus Peaking] of [Live View] in the A3 menu or [Focus
Peaking] in the control panel is set to on, the outline of the subject
in focus is emphasized and makes it easier to check the focus.
(
w p.R18)
Setting the AF Mode during Live View
e
Face
Detection
Detects and tracks faces of people. (Default setting)
The main face detection frame for AF and AE is
displayed in yellow.
f
Tracking
Tracks the subject in focus.
The shutter can be released even if the subject is not
in focus.
g
Multiple
AF Points
Sets the focusing area to the desired area.
The sensor is divided into 35 areas (7 horizontal
by 5 vertical), and you can select a wider or narrower
focusing area by using 1, 9, 15, or 21 of those
35 available areas.
h
Select Sets the focusing area by the number of pixels.
i
Spot Sets the focusing area to a limited area at the center.
Face Detection
Face Detection
1/
2000
1/
2000
F2.8
F2.8
1600
1600
1234
1234
ABCD
Changes the position of the AF area.
R
Increases/reduces the size of the AF area
(when g is selected).
M
Returns the AF area to the center.
OK
OK
Loading ...
Loading ...
Loading ...