Loading ...
Loading ...
Loading ...
To Reinstall the Oven Door:
1. Position the door at a sharp angle (see Figure 8) and
insert the hinges centered evenly into the hinge slots.
The hinges will securely hook into the slots when
properly installed. Do not force, bend, or twist the door.
• Tip: Rest the door on your foot while using your leg
for stability.
2. Open the door fully and use a screwdriver to push the
hinge clips all the way into the hinge slots (toward the
oven) until they meet the hinge. Be careful not to
scratch the range during this process.
FIGURE 8: APPROXIMATE DOOR ANGLE FOR REMOVAL
To Check Door Fit and Operation:
1. Open and close the door slowly to test the movement
and the fit of the door to the oven cavity. Do not force
the door to open or close. If the door is properly
installed, it should move smoothly and rest straight on
the front of the range when closed.
2. If the door does not operate correctly, verify that the
hinges are properly seated into the hinge slots, and
that the hinge clips are fully engaged into the slots.
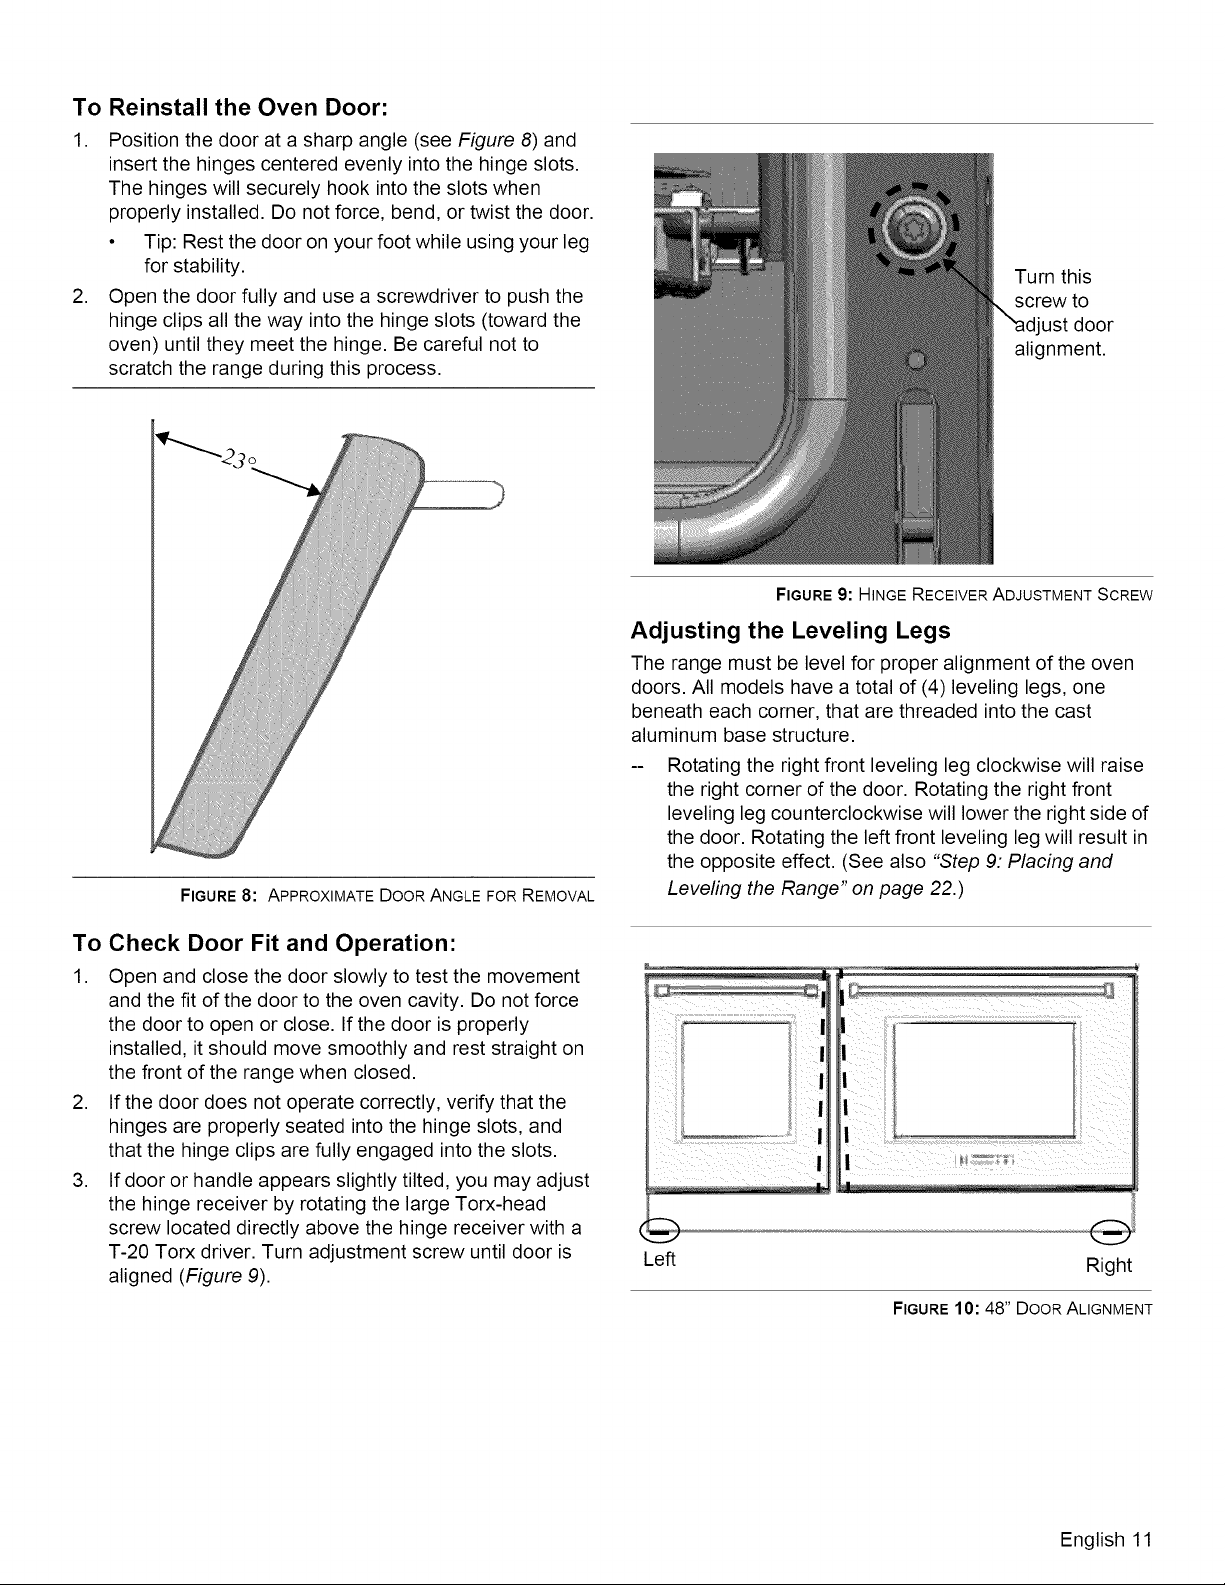
3. If door or handle appears slightly tilted, you may adjust
the hinge receiver by rotating the large Torx-head
screw located directly above the hinge receiver with a
T-20 Torx driver. Turn adjustment screw until door is
aligned (Figure 9).
Turn this
screw to
ust door
alignment.
FIGURE 9: HINGE RECEIVER ADJUSTMENT SCREW
Adjusting the Leveling Legs
The range must be level for proper alignment of the oven
doors. All models have a total of (4) leveling legs, one
beneath each corner, that are threaded into the cast
aluminum base structure.
Rotating the right front leveling leg clockwise will raise
the right corner of the door. Rotating the right front
leveling leg counterclockwise will lower the right side of
the door. Rotating the left front leveling leg will result in
the opposite effect. (See also "Step 9: Placing and
Leveling the Range" on page 22.)
Left Right
FIGURE10: 48" DOOR ALIGNMENT
English 11
Loading ...
Loading ...
Loading ...