Loading ...
Loading ...
Loading ...
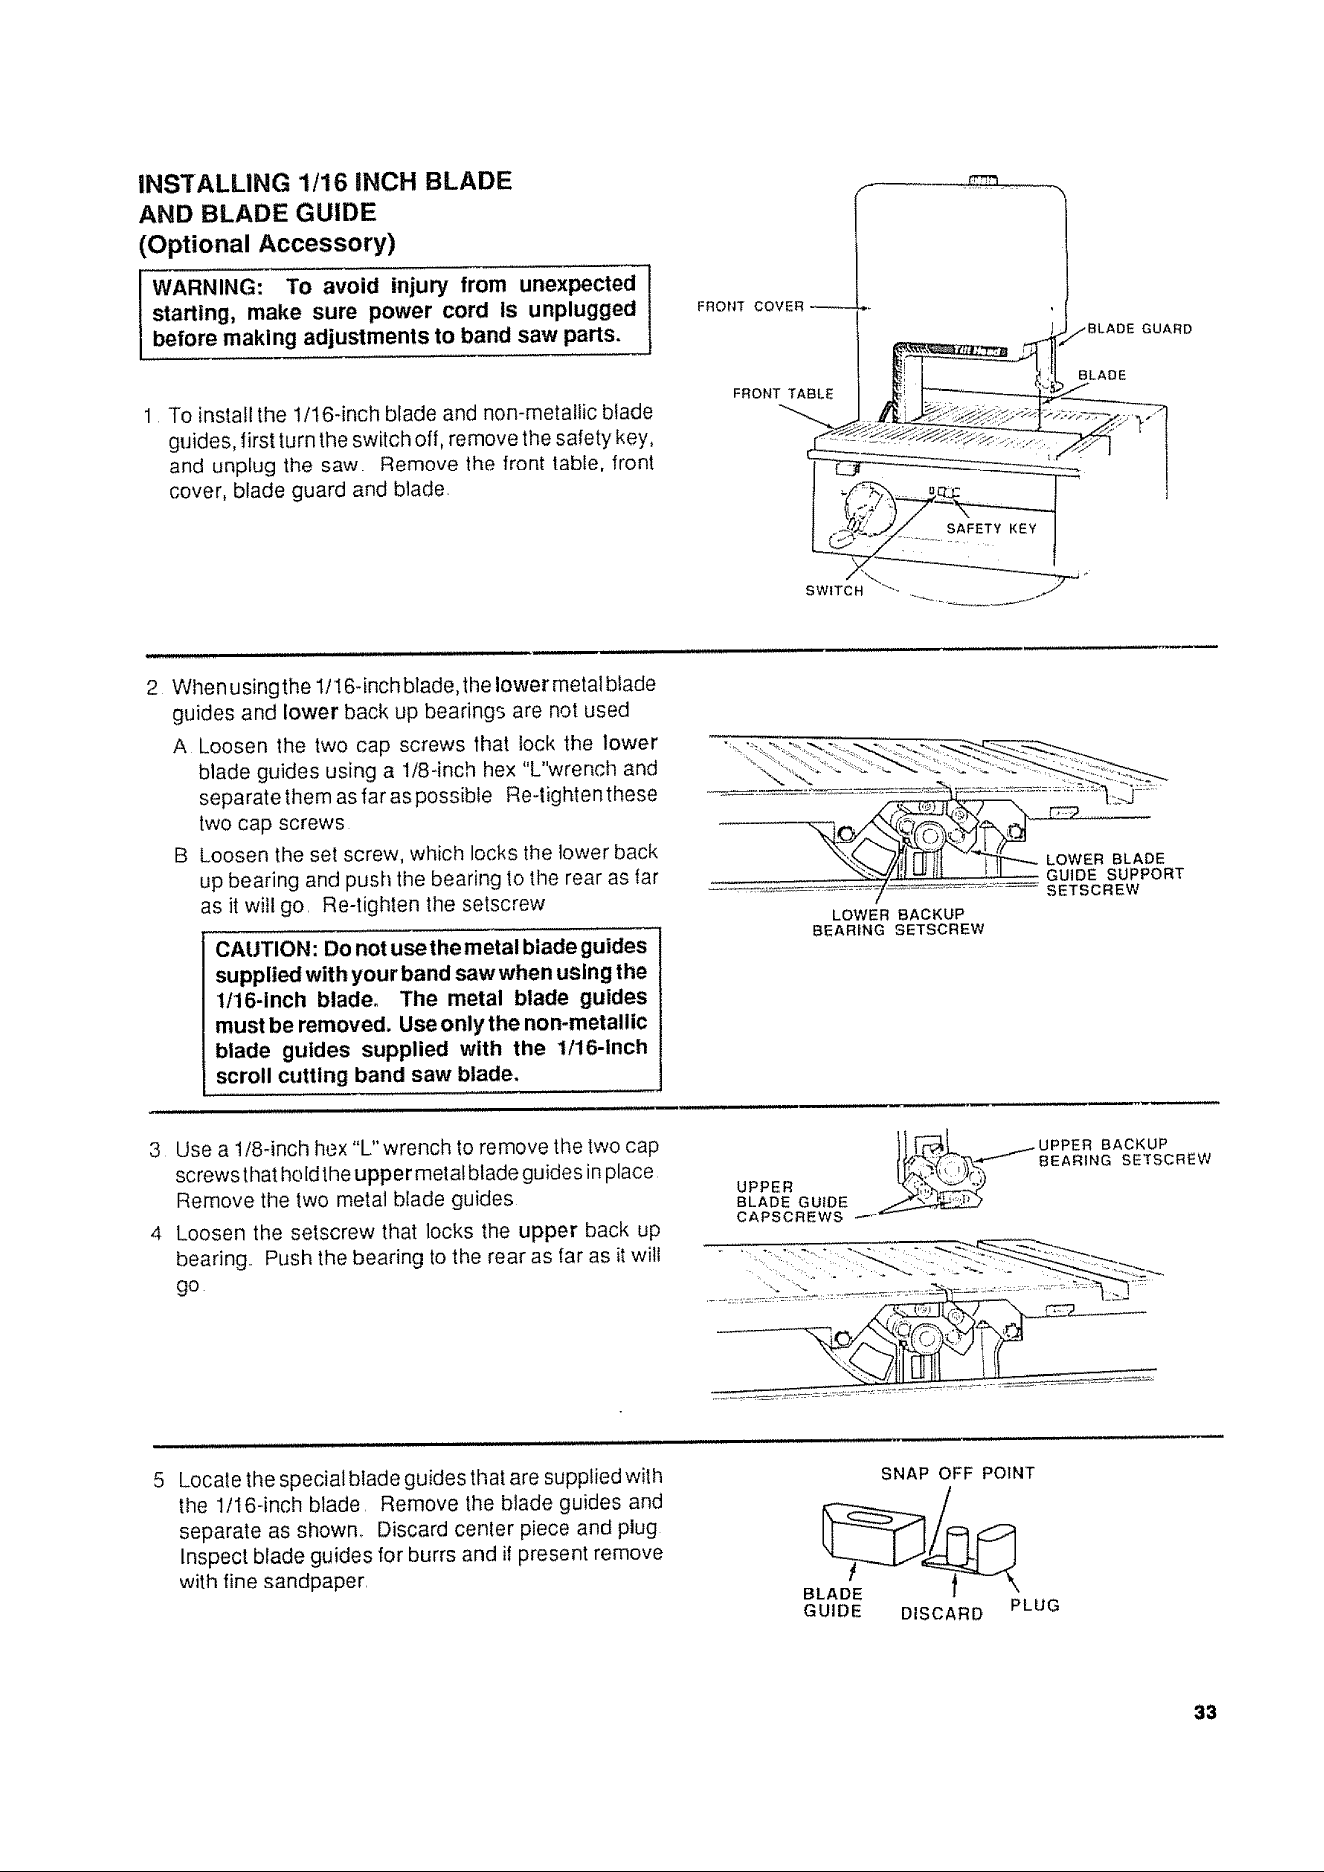
iNSTALLING 1/16 INCH BLADE
AND BLADE GUIDE
(Optional Accessory)
WARNING: To avoid injury from unexpected
starting, make sure power cord ts unplugged
before making adjustments to band saw parts,
1 To install the 1/16+inch blade and non-metallic blade
guides, lirst turn the switch off, remove the safety key,
and unplug the saw, Remove the front table, front
cover, blade guard and blade,
f
FRONT COVER _++
I ,"BLADE GUARD
BLADE
FRONT TABLE _i _ /
SAFETY KEY
2 When using the 1/16-inch blade, the lower metal blade
guides and lower back up bearings are not used
A Loosen the two cap screws 1hat lock the lower
blade guides using a 1/8-inch hex "L"wrench and
separate them as far as possible Re-tighten these
two cap screws
B Loosen the set screw, which locks the lower back
up bearing and push the bearing to the rear as far
as it will go, Re-tighten the setscrew
CAUTION: Do not usethe metal blade guides
supplied with your band saw when using the
1/16-inch blade_ The metal blade guides
must be removed, Use only the non-metallic
blade guides supplied with the 1/16-Inch
scroll cutting band saw blade,
LOWER BACKUP
BEARING SETSCREW
LOWER BLADE
GUIDE SUPPORT
SETSCREW
3 Use a 1!8-inch hex "L" wrench to remove the two cap
screwsthat ho[dthe upper metalblade guides in place
Remove the two metal blade guides
4 Loosen the setscrew that locks the upper back up
bearing,. Push the bearing to the rear as tar as it wilt
go
_UPPER BACKUP
_, , / BEARING SETSCREW
' i:" ;*++) r ':
UPPER
BLADE GU+DE
CAPSCREWS I
..................... >
5
Locate the special blade guides that are supplied with
lhe 1!16-inch blade, Remove the blade guides and
separate as shown., Discard center piece and plug
Inspect blade guides for burrs and if present remove
with fine sandpaper,
SNAP OFF POINT
BLADE
GUIDE DISCARD PLUG
33
Loading ...
Loading ...
Loading ...