Loading ...
Loading ...
Loading ...
BOTH MODELS
ALIGNING THE BLADE AND BLADE
G UIDE ASSEMBLIES
This band saw comes equipped with a 1!4-inch blade,
This band saw can be used with blades of width from
1/8qnch to 1/2-inch. The alignment steps must be
followed for proper tension, blade guide, and bearing
adjustments for each different blade.
Refer to the blade usage section for the recommended
blade size for best results during most band saw opera-
fions
NOTE: It is critical to the life of the blade that the
following steps are followed., Premature blade breakage
will result if these steps are omitted.
1 Turn the tension knob until the tension scale indicates
1/4qnch position This wilt set the correct tension for
a 1/44nch blade.
WARNING: To avoid injury from unexpected
starting or electrical shock, do not plug the saw
in. The power cord must remain unplugged
whenever you are working on the saw.
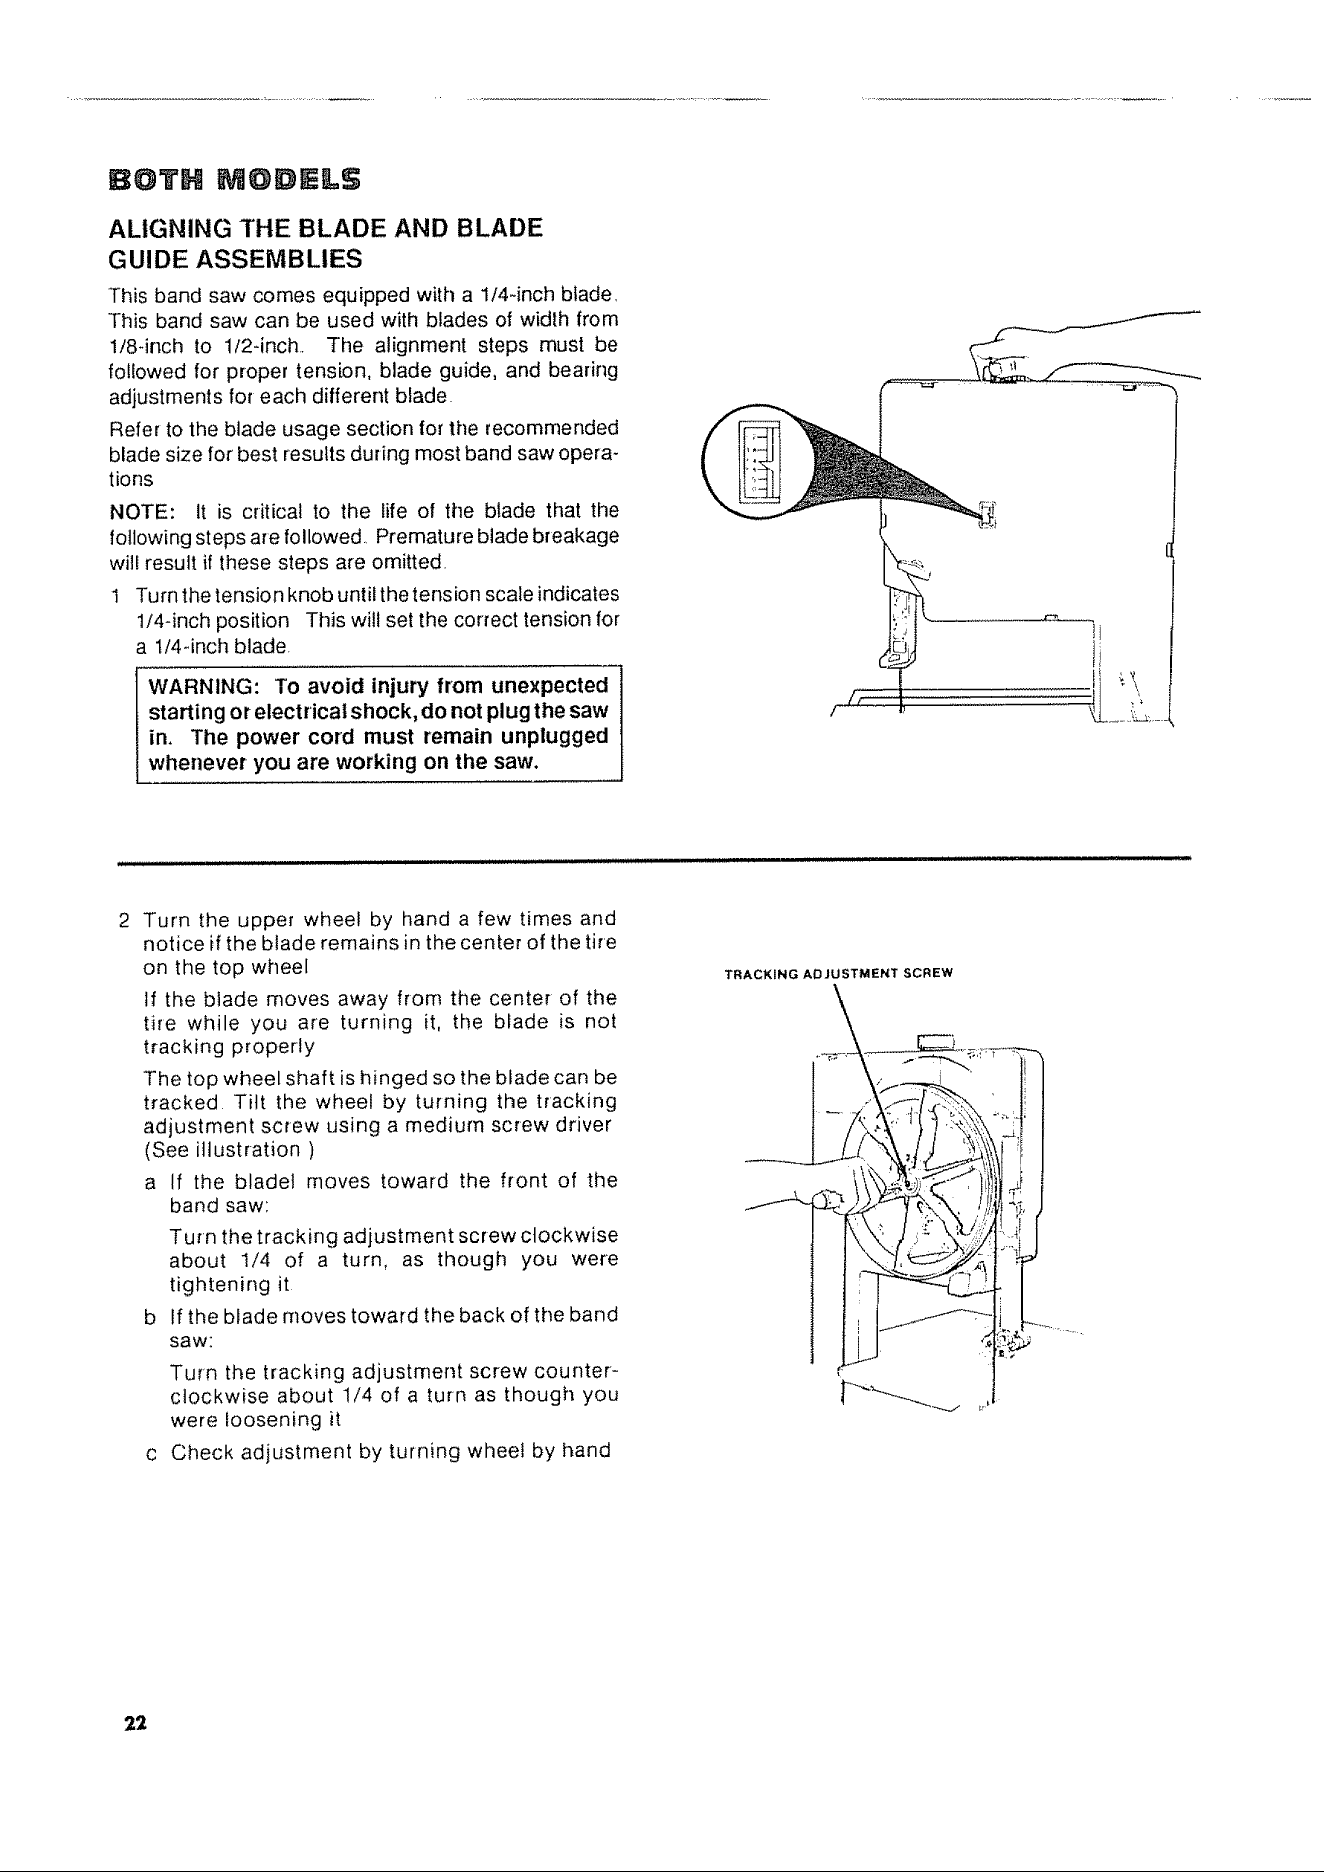
Turn the upper wheel by hand a few times and
notice if the blade remains in the center of the tire
on the top wheel
If the blade moves away from the center of the
tire while you are turning it, the blade is not
tracking properly
The top wheel shaft is hinged so the blade can be
tracked Tilt the wheel by turning the tracking
adjustment screw using a medium screw driver
(See illustration )
a If the bladel moves toward the front of the
band saw:
Turn the tracking adjustment screw clockwise
about t/4 of a turn, as though you were
tightening it
b If the blade moves toward the back of the band
saw:
Turn the tracking adjustment screw counter-
clockwise about 1/4 of a turn as though you
were loosening it
c Check adjustment by turning wheel by hand
TRACKING ADJUSTMENT SCREW
,:t.. I i
,LL .....
22
Loading ...
Loading ...
Loading ...