Loading ...
Loading ...
Loading ...
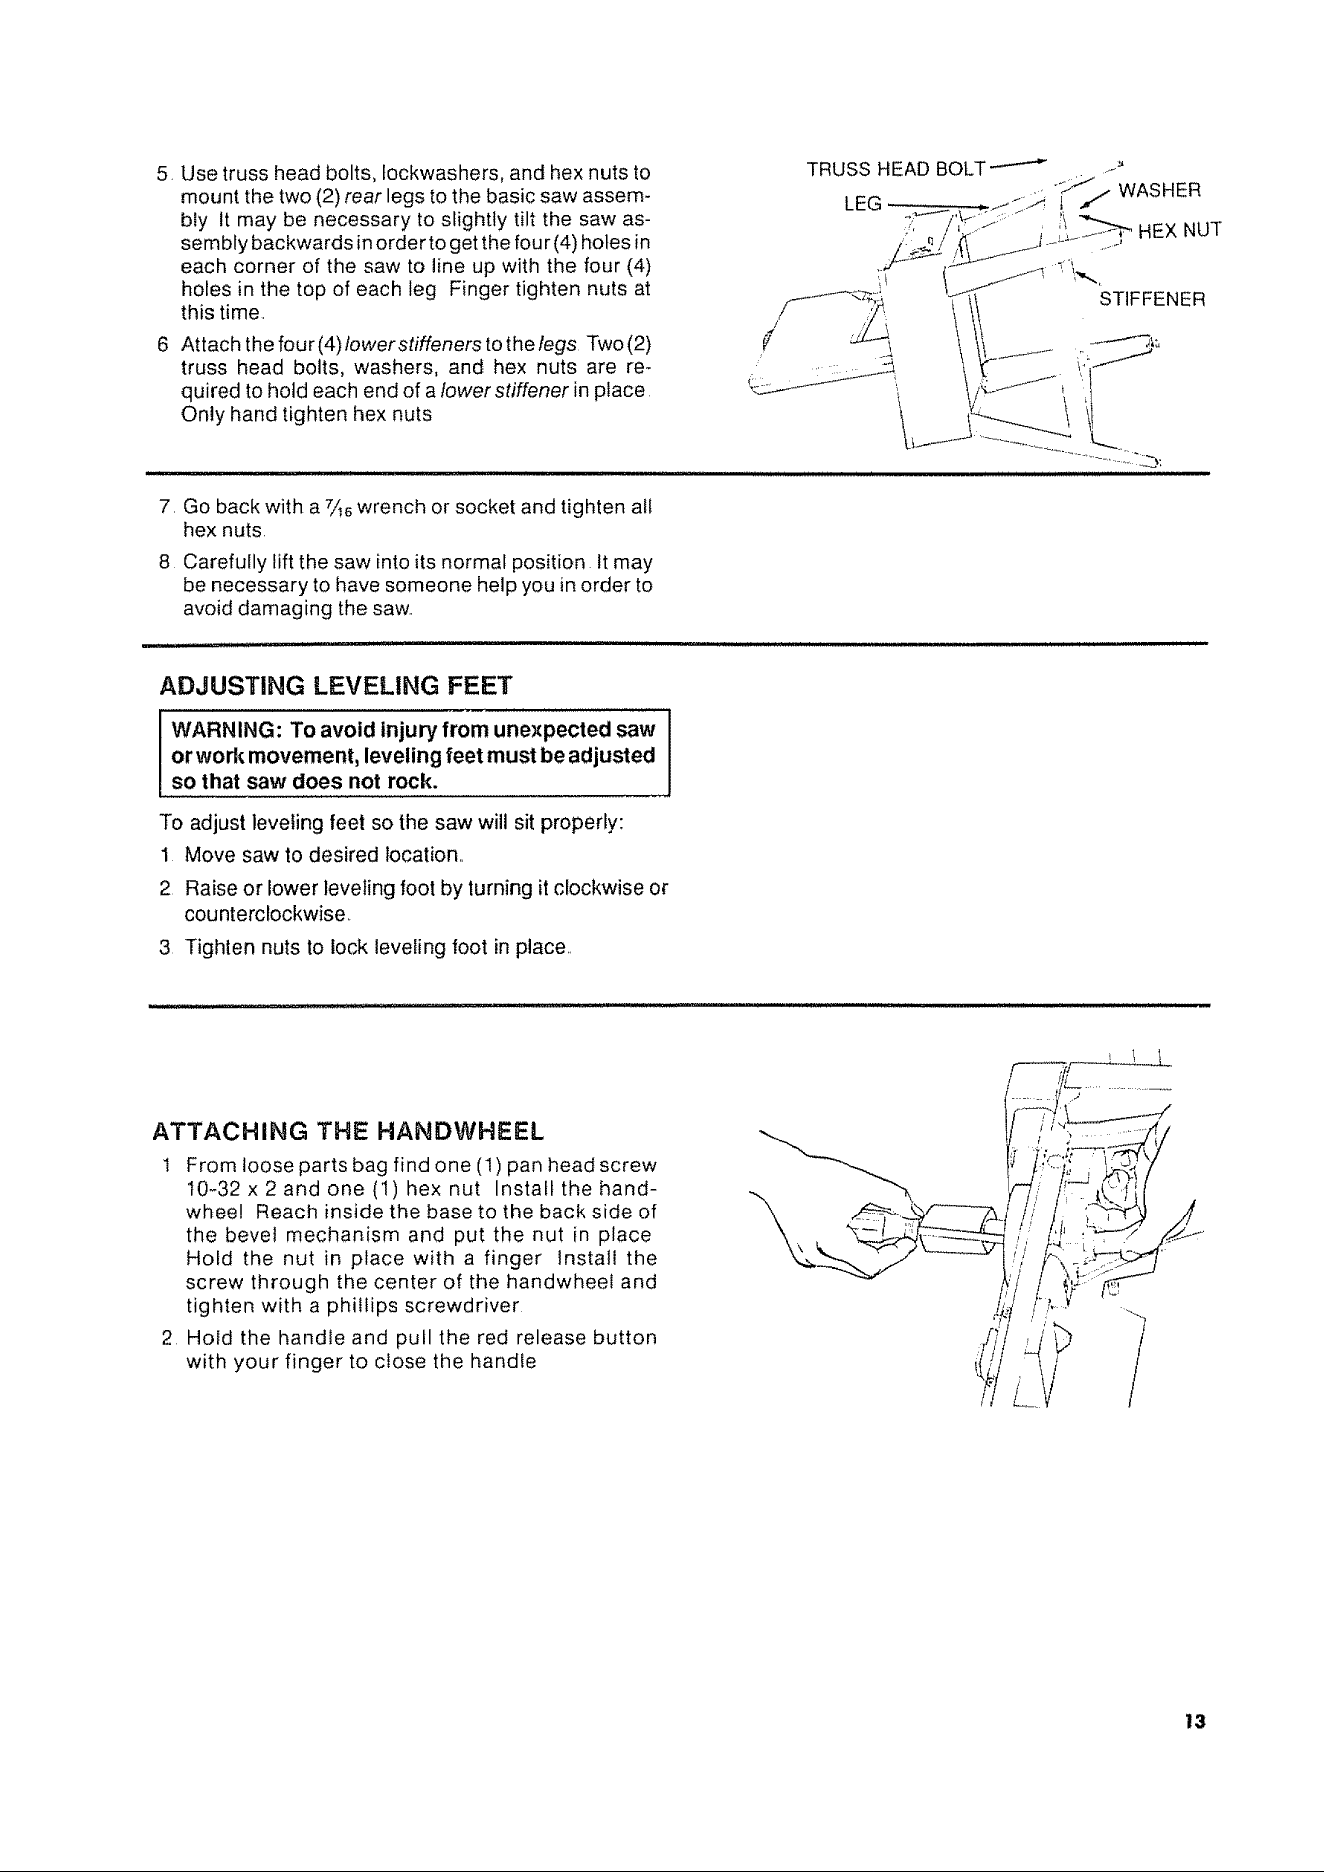
5 Usetrussheadbolts,tockwashers,andhexnutsto
mountthetwo(2)rear legs to the basic saw assem-
bly It may be necessary to slightly tilt the saw as-
sembly backwards inorder to get the four (4) holes in
each corner of the saw to line up with the four (4)
holes in the top of each leg Finger tighten nuts at
this time
6 Attach the four (4) lower stiffeners to the legs Two (2)
truss head bolts, washers, and hex nuts are re-
quired to hold each end of a lower stiffener in place
Only hand tighten hex nuts
7, Go back with a 7/_6wrench or socket and tighten aft
hex nuts.
8 Carefully lift the saw into its normal position It may
be necessary to have someone help you in order to
avoid damaging the saw,,
ADJUSTING LEVELING FEET
WARNING: To avoid injury from unexpected saw I
or work movement, leveling feet must be adjusted
I
so that saw does not rock.
To adjust leveling feet so the saw will sit properly:
I Move saw to desired location,
2 Raise or lower leveling foot by turning it clockwise or
counterclockwise,
3 Tighten nuts to lock leveling foot in place
ATTACHING THE HANDWHEEL
1 From loose parts bag find one (1) pan head screw
10-32 x 2 and one (1) hexnut Install the hand-
wheel Reach inside the base to the back side of
the bevel mechanism and put the nut in place
Hold the nut in place with a finger Install the
screw through the center of the handwheel and
tighten with a phillips screwdriver
2 Hold the handle and pull the red release button
with your finger to close the handle
13
Loading ...
Loading ...
Loading ...