Loading ...
Loading ...
Loading ...
BOTH MODELS
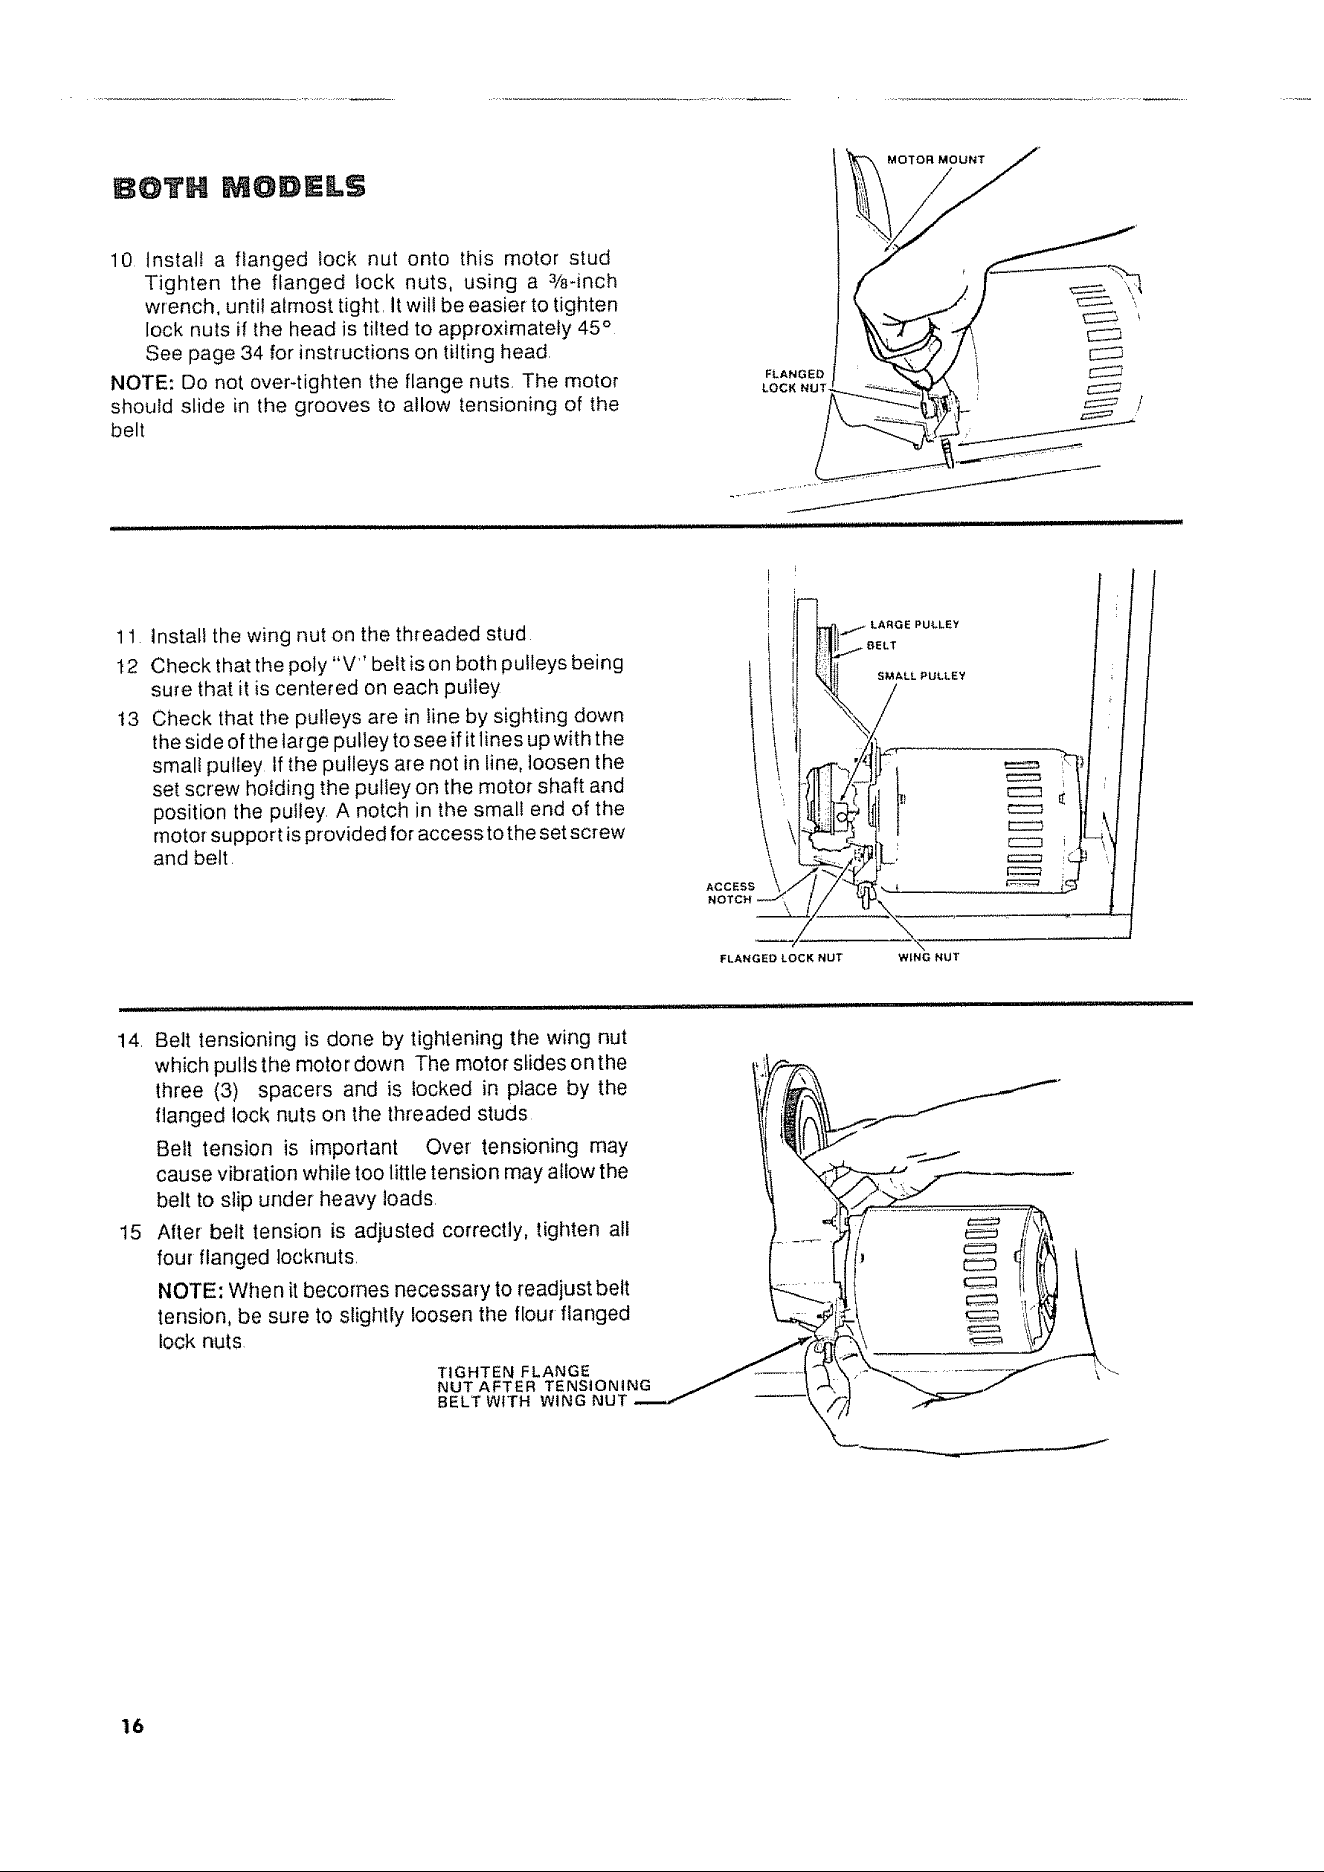
10 Install a flanged lock nut onto this motor stud
Tighten the flanged lock nuts, using a 3/8-inch
wrench, until almost tight, It will be easier to tighten
lock nuts if the head is tilted to approximately 45°
See page 34 for instructions on tilting head,
NOTE: Do not over-tighten the flange nuts The motor
should slide in the grooves to allow tensioning of the
belt
11 Install the wing nut on the threaded stud
t2 Check that the poly "V" belt ison both pulleys being
sure that it is centered on each pulley
t3 Check that the pulleys are in line by sighting down
the side ofthe large pulley to see if itlines up with the
small pulley If the pulleys are not in line, loosen the
set screw holding the pulley on the motor shaft and
position the puiley, A notch in the small end of the
motoTsupport is provided for access tothe set screw
and belt.
FLANGED
LOCK NUT
MOTOR MOUNT
ACCESS
NOTCH
FLANGED LOCK NUT WING NUT
14, Belt tensioning is done by tightening the wing nut
which pulls the motor down The motor slides on the
three (3) spacers and is locked in place by the
flanged lock nuts on the threaded studs
Belt tension is important Over tensioning may
cause vibration while too little tension may allow the
belt to slip under heavy loads,
15 Alter belt tension is adjusted correctly, tighten all
four flanged locknuts
NOTE: When it becomes necessary to readjust belt
tension, be sure to slightly loosen the flour flanged
lock nuts
TIGHTEN FLANGE
NUT AFTER TENSIONING
BELTWITH WtNGNUT
16
Loading ...
Loading ...
Loading ...