Loading ...
Loading ...
Loading ...
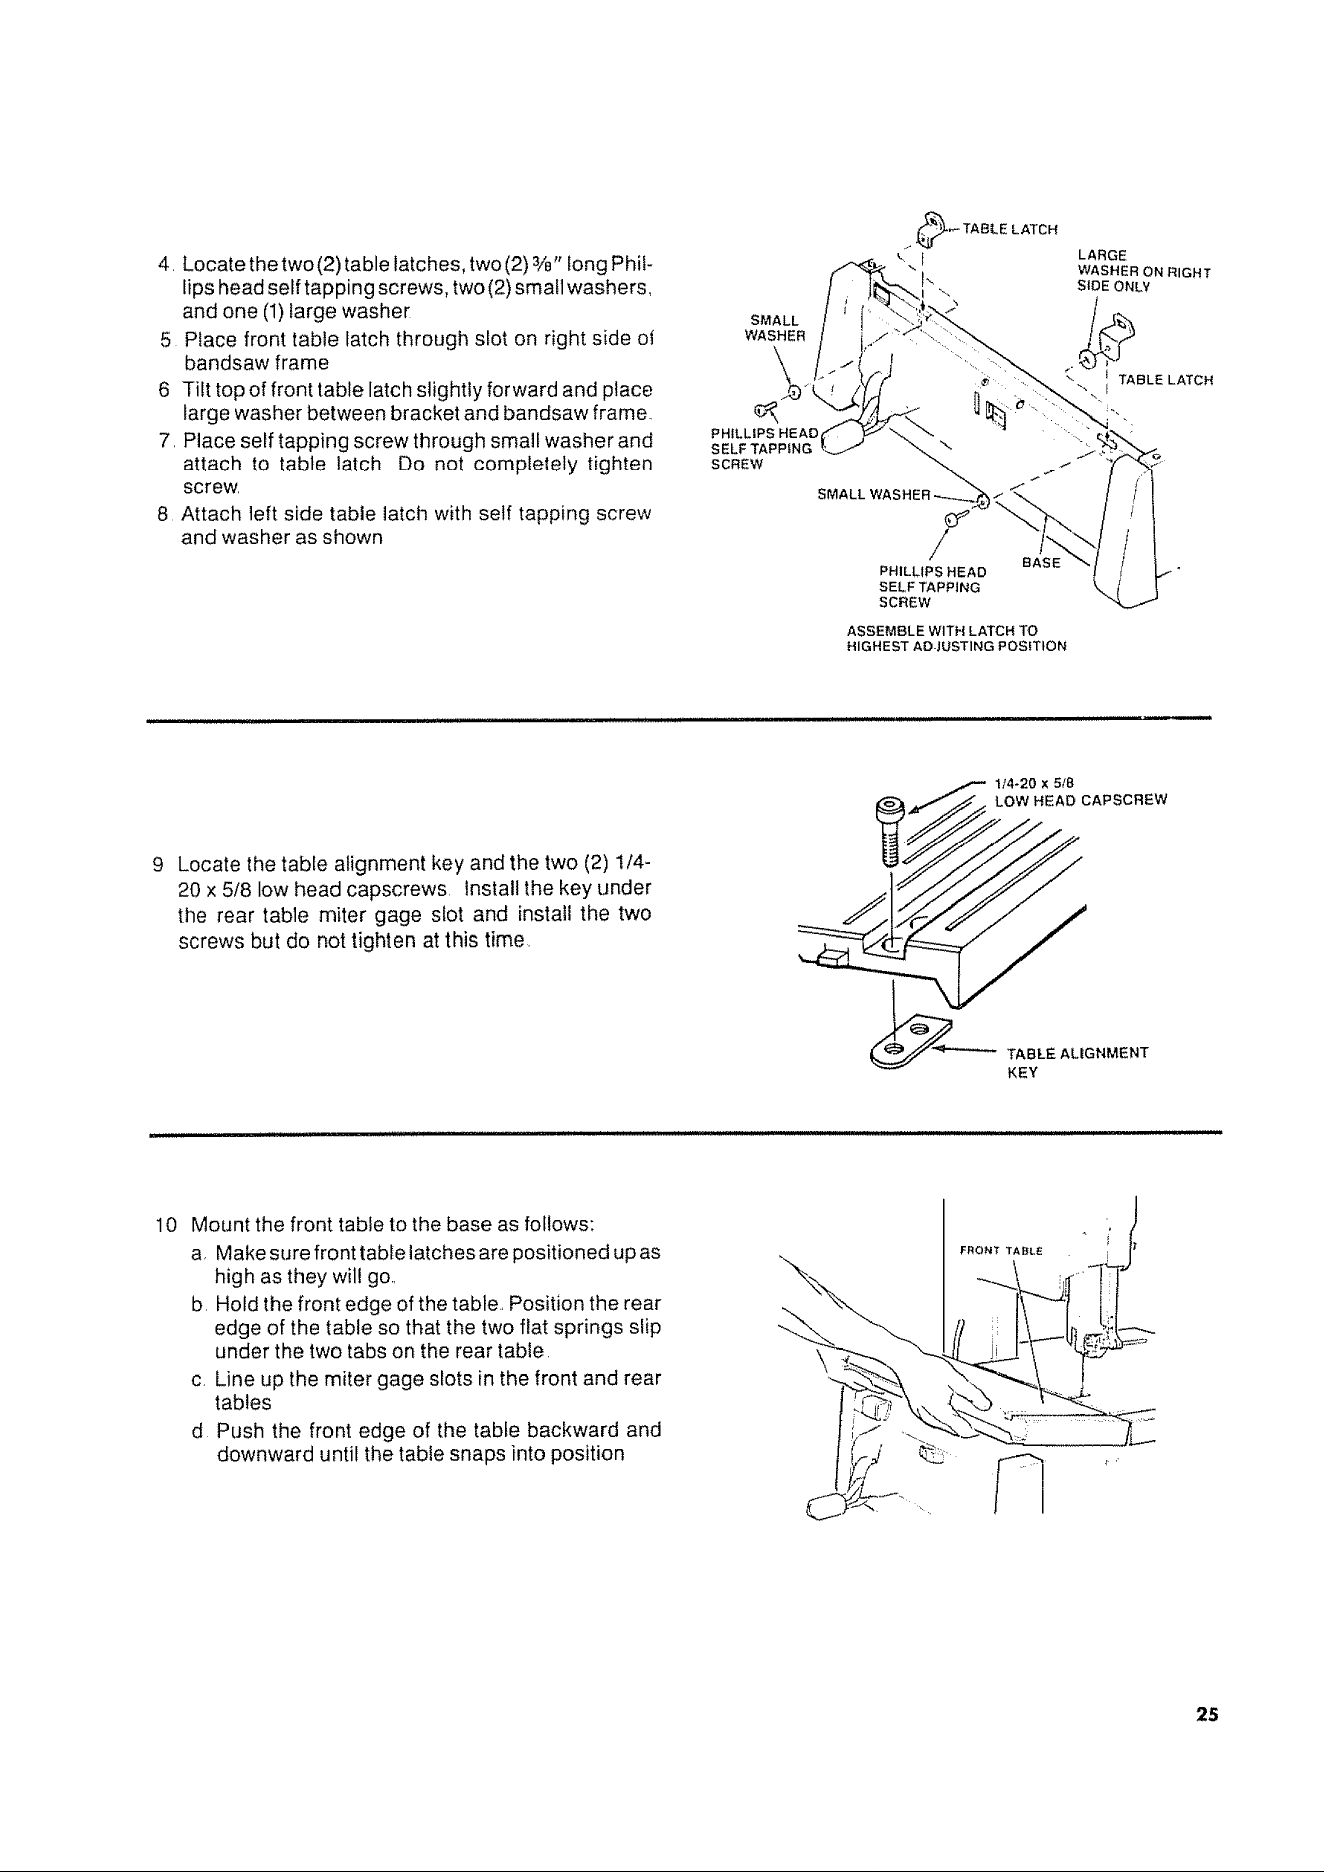
4, Locate the two (2) table latches, two (2) 3ie"long Phil-
lips head self tapping screws, two(2) smail washers,
and one (1)iarge washer
5 Piace front table latch through slot on right side ot
bandsaw frame
6 Tilt top of front table latch slightly forward and place
large washer between bracket and bandsaw frame,
7, Place self tapping screw through small washer and
attach to table latch Do not completely tighten
screw,
8 Attach left side table latch with self tapping screw
and washer as shown
SMALL
WASHER
PHtLLtPS HEAD
SELF TAPPING
SCREW
SMALL
_ TABLE LATCH
BASE
PHILLIPSHEAD
SELFTAPPING
SCREW
ASSEMBLE WITH LATCH TO
HIGHEST AOJUSTING POSITION
LARGE
WASHER ON RIGHT
SlOE ONLY
t TABLE LATCH
I
9
Locate the table alignment key and the two (2) 1/4-
20 x 5/8 low head capscrews Install the key under
the rear table miter gage slot and install the two
screws but do not tighten at this time.
KEY
10 Mount the front table to the base as follows:
a, Make sure front table latches are positioned up as
high as they wil! go.,
b, Hold the front edge ofthe table., Position the rear
edge of the table so that the two flat springs slip
under the two tabs on the rear table.
c, Line up the miter gage slots in the front and rear
tables
d Push the front edge of the table backward and
downward until the tabte snaps into position
\
25
Loading ...
Loading ...
Loading ...