Loading ...
Loading ...
Loading ...
En
31
Changing the settings
! Use a size 1 screwdriver to remove the screws. The use of screw-
drivers other than size 1 screwdrivers may result in damage to the
screws.
4 Remove the aluminum panel.
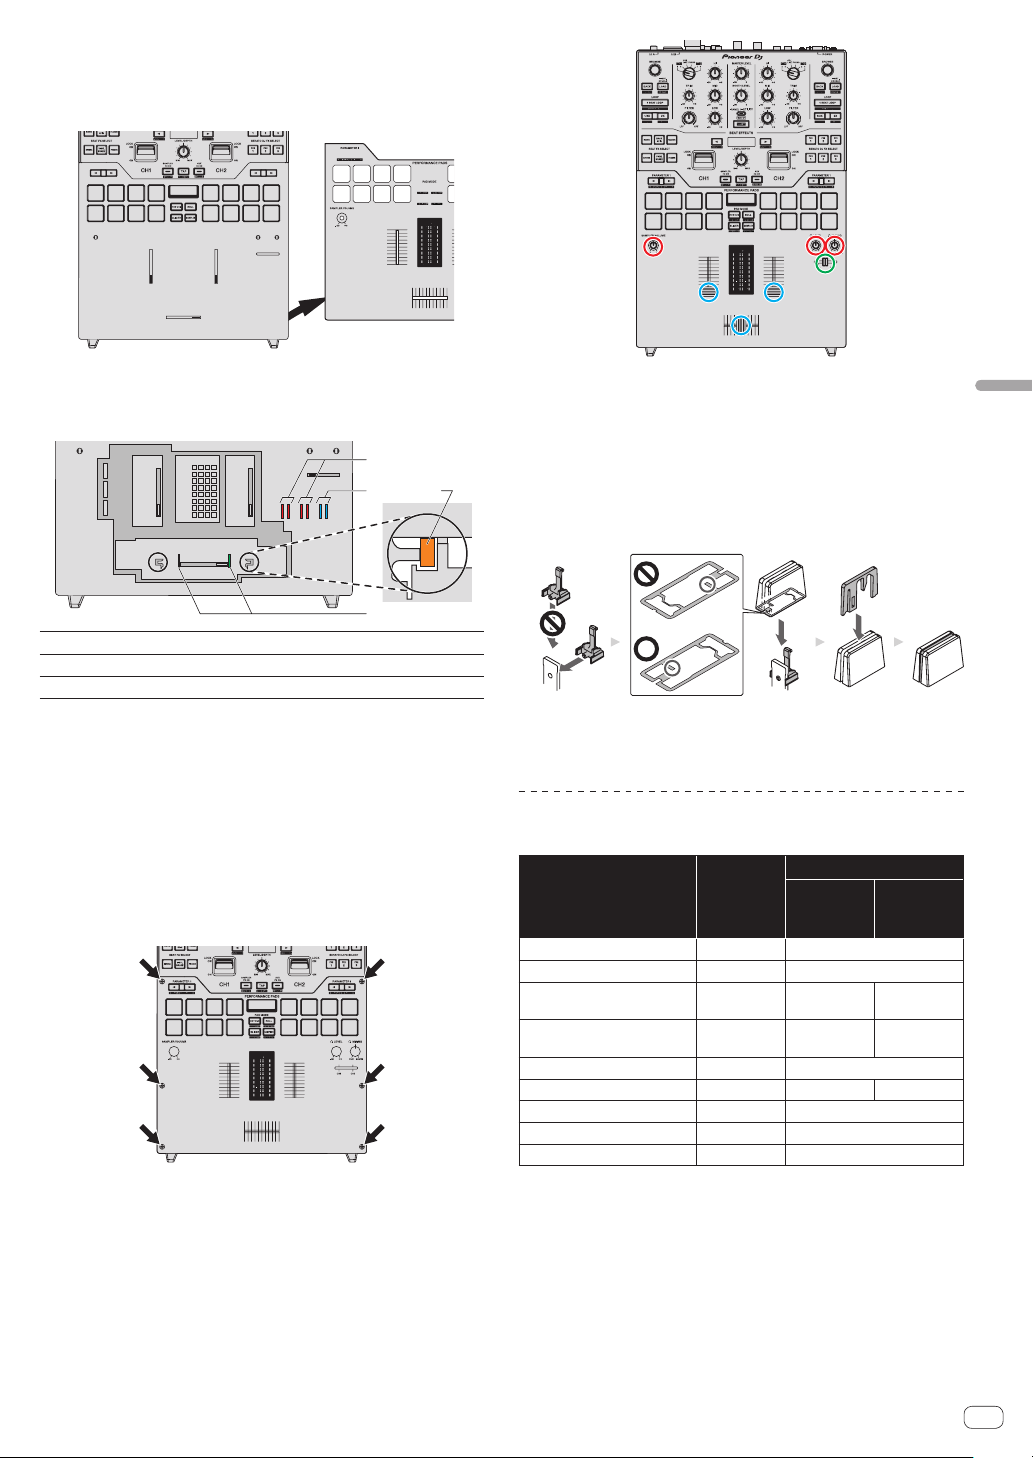
5 Replace the bumper.
Replace the pre-installed fader bumper C (3 in the diagram below) with
the bumper of the desired hardness.
1
2
3
1
1
Fader bumper A (hardness: hard)
2
Fader bumper B (hardness: soft)
3
Fader bumper C (hardness: rather hard)
! Use tweezers if it is hard to remove the bumper.
! Take care not to drop the bumper inside the unit.
! Do not turn or pull the bumper with excessive force. It may result in
damage to the bumper.
! After the bumper is replaced, adjust the ranges that do not output
sound on both edges of the crossfader by referring to Changing the
settings (p. 34 ).
! The fader unit can be fixed by inserting the fader bumper A vertically
into the grooves (1 in the diagram above) on both edges of the fader
unit. Insert the bumper as necessary.
6 Attach the aluminum panel, and tighten the screws.
Tighten the six screws that removed in the previous step.
! Check if there is no parts or dust fell inside the unit before tightening
the screws.
! Do not tighten the screws too much. It may result in damage to the
screws.
! Be careful not to strip the screw thread when tightening a screw.
! Never install the screws at an angle. It may result in damage to the
parts.
7 Attach the controls.
Attach the seven controls that removed in the previous step.
! The rotary controls and fader control (small) can be attached by
insertion. Attach the controls by pushing them in straight.
! Attach the fader control (small) by inserting the axis through the
center hole on the control.
! Check the orientation of the axises (D cut plane) and attach the
rotary controls by aligning the orientation of the controls parallel to
it.
! Do not attach the controls at an angle or insert them with excessive
force. It may result in damage to the parts.
! Refer to the diagram below for assembling the fader control (large).
1234
1 Insert the base part from the side.
2 Insert the control part in the correct orientation.
3 Insert the indicating line part in the correct orientation.
Purchase of parts
! You can purchase parts in case that parts are lost or damaged.
Part name
Number of
items
Part number
DJM-S9
(Black
Model)
DJM-S9-N
(Gold
Model)
Rotary control 1 DAA1346
Fader control (small) 1 DAC3088
Fader control (large) (indicating
line part)
1 DAC2685 DAC3164
Fader control (large) (control
part)
1 DAC3233 DAC3100
Fader control (large) (base part) 1 DNK6440
Screw 1 DBA1446 DBA1447
Fader bumper A 1 GNK1010
Fader bumper B 1 DEC3596
Fader bumper C 1 DEC3605
Loading ...
Loading ...
Loading ...