Loading ...
Loading ...
Loading ...
18
www.hasselblad.comH6X
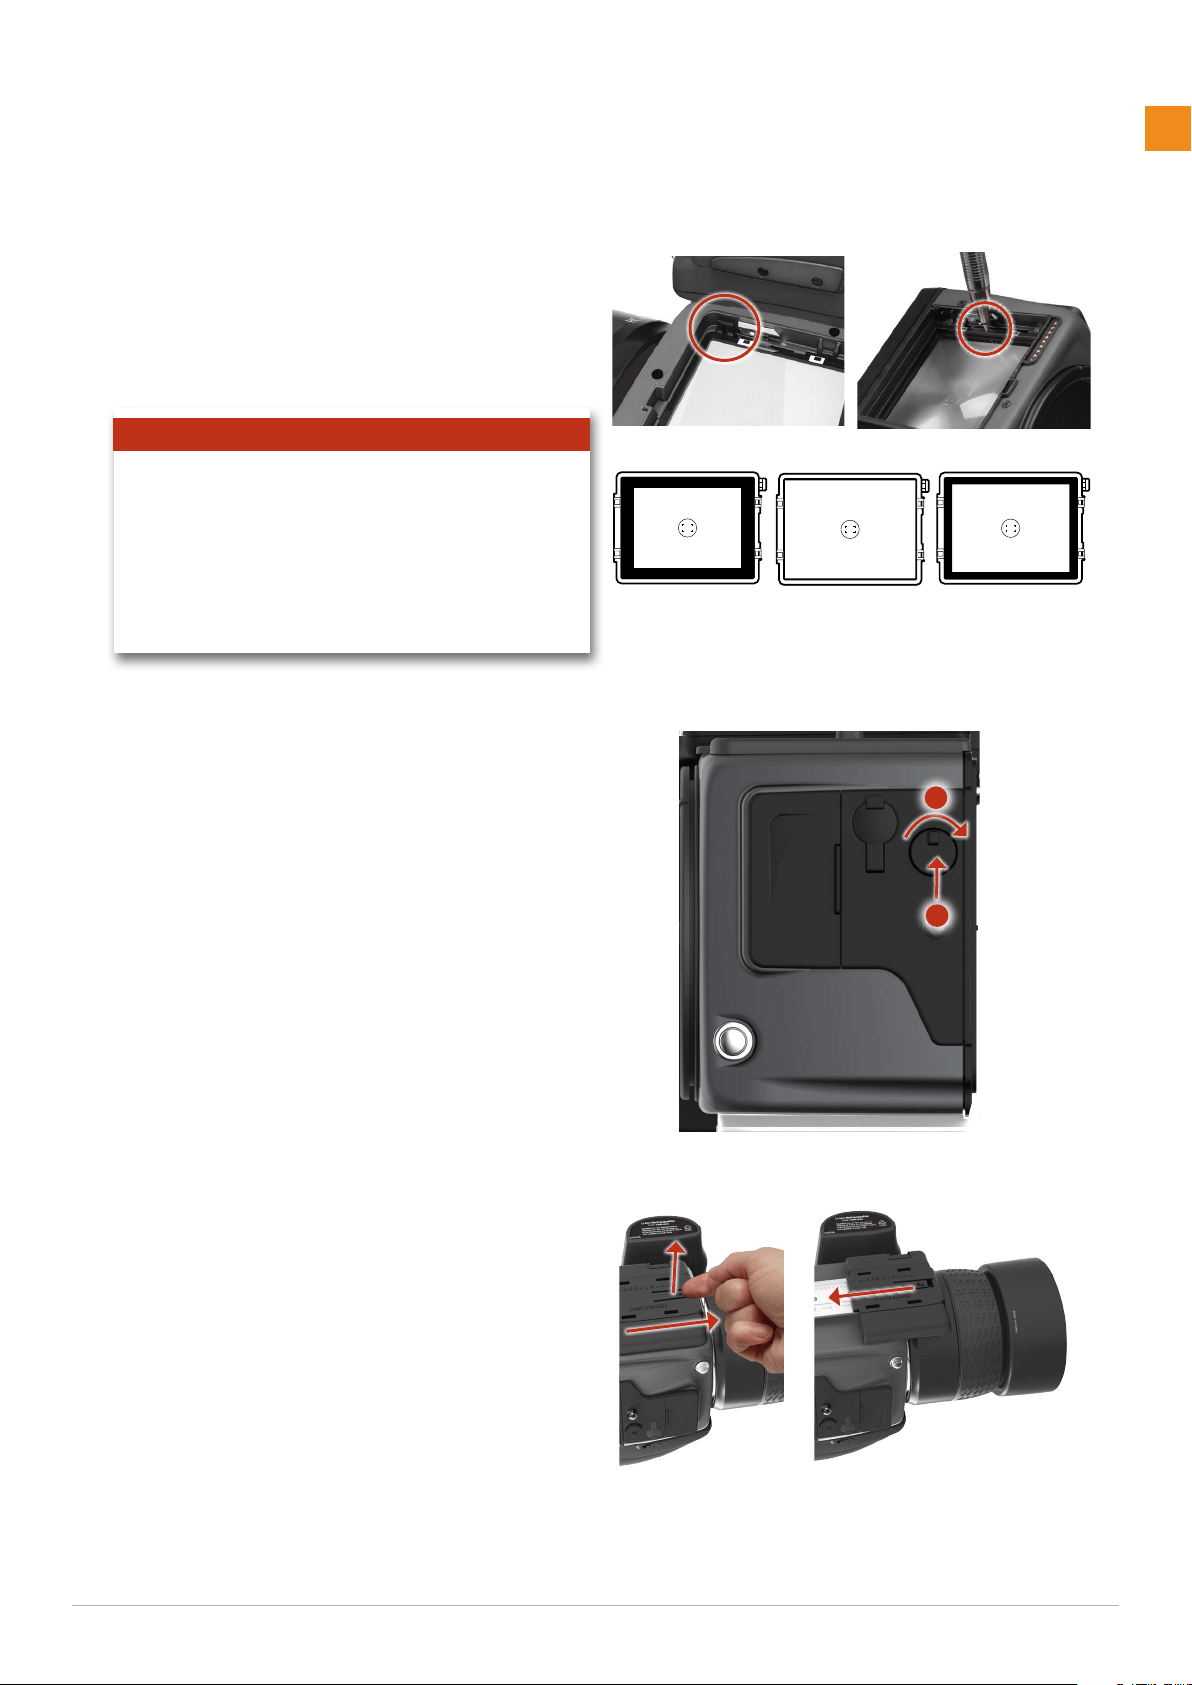
VIEWFINDER SCREEN
The H6X is fitted with a Spherical Acute-Matte D viewfinder
screen for extreme brightness, clarity and even illumina-
tion. An optional accessory screen with a grid pattern is also
available.
To change a viewfinder screen, remove the viewfinder to ac-
cess the viewfinder screen. To remove the screen, place the
tip of a ballpoint pen or similar in the viewfinder screen re-
moval lug and pull upwards. To replace the screen, position
the right side of the screen in place so that it sits correctly
in the recess. Place the tip of a ballpoint pen or similar in
Viewfinder screens showing the difference in masking and composition
frame marking. Type varies according to sensor size. See under Accesso-
ries for other types (with grid pattern, for example).
Note
Do not attempt to clean the screen by immersing it in wa-
ter, or use any kind of cleaning fluid. If the screen becomes
damp, do not use hot air to dry it. Use a soft cloth on the up-
per surface only. Seek advice from an Authorized Hasselblad
Service Center if the screen becomes particularly soiled. Re-
member that particles or greasy marks on the screen might
impair the viewfinder image but have no effect whatsoever
on the recorded image
the viewfinder screen replacement indentation and press
downwards until the screen snaps into position. Try to avoid
touching either surface of the screen with bare fingers.
PROTECTIVE BASEPLATE
To remove the protective base plate, lift the securing catch
while pushing the plate towards the lens. To attach it again,
slip it over the camera foot until it stops and the securing
catch snaps into place.
REMOVING AND ATTACHING A
SENSOR UNIT
Attachment
1. Remove a FireWire cable if connected.
2. Position the retention groove on the sensor unit onto the
retention bar on the camera body ensuring that they
are correctly positioned. Swing the sensor unt towards
the camera body and firmly press into place with a click.
If there is resistance, the magazine retaining catch on
the camera has probably been inadvertently released.
In that case, push the release button again to reset the
catch.
Removal
1. Rotate the sensor unit release button A to the right, and
while maintaining that position press the centre of the
button firmly inwards towards the camera body B to
release the sensor unit.
A
B
Loading ...
Loading ...
Loading ...