
Loading ...
Loading ...
Loading ...
12
GB
3.
4.
5.
6.
7.
The manually specied IP address should be chosen to be compatible with the settings in your
router and must be a unique address on your network. If you are using DHCP for some devi-
ces and static (manually congured) IP addresses for others, the IP address used should fall
outside the range that the router may allocate using DHCP. Typically, the rst three groups
of digits will be the same for all devices on your network. To enter the IP address, rotate the
Tuning Control Rotary to set the value for each group of digits and then press the Tuning
Control Rotary to enter the value and to move on to the next group.
When the IP address has been entered, the subnet mask should be entered. The subnet mask
defines which parts of the IP address are common across your network. For most small
networks the subnet mask will be 255.255.255.0 and this is entered in the same way.
The Gateway address is normally the IP address of the router through which the radio
connects to the internet and is entered in the same way as the previous addresses.
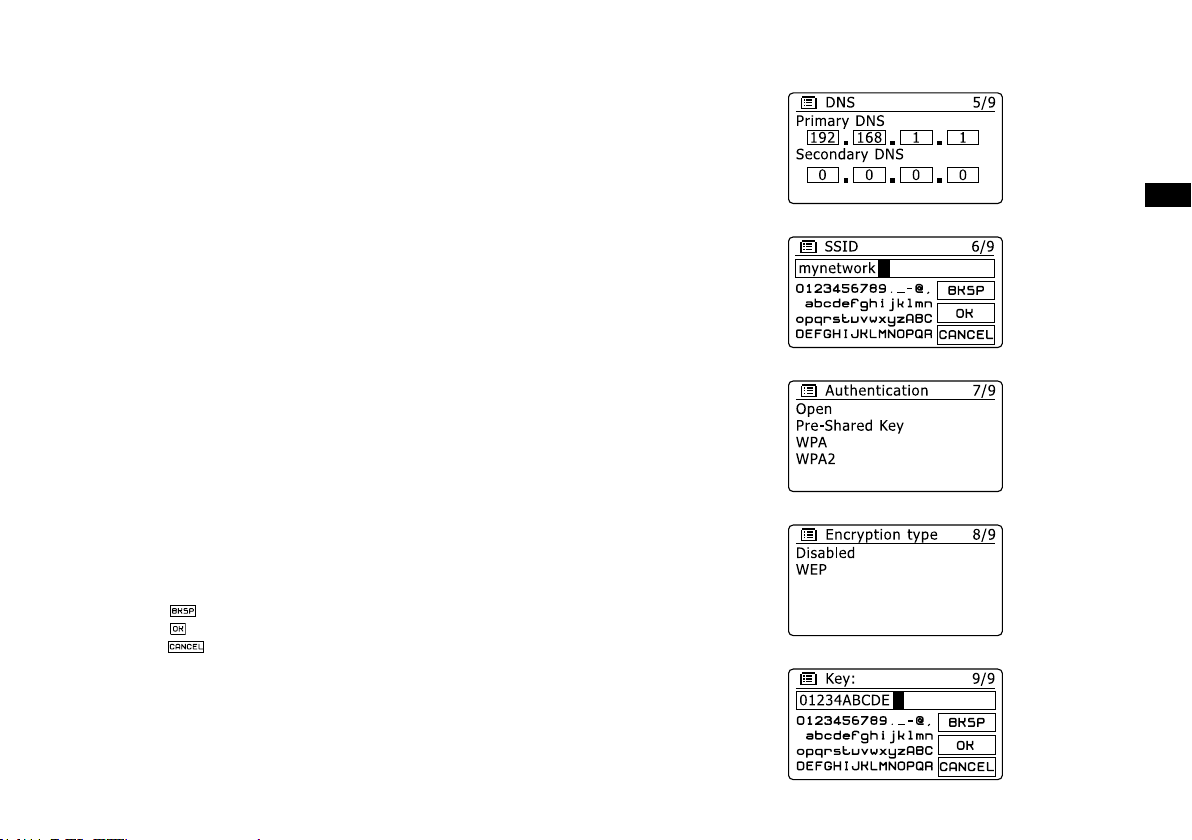
In most installations the DNS settings (DNS = Domain Name Server) will be set to the same IP
address as your router. In this case the secondary DNS may be left at zero. To enter the DNS
address, rotate the Tuning Control Rotary to set the value for each group of digits and then
press the Tuning Control Rotary to enter the value and to move on to the next group. Repeat
this until all eight groups of digits have been entered.
The next step is to set up the WiFi connection, starting with the name of the wireless network
(SSID) followed by the encryption options and password. To enter the SSID, characters are
selected and entered using the Tuning Control Rotary The radio scrolls through the available
characters as well as the three controls on the right. The character currently highlighted will
be entered when you press the Tuning Control Rotary. Do this as needed until the complete
network name has been entered. The SSID setting is sensitive to upper and lower case cha-
racters and symbols.
You must enter it exactly as set up in your router. The three controls on the right-hand side of
the screen have special functions:
select ‘ ’ to erase a character just entered
select ‘ ’ when the complete SSID has been entered
select ‘ ’ to cancel and go back to the DNS settings screen
Having entered the SSID, you must enter details of the encryption system used on your wi-
reless network. This should be the same as specied in your router settings. If your network
does not use encryption, then select the ‘Open’ option. Your radio should then connect to the
network, so skip to step 11. If your network uses WEP (Wired Equivalent Privacy) select the
‘Pre-Shared Key’ option then go to step 8. The remaining options are for WPA or WPA2 (WiFi
Protected Access) – see step 9.
Loading ...
Loading ...
Loading ...