Loading ...
Loading ...
Loading ...
38
This kit provides for the installation of Stainless Steel custom
handles on 1/4" thick decorator door panels. The door extru-
sions allow these custom handles to be secured to the door
structure, rather than to the custom panels. This kit contains
all the necessary parts for dispenser and non-dispenser
models.
Step 1:
Remove
Handles
• Carefully remove the phillips head screws from the
door handle top endcaps, if present.
• Open doors to 90°. Remove the screws from the full-
length handles of both doors.
• Retain screws, discard handles and endcaps.
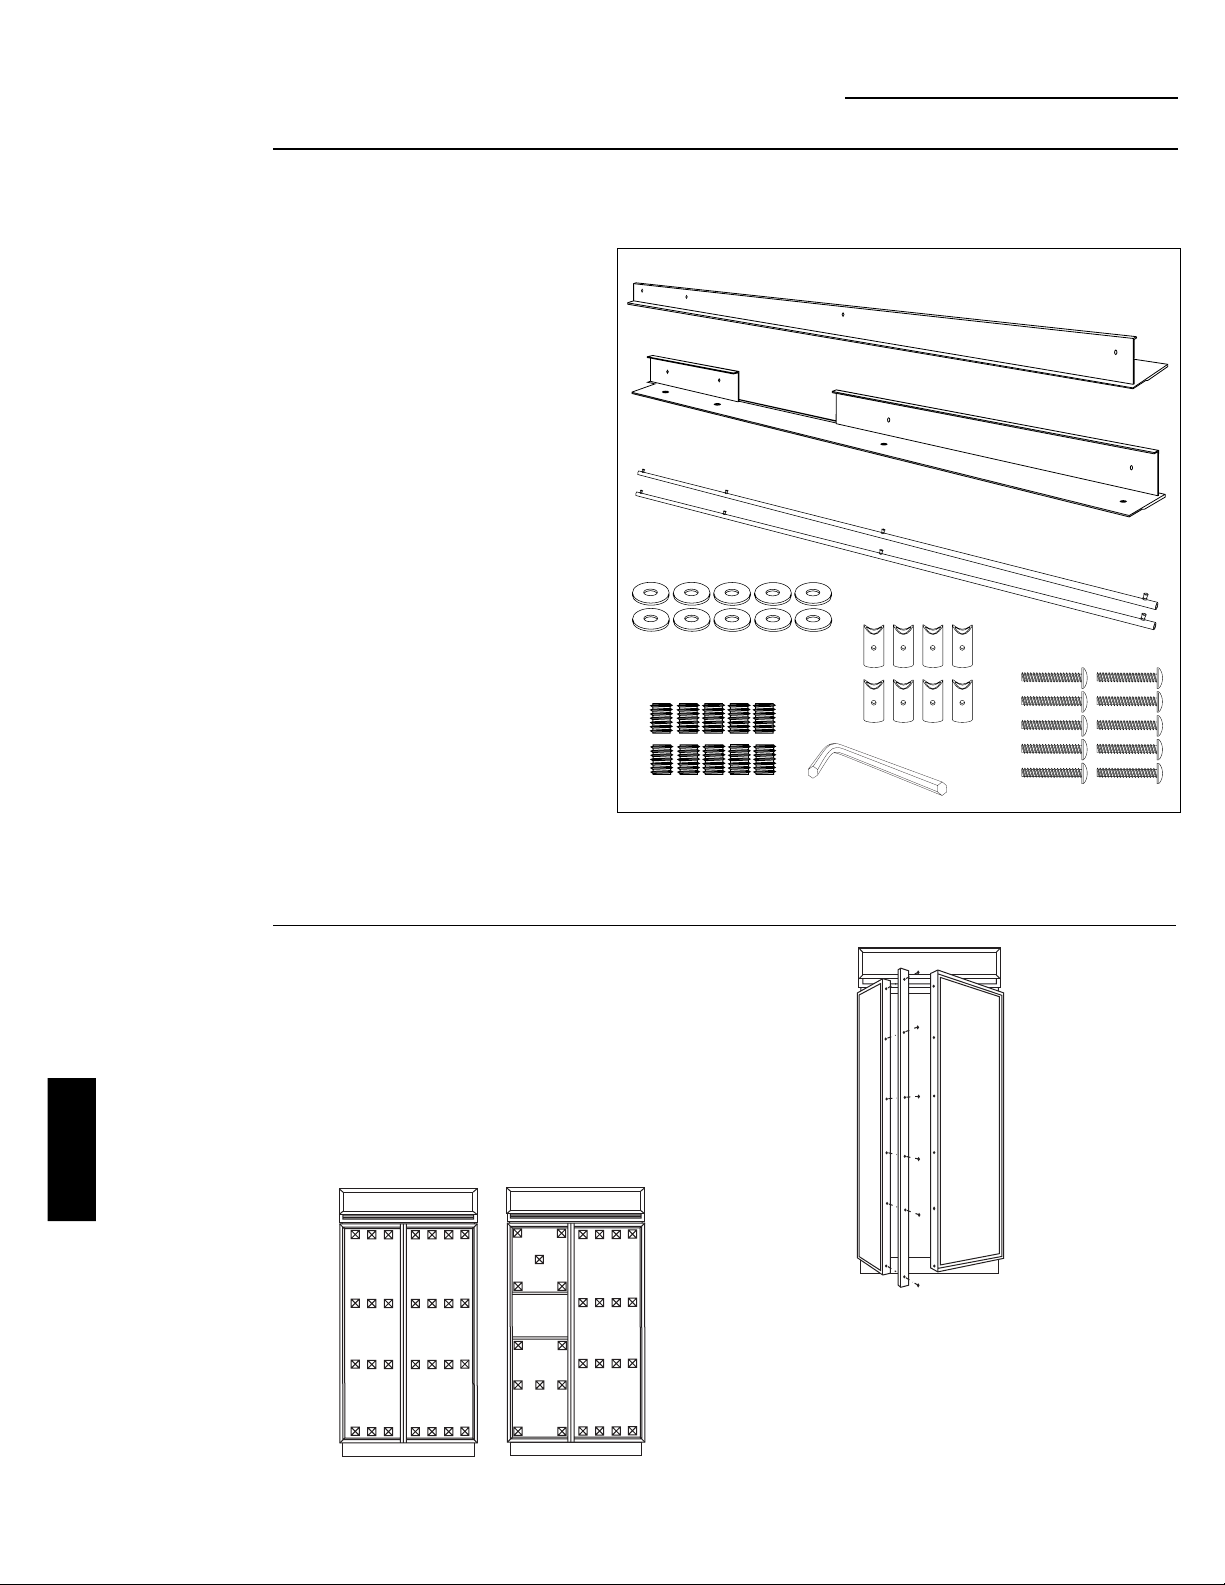
• Locate the 2" x 2" adhesive foam pads packed with
the refrigerator. Apply pads to the doors as shown.
Corner pads should be as close to inside corners as
possible.
Note:
It is best that 2 people install this kit.
Tools and materials required:
• #2 Phillips screwdriver
• Drill and 1/8", 9/32" bits
• Custom door panels
• Safety glasses
• Center punch
• Masking tape
• Hammer
• Pencil
• 1/2" thick 12" x 12" min. piece of plywood
to protect floor when drilling
• For stainless steel panels wear gloves to
protect against sharp edges.
Parts List:
A. Fresh food door extrusion
B. Freezer door extrusion
C. 2 Stainless tubular handles
D. 10 Spacer rings (for Stainless panels ONLY)
(8 required, 2 extra)
E. 8 Handle standoffs
F. 10 Screws for mounting handle standoffs
(8 required, 2 extra)
G. 10 Set screws (8 required, 2 extra)
H. 3/32" Allen wrench for set screws
A
B
D
E
G
H
F
C
Note:
If a custom collar is to be used, order ZWCD1 Trim Kit
for 36" and 42" wide models. Order ZWCD2 for 48" wide
models.
ZKHSS1 for 1/4" Panels
Tubular Stainless Steel Handles
ZKHSS1
INSTALLATION
Loading ...
Loading ...
Loading ...