Loading ...
Loading ...
Loading ...
21
ZKH1 Trim Kit (For 1/4" Panels)
Support for Custom Handles
OPTION 1
For non-dispenser
model or dispenser
model using custom
collar trim
Step 1
Remove
handles
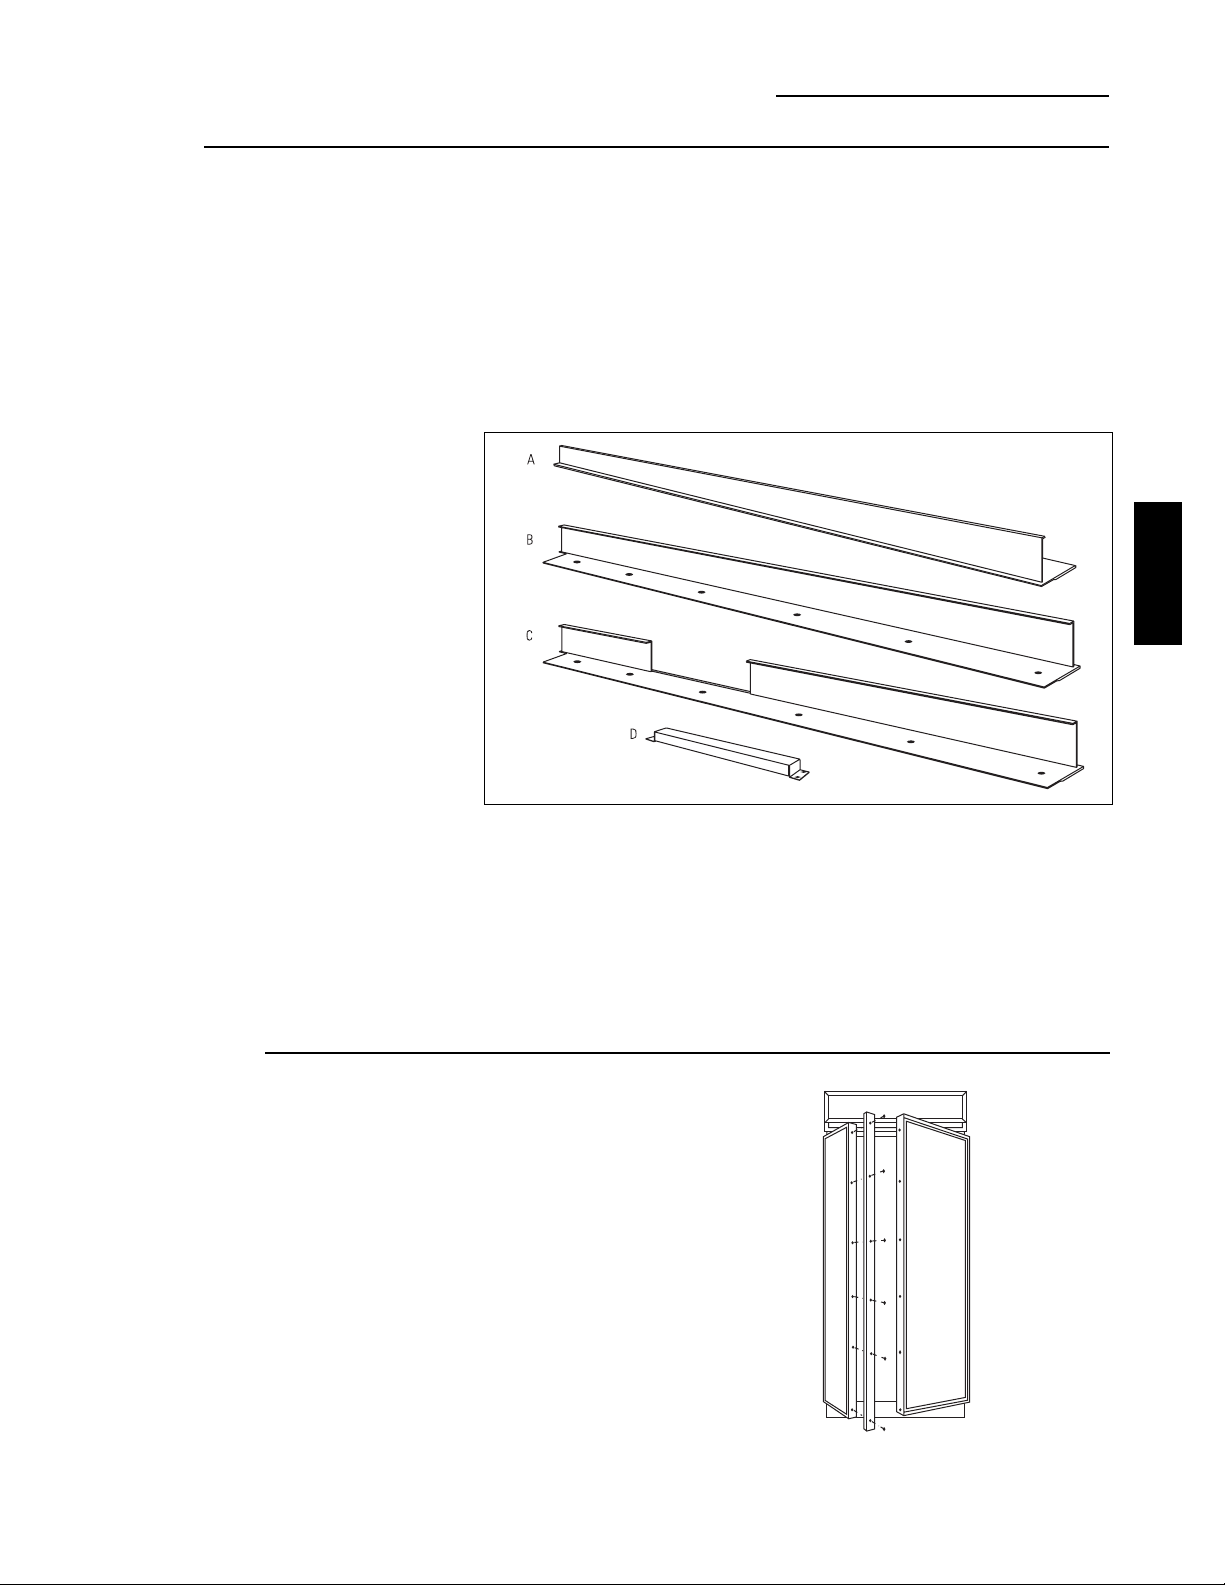
Kit
contents
Parts List:
A. Fresh food door
extrusion
B. Freezer door
extrusion for non-
dispenser model and
dispenser model
using custom collar.
(Option 1)
C. Freezer door
extrusion for
dispenser model
using full-width trim.
(Option 2)
D. Handle bracket for
dispenser model using
full-width trim.
(Option 2)
Tools and materials
required:
•#2 Phillips screwdriver
•Drill and appropriate bits
•Custom door panels
•Custom handles
•Safety glasses
These instructions are divided into 2 options:
Option 1—For non-dispenser and dispenser models
using custom collar trim.
Option 2—For dispenser model using the standard
full-width trim.
This kit provides the necessary framework to install
custom handles, of your choice, onto 1/4" thick decora-
tor door panels. (Handles not included.) The door
extrusions and bracket allow custom handles to be
secured to the door structure, rather than the door
panels. This kit contains all the necessary parts for
dispenser and non-dispenser models. Follow the
instructions for Option 1 when applying custom handles
to a non-dispenser model or dispenser model using
custom collar trim. Follow instructions in Option 2 for
a dispenser model using the standard full-width
dispenser trim.
• Carefully remove the Phillips head screws from the
door handle top endcaps, if present .
• Open doors to 90°. Remove the screws from the
full-length aluminum handles of both doors.
• Retain screws, discard handles and endcaps.
Note:
If a custom collar is to
be used, order ZWCD2 Trim Kit.
ZKH1
INSTALLATION
Loading ...
Loading ...
Loading ...