Loading ...
Loading ...
DESIGN
INFORMATION
Design Information
48" Built-In Refrigerator
Flush or
Semi-Flush
Enclosure
Installations
Side Panels Requirements:
• Side panels are not required whenever the
refrigerator is installed into an enclosure or between
pantry and oven cabinets.
• Side panels are required whenever the sides of the
refrigerator are exposed.
• Side panel sizes vary depending on the type of
installation being made.
To accomplish an attractive installation, you must:
1. Determine the need for side panels.
2. Determine side panel thickness.
3. Order matching side panels from the cabinet
manufacturer. Be sure to provide the exact
dimensions.
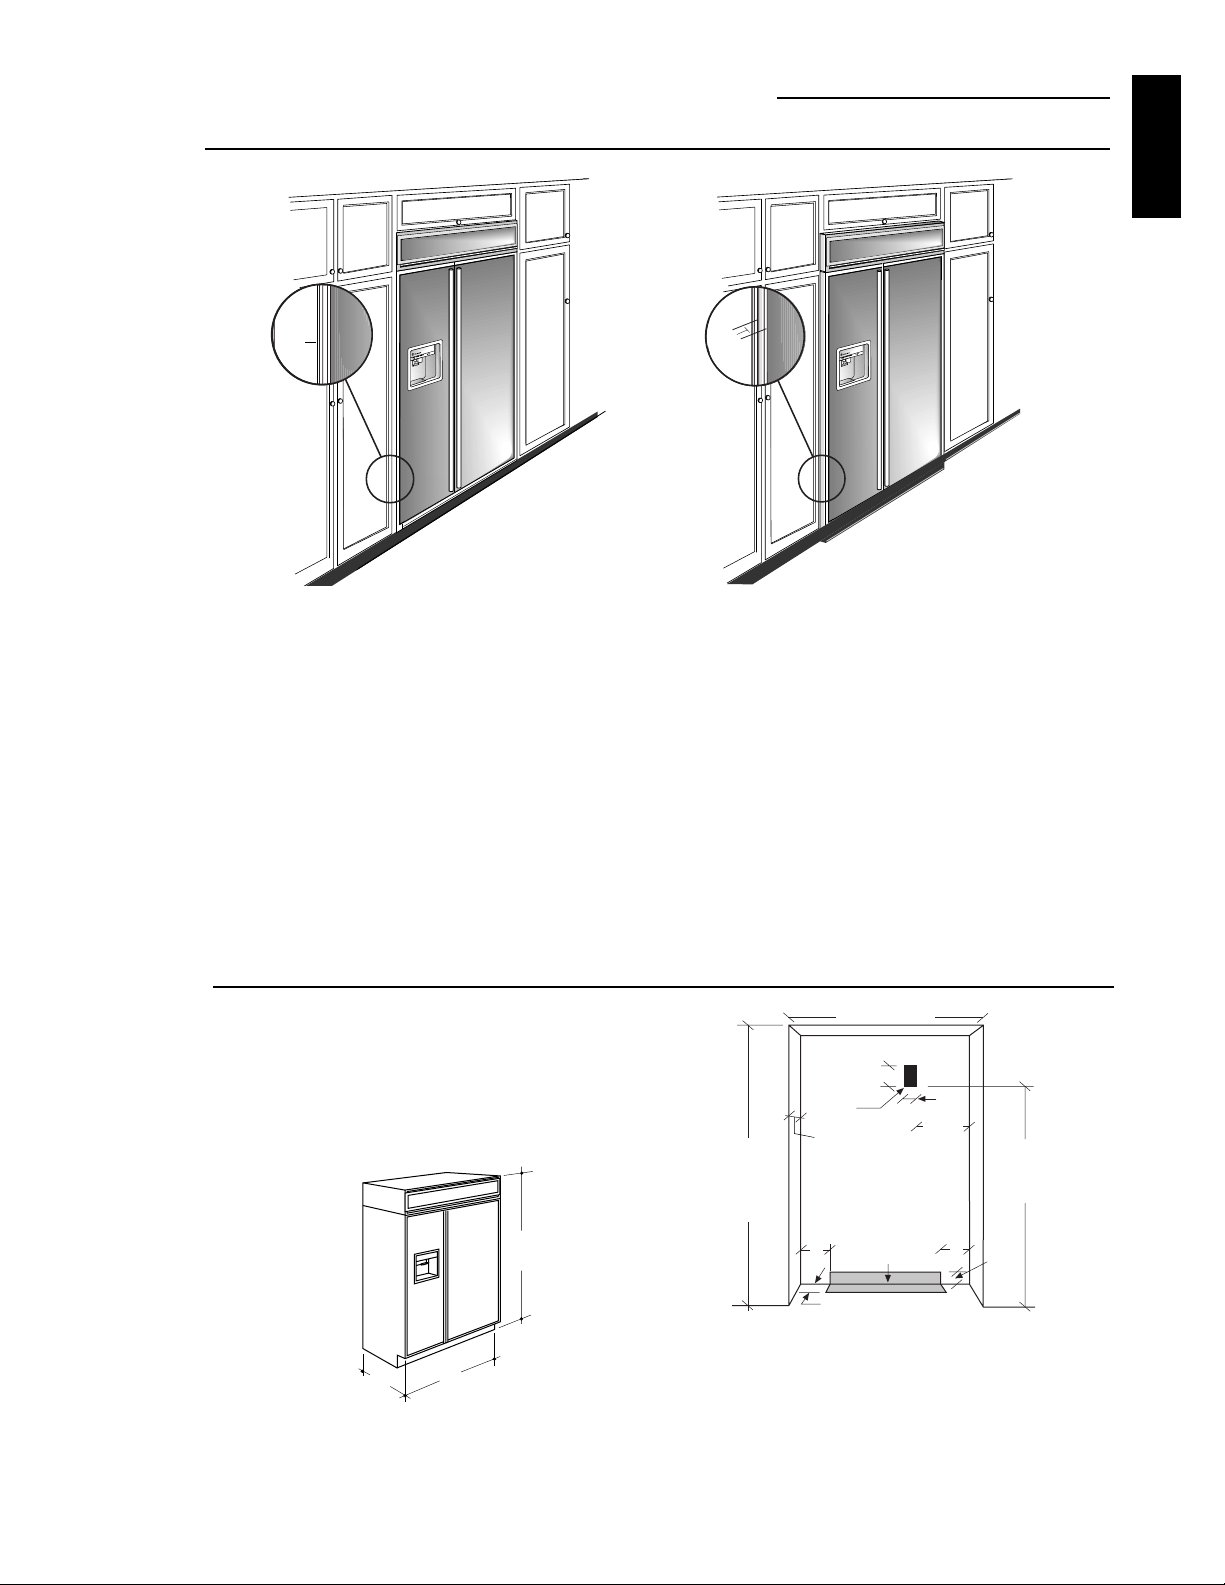
True Flush Installation
In a flush installation,
the refrigerator doors
will align evenly with the
front face of adjacent cabinet
doors. The refrigerator blends
into the surrounding cabinetry.
Semi-Flush Installation
These refrigerators
can also be installed
semi-flush into an enclosure
using the minimum cutout
width. The case trim creates a
frame around the opening.
Monogram built-in refrigerators can be installed flush
with typical 24-3/4" deep cabinetry.
When installed semi-flush, the case trim will conceal
slight gaps around the enclosure. The refrigerator will
project forward approximately 3/4" beyond the front
face of surrounding cabinetry.
In any installation situation, a wide range of appear-
ance options can be accomplished through the use of
one or more trim kits. See trim kit descriptions and
appearance options on page 5.
Enclosure
Cutout and
Product
Dimensions
• To achieve a flush fit the finished cutout width must
be at least 48" wide.
• A semi-flush installation requires 47-1/2" min. finished
cutout width.
• The electrical and water locations must be located as
shown for either type of installation.
*48" Min. for a flush installation
47-1/2" Min. for a semi-flush installation
Note: Additional cutout width may be required when
side panels are used. Add side panel thickness to the
finished cutout to calculate rough-in width. See
installation examples on the following page.
0"
3/4"
Advance Planning
3
48"
83" Min
84-1/2" Max
24-3/4"
*Finished Width
7"
Wall View
Electrical
Area
84 1/2" max
83-1/4" min
Finished
Opening
74" From Floor
to
Bottom
of Electrical
5"
20 3/8"
5"
3 1/2"
5"
3 1/2"
Water Supply
24 3/4" Total
Depth
Loading ...
Loading ...
Loading ...