Loading ...
Loading ...
Loading ...
Installation & Owner’s Guide 10
Cutting & Customizing
Cut the mat to the
required length
It is important to only cut BETWEEEN the
Black Stripes. Do NOT cut into them as
this will cause the GFCI to trip.
Terminate the end with green insulating discs
Cut back one black heat stripe from both sides of the panel making sure not to cut into
black stripe. Fold one Kapton Insulating Disk, (Green dots supplied in kit) on the two silver
bus bar endings on the panel on the opposite side from the thermostat location. Green
insulating disk must be folded over the top and bottom of silver bus bar. Make sure the
green kapton disk is covering the bus bar and the black ink area exactly as in the figure.
Since the boxed kit for the 2-in-1 mat is designed to
create 2 mats, both ends of the kit length have factory
installed lead wires. The end result is it will create 2 mats
out of 1 boxed length. The mat MUST be cut into 2 desired
lengths and the flap edges must be sealed properly in
order for the two mats to operate correctly (See step 3 for
sealing the heater). Similar to all the previous steps in the
cutting and customizing section you will need to properly
prepare the 2-in-1 as follows:
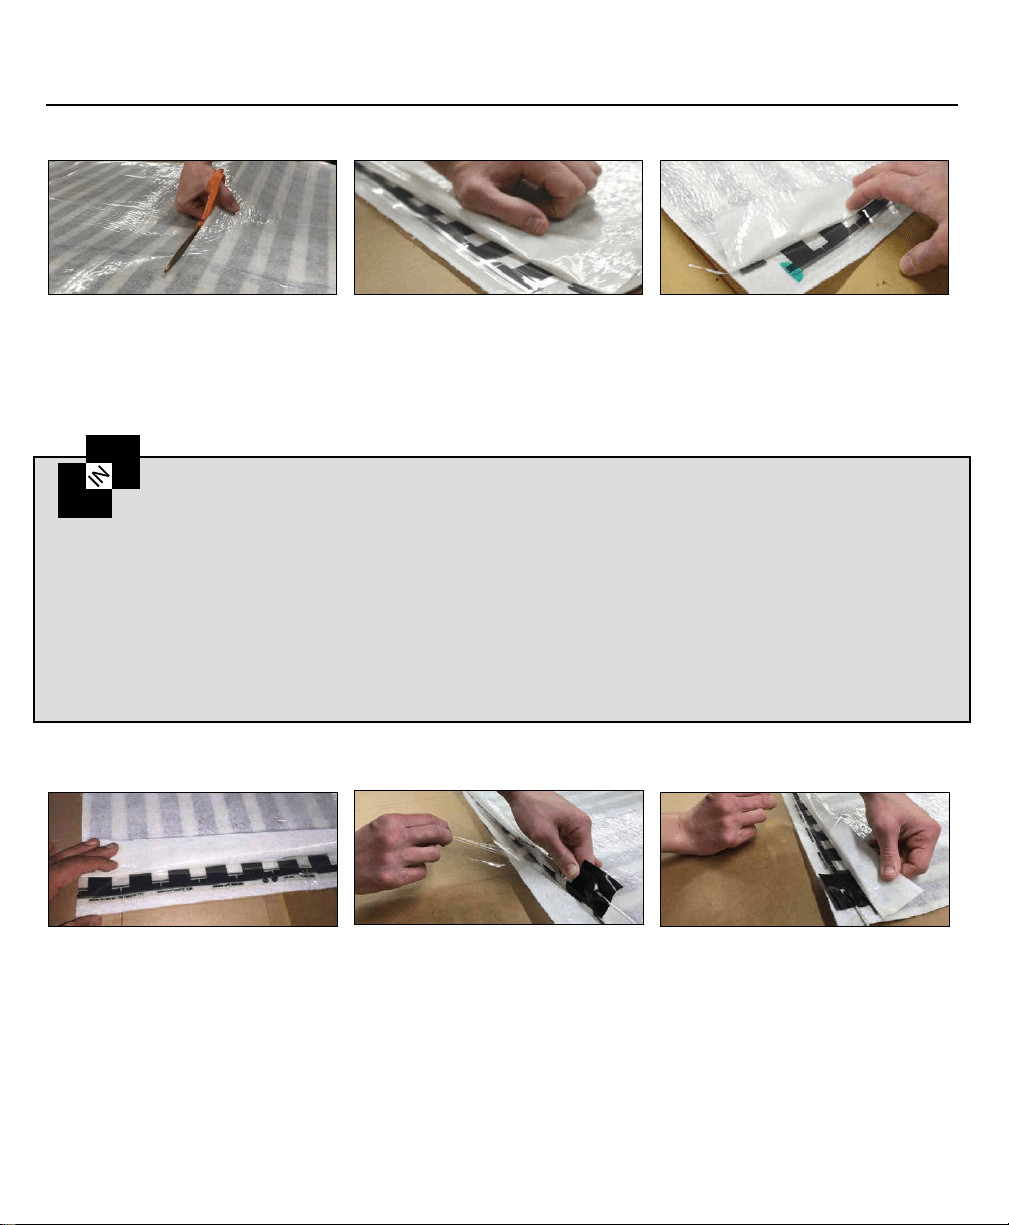
Sealing the heater by removing the liners.
MAKE SURE TO PRESS OUT ANY AIR BUBBLES AS YOU ARE ADHERING THE TOP FLAP TO THE BOTTOM.
Fold back and crease the top “flap” on
each end of the heating panel(s).
Peel back the bottom release liner on the
inside of the flap and adhere the heating
element by pressing down firmly.
Once the heating element is adhered to
the bottom of the flap carefully peel back
the upper release liner and press down
to seal the edges of the membrane.
Proceed with the rest of the steps for installation on the following pages.
Check the resistance reading again to the new customized size.
Step 1
Step 2a. 2-in-1 Radiant Film Mat for Tile Preparations
Step 3
Step 2
*This step must be done regardless if you are cutting the mat or not.
Otherwise it will lead to nuisance tripping of the GFCI and void the warranty.
1. Using the diagram you made earlier, cut the heating element into 2
desired lengths using a scissors. Ensure not to cut into any black
stripes and stay only on the dotted line when cutting to lengths.
2. Cut back one black heat stripe from both ends of the panel as shown
above. Insulate the 2 created mat cut ends with the supplied Kapton
Disks on the exposed bus bars. There will be 4 bus bars to cover after
the cut.
3. Seal the heater by removing the flap release liners as explained in step
3 in the cutting and customizing section.
2
1
Loading ...
Loading ...
Loading ...