
Loading ...
Loading ...
Loading ...
Page 11
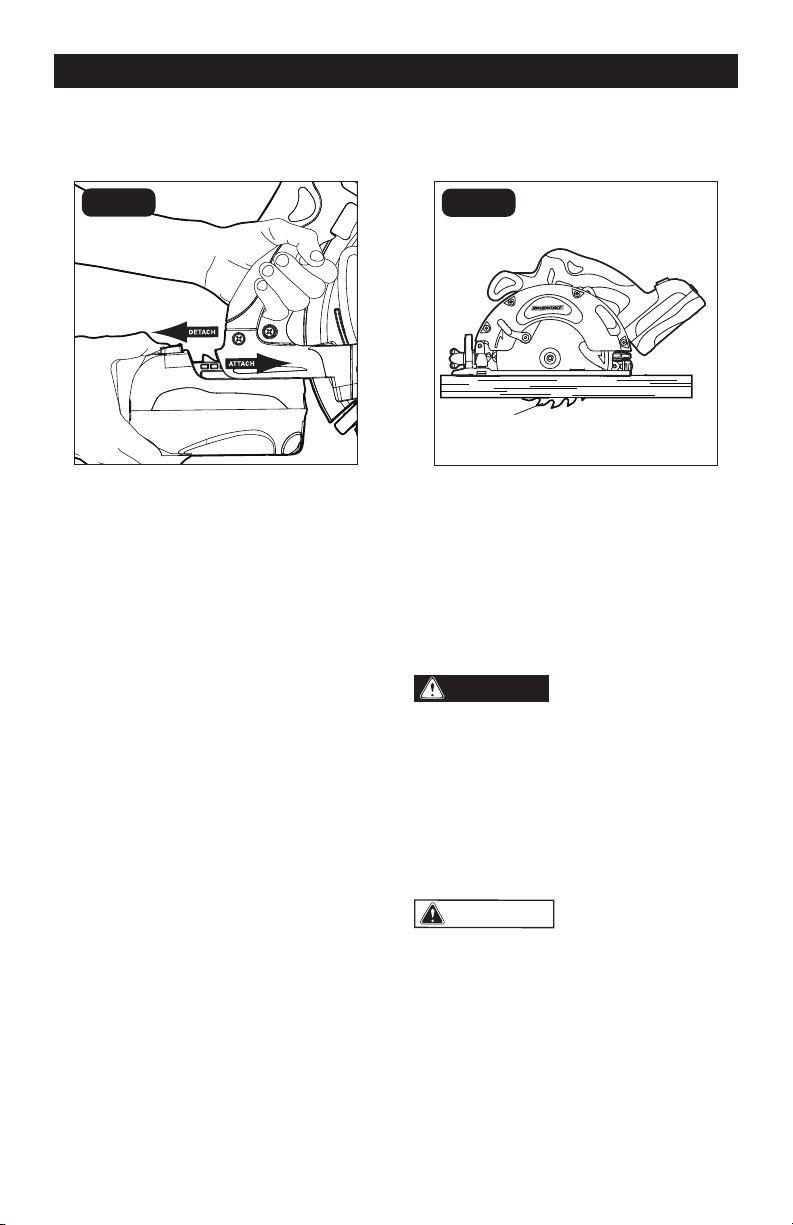
BLADE GUARD
SYSTEM (FIG. 2)
Lower blade guard is in up
position when making a cut
Blade exposed on
underside of workpiece
FIG. 2
The lower blade guard attached to your
saw is there for your protection and safety.
It should never be altered for any reason.
If it becomes damaged or begins to return
slowly, do not operate the saw until the
damaged guard has been repaired or
replaced. Always leave the blade guard in
operating position when using the saw.
DANGER:
When sawing through
a workpiece, the lower blade guard does
not cover the blade on the underside of
the workpiece. Since the blade is exposed
on the underside of the workpiece, keep
hands and ngers away from the cutting
area. Any part of your body coming in con-
tact with the moving blade will result in se-
rious injury.
CAUTION:
Never use the saw
when the blade guard is not operating cor-
rectly. Check the guard for correct opera-
tion before each use. The guard is oper-
ating correctly when it moves freely and
readily returns to the closed position. If you
drop the saw, check the lower blade guard
and bumper for damaged at all depth-of-
cut settings before reuse.
TO ATTACH BATTERY
PACK (FIG. 1)
FIG. 1
NOTICE: Use with the battery packs listed
on page 7 only.
1. Make sure that the circular saw is “OFF”.
2. Align the raised rib on the battery pack
with the grooves on the bottom of the
saw, and then slide the battery forward
to attach the battery pack to the saw.
NOTICE: When placing the battery pack
on the tool, be sure that the raised rib on
the battery pack aligns with the groove
on the saw and that the latches snap into
place properly. Improper assembly of the
battery pack can cause damage to internal
components.
TO DETACH BATTERY
PACK (FIG. 1)
1. Release the trigger switch to engage the
lock-off button.
2. Depress the battery release buttons
located on the front of the battery pack
to release the battery pack.
3. Pull forward on the battery pack to
remove from the tool.
OPERATION
Loading ...
Loading ...
Loading ...