Loading ...
Loading ...
Loading ...
Fuses and bulbs
Changing the number plate light
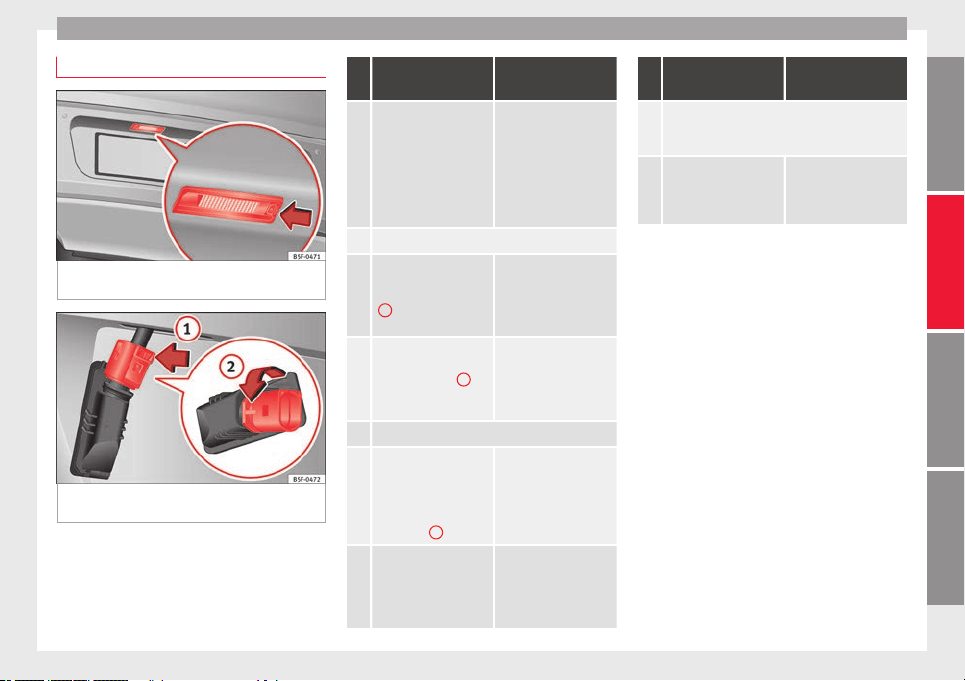
Fig. 221 On the rear bumper: number plate
lights
Fig. 222 Number plate light: Remove the
lamp holder
Complete operations only in the sequence
given:
Fixed number plate
light
Bolted number plate
light
1.
Press the flat part of the
screwdriver included in
the vehicle on-board
tools (››› Fig. 181) in the
direction of the arrow,
in the groove of the
number plate light
››› Fig. 221.
Unscrew the number
plate light screws using
the screwdriver from
the vehicle tool kit
(››› Fig. 181).
2. Detach the number plate light.
3.
Press on the connector
lock in the direction of
the arrow ››› Fig. 222
1
and pull out the
connector.
Separate the attach-
ment tabs from the rear
panel of the number
plate light by pressing.
4.
Rotate the bulb holder
in the direction of the
arrow ››› Fig. 222
2
and extract it with the
bulb.
Take the lamp holder
out of the number plate
light.
5. Replace the faulty bulb by a new identical bulb.
6.
Insert the bulb holder
into the number plate
light and rotate all the
way in the opposite di-
rection to the arrow
››› Fig. 222
2
.
Insert the lamp holder
into the number plate
light.
7.
Plug the connector into
the lamp holder.
Press on the attach-
ment tabs. The lamp
holder must be firmly
attached to the number
plate light.
Fixed number plate
light
Bolted number plate
light
8.
Insert the number plate light carefully into the
opening on the bumper. Ensure that the number
plate light is in the correct position.
9.
Insert the number plate
light into the bumper
until it audibly clicks in-
to place.
Tighten the attachment
screws for the number
plate light using the
screwdriver.
273
Technical specifications
AdviceOperationSafety
Loading ...
Loading ...
Loading ...