Loading ...
Loading ...
Loading ...
9
Getting Started
Parts and Accessories
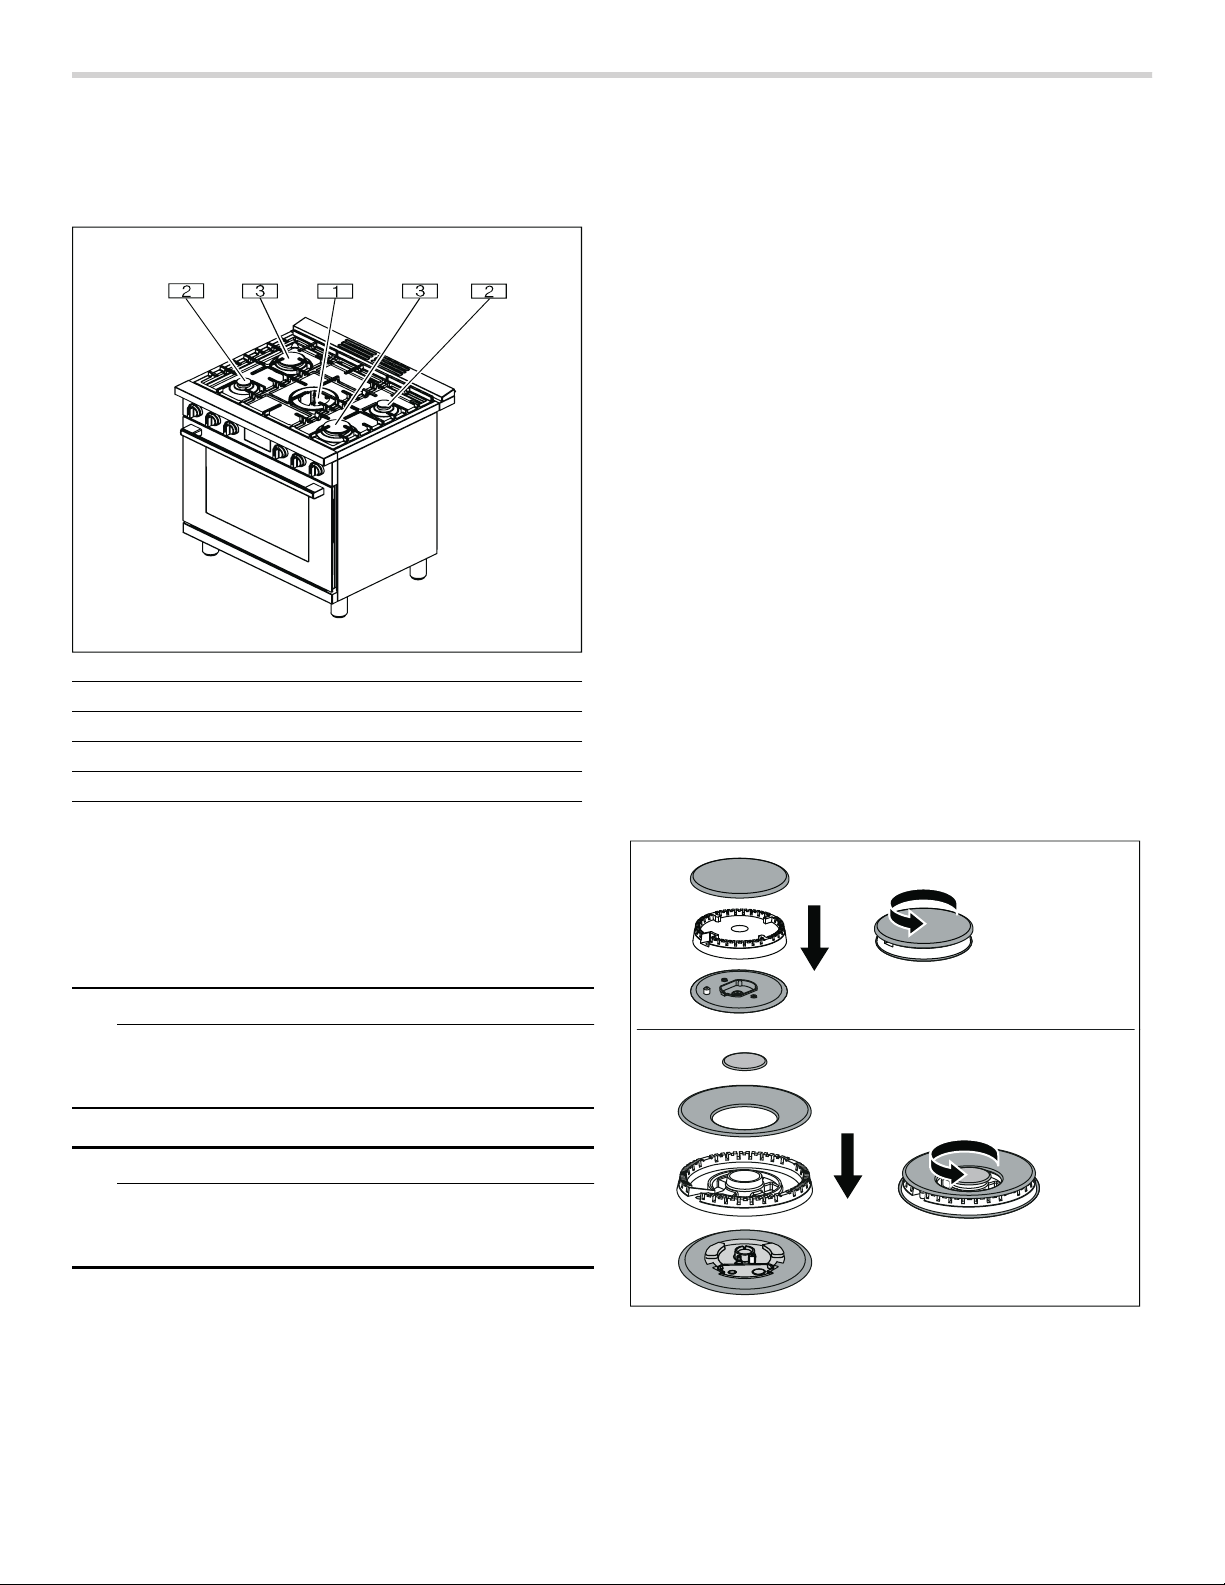
30”
Burner Cap Placement
Sealed burners
Your new cooktop has sealed gas burners. There are no
burner parts under the cooktop to clean, disassemble or
adjust. Your cooktop has three different burner sizes:
small, large and dual-flame.
9 WARNING
To prevent flare-ups, do not use the cooktop without
all burner caps and all burner grates properly
positioned.
9 WARNING
To prevent burns, do not touch burner caps
orgrates while hot. Turn the cooktop off and allow
the burners to cool.
The burner parts must be correctly positioned for the
cooktop to function properly. If the burner parts are not
correctly positioned, one or more of the following
problems may occur:
▯ Burner flames are too high.
▯ Flames shoot out of burners.
▯ Burners do not ignite.
▯ Burner flames light unevenly.
▯ Burner emits gas odor.
Burner Cap and Burner Base Placement
After electrical connection is complete, place each
burner base on the corresponding location on the
cooktop. One of the three bars on the burner base
should line up with the notch and prevent the base from
rotating. The small hole or cutout near the edge should
also line up with the igniter. Pay special attention to avoid
damaging the igniter during installation of the base. See
Illustration below.
Once each base is located and resting evenly, place
each burner cap on its correct burner base. See
Illustration.
Place burner cap gently on top of base so that the
prongs of the burner base fit snugly into the groove of
the burner cap.
If the maintop is removed by a certified installer (for
example to check electrical or piping connection) the
panhead screws that were removed must be re-installed
to ensure proper functionality of burners.
No. Designation
(
Dual-flame burner (18,000 BTU/ 5.3 kW)
0
Small burner (5,000 BTU/ 1.5 kW)
8
Large burner (10,000 BTU/ 2.9 kW)
Loading ...
Loading ...
Loading ...