Loading ...
Loading ...
Loading ...
English 17
Operating the oven
Control panel display modes
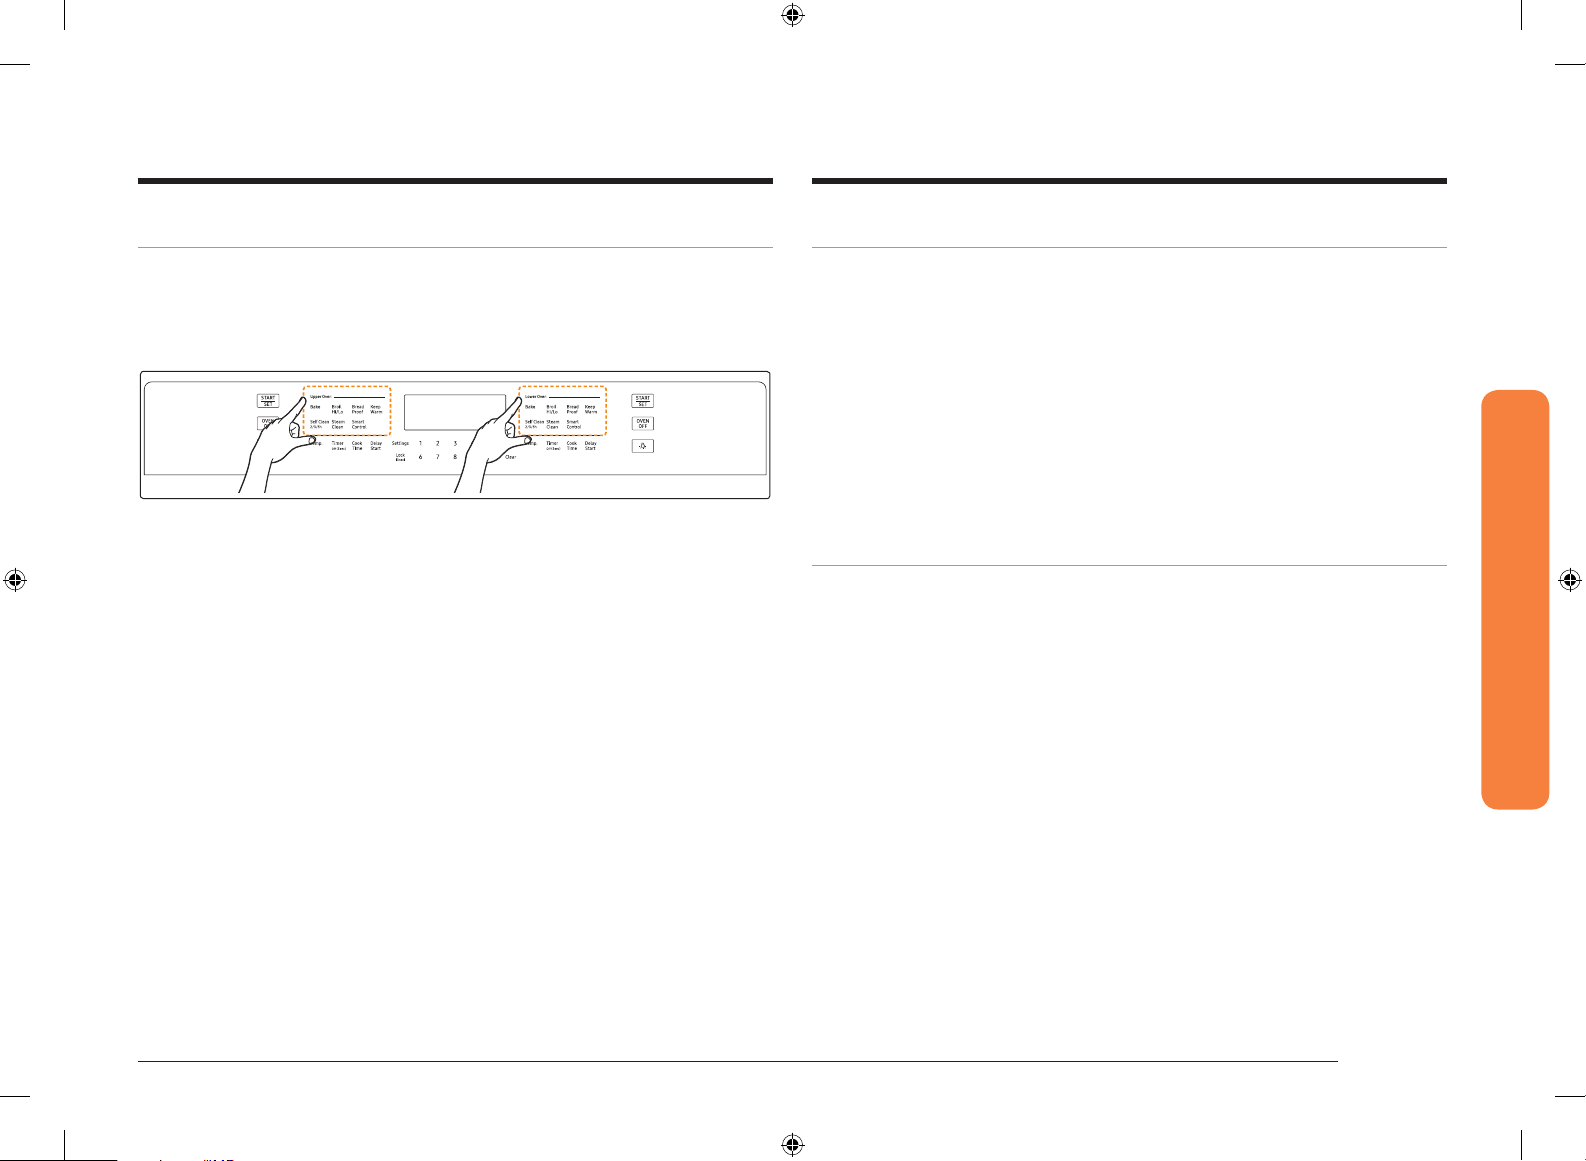
Selecting the upper or lower oven
To change between the upper and lower oven, touch the UPPER OVEN or LOWER
OVEN area. Note that each oven has its own set of control buttons. The button sets
are identical and perform the same functions.
Setting the clock
The clock must be set to the correct time of day for the automatic oven timing
functions to work properly.
• The time of day cannot be changed during timed cooking, delay-timed
cooking, or a self-cleaning cycle.
• You can choose between a 12-hour or 24-hour display. The default is 12-hour.
How to set the clock
1. Touch Clock.
2. Touch Clock to select AM or PM. (Skip this step if you are setting the clock to
24 hour display mode.)
3. Touch keys in the number pad to set the current time of day.
4. Touch Clock or START/SET to save the changes.
Setting the kitchen timer
The kitchen timer serves as an extra timer that will beep when the set time has
elapsed. It does not start or stop cooking functions. You can use the kitchen timer
with any of the other oven functions.
How to set the timer
1. Touch Timer Off (3 sec).
2. Touch number keys in the number pad to set the hours and minutes. The timer
can be set for any amount of time from 1 minute to 9 hours and 59 minutes. If
you make a mistake, touch Clear, and then enter the amount of time again.
3. Touch Timer Off (3 sec) or START/SET.
4. When the set time has elapsed, the oven will beep and the display will show
End until you touch Timer Off (3 sec). You can cancel the timer at any time by
touching Timer Off (3 sec) for 3 seconds.
NV51R5511D_AA_DG68-01126A-02_EN.indd 17 11/5/2019 10:31:05 AM
Loading ...
Loading ...
Loading ...