Loading ...
Loading ...
Loading ...
Recording Video
62
NOTES
NOTES
• You can use the [Monitoring Setup] > [Surrounding Area] settings to show on the monitoring
screen more of the periphery around the area that is actually recorded by the camera.
• You can use the [Monitoring Setup] > [OSD Output] > [VIDEO] or [MON.+HDMI] > [Peripheral
Border] setting to change whether the camera’s onscreen displays appear on the image or in the margins
around the image (the default setting).
• You can also choose not to output the onscreen displays to monitoring devices (A 158).
Setting the Clip File Name
The camera allows you to change several settings that determine the file name of the recorded clips. Personalize
the clip file name according to your preferences or organizational conventions to create files that are easier to
identify and organize.
The basic file name structure is as follows. When the simultaneous sub recording of XF-AVC Proxy clips is
activated, the file names of the main and sub recording clips will be identical for the most part (components
1 to 6).
Setting the components of the clip file name
To set the camera index
1 Open the [Camera Index] screen.
[Rec/Media Setup] (
3
) > [Metadata] > [Camera Index]
2 Turn the SELECT dial to select the desired camera index.
3 Press [OK] (camera menu) or press SET twice (monitoring menu).
A001C001 to Z999D999 Clip identification. Includes the camera index, reel number and clip number
components of the clip file name (A 62).
2: [Reel/Clip Number]
00:00:00.00, 00:00:00:00 Time code (A 101)
• Depending on the operation, a letter may appear after the time code (A 102).
2: [Time Code]
U
Genlock (A 106) 2: [Genlock]
Icon/Display Description Custom Display
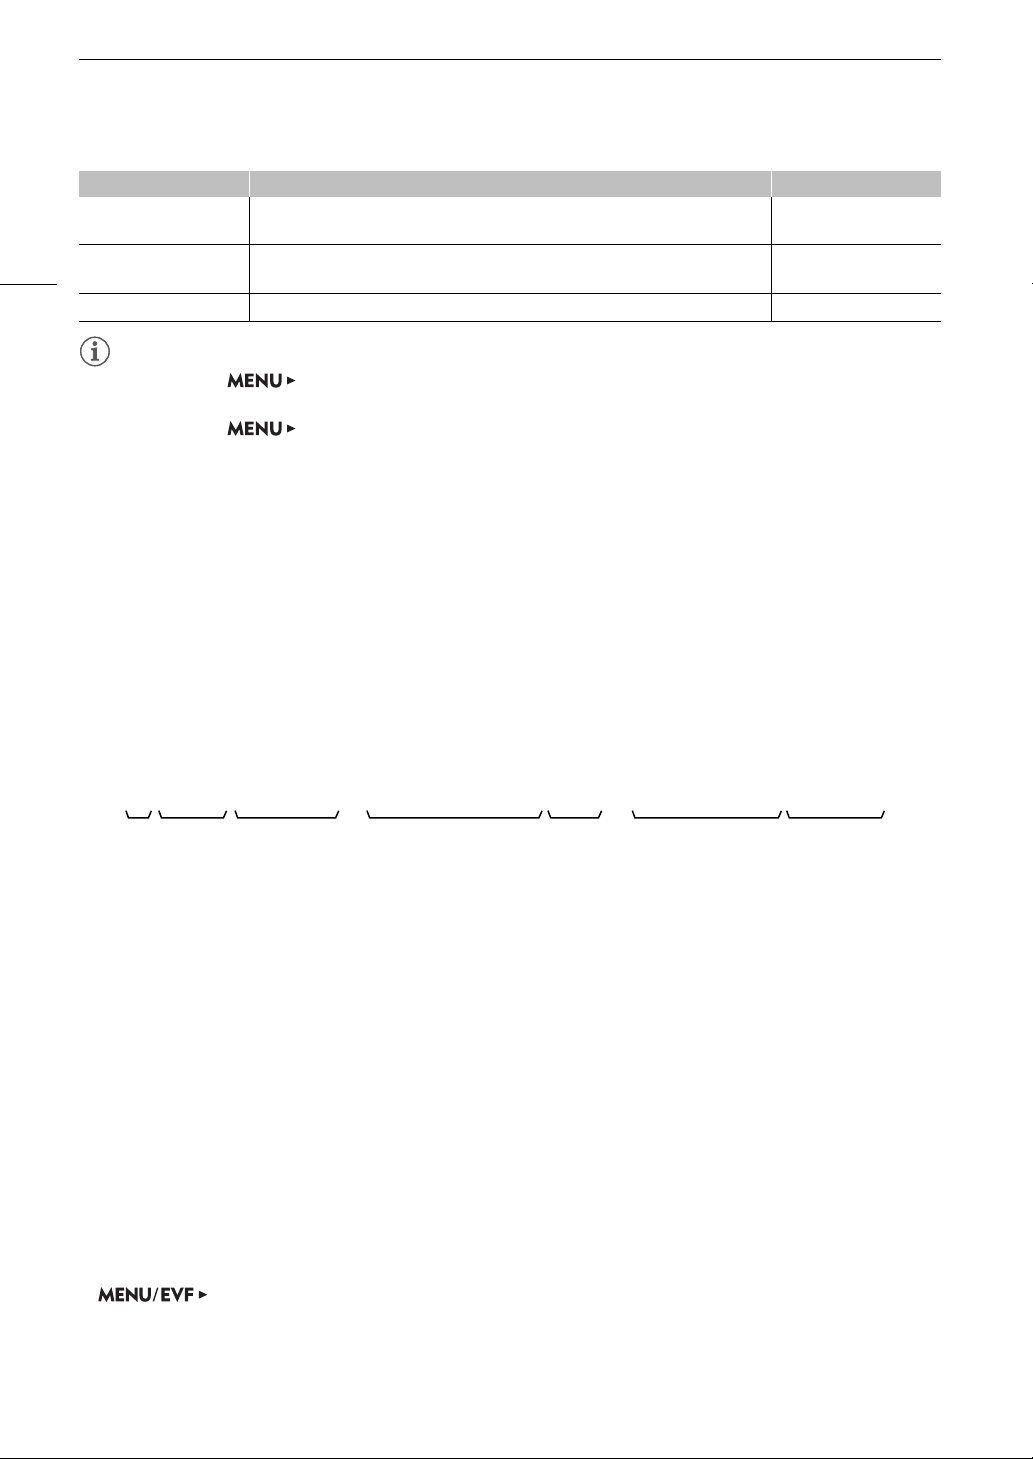
A001C001_yymmddXX_CANON_01P
1 2 3 4 675
1 Camera index: One character (A to Z) that
identifies the camera used.
2 Reel number: 3 characters (001 to 999) that
identify the recording media used.
3 Clip number: 4 characters (C001 to D999). The
clip number advances automatically with each
clip recorded (switching to D001 after C999), but
you can set the initial clip number.
4 Recording date (set automatically by the camera).
5 Random component: 2 characters (numbers 0 to
9 and capital letters A to Z) that change randomly
with each clip.
6 User defined field: 5 characters (numbers 0 to 9
and capital letters A to Z) for any other
identification purposes.
7 The camera will automatically add the suffix “_P”
to the file name of XF-AVC Proxy clips.
Additionally, when an SDHC card is used to
record XF-AVC Proxy clips, a stream number (01
to 99) will be added before the “P”. The stream
number will advance every time the video (stream)
file within the clip is split and recording continues
on a separate stream file.
Loading ...
Loading ...
Loading ...