Loading ...
Loading ...
Loading ...
ENGLISH
19
USING THE COOKTOP
• Hi is the highest temperature available.
• Lo is the lowest temperature available.
• Press and hold the
+
or
–
buttons to quickly
scroll through the temperature settings.
NOTE
To turn on the Warming Zone (center element):
1. Press the warming zone ON/OFF button. The warm-
ing zone indicator light will ash.
2. Press the
+ button once to adjust the temperature to
Hi, or the
– button once to adjust the temperature to
Lo. Power level sequence is from
– Lo, 2, 3, 4, Hi or
from
+ Hi, 4, 3, 2, Lo.
3. Use the
– / + buttons to adjust the temperature set-
tings. The temperature settings are adjustable at all
times.
4. To turn o the warming zone, press the ON/OFF but-
ton once.
• Only use cookware and dishes that are safe for
oven and cooktop use.
• Always use oven mitts when removing food from
the cooktop and oven.
• Do not place sealed containers on the cooktop.
• DO NOT use plastic wrap to cover food while on
the cooktop. Plastic may melt onto the surface and
be very dicult to clean.
• When using the warming zone, food should be
kept in its container and covered with a lid or alu-
minum foil to maintain food quality.
• DO NOT leave food on the warming zone for more
than two hours.
CAUTION
Recommended surface cooking settings
Element Temp. Recommended Use
Single or
Dual
8.5-Hi
y Bring liquid to a boil
y Start cooking
5.5-8.0
y Hold a rapid boil, frying, deep fat fry
y Quickly brown or sear food
3.5-5.0
y Maintain a slow boil
y Fry or saute foods
y Cook soups, sauces and gravies
2.2-3.0 y Stew or steam food
y Simmer
LO-2.0
y Keep food warm
y Melt chocolate or butter
Element Temp. Recommended Use
Warming
Zone
Hi
y Fried Foods
y Hot Beverage
y Soups (liquid)
2–4
y Dinner Plate with Food
y Sauces
y Soups (Cream)
y Stew
y Vegetables
y Meats
Lo
y Bread/Pastries
y Gravies
y Casseroles
y Eggs
Home canning tips
Be sure that the canner is centered over the surface
unit and at on the bottom.
y The base must not be more than 1 inch larger than the
element. Use of water bath canners with rippled bot-
toms may extend the time required to bring the water
to a boil and cooktops may be damaged.
y Some canners are designed with smaller bases for use
on smooth top surfaces.
y Use the high heat setting only until the water comes to
a boil or pressure is reached in the canner.
y Reduce to the lowest heat setting that maintains the
boil, or pressure. If the heat is not turned down, the
cooktop may be damaged.
USING THE PROPER COOKWARE
Using the proper cookware can prevent many problems,
such as food taking longer to cook or achieving inconsis-
tent results. Proper pans will reduce cooking times and
cook food more evenly. Stainless steel is recommended.
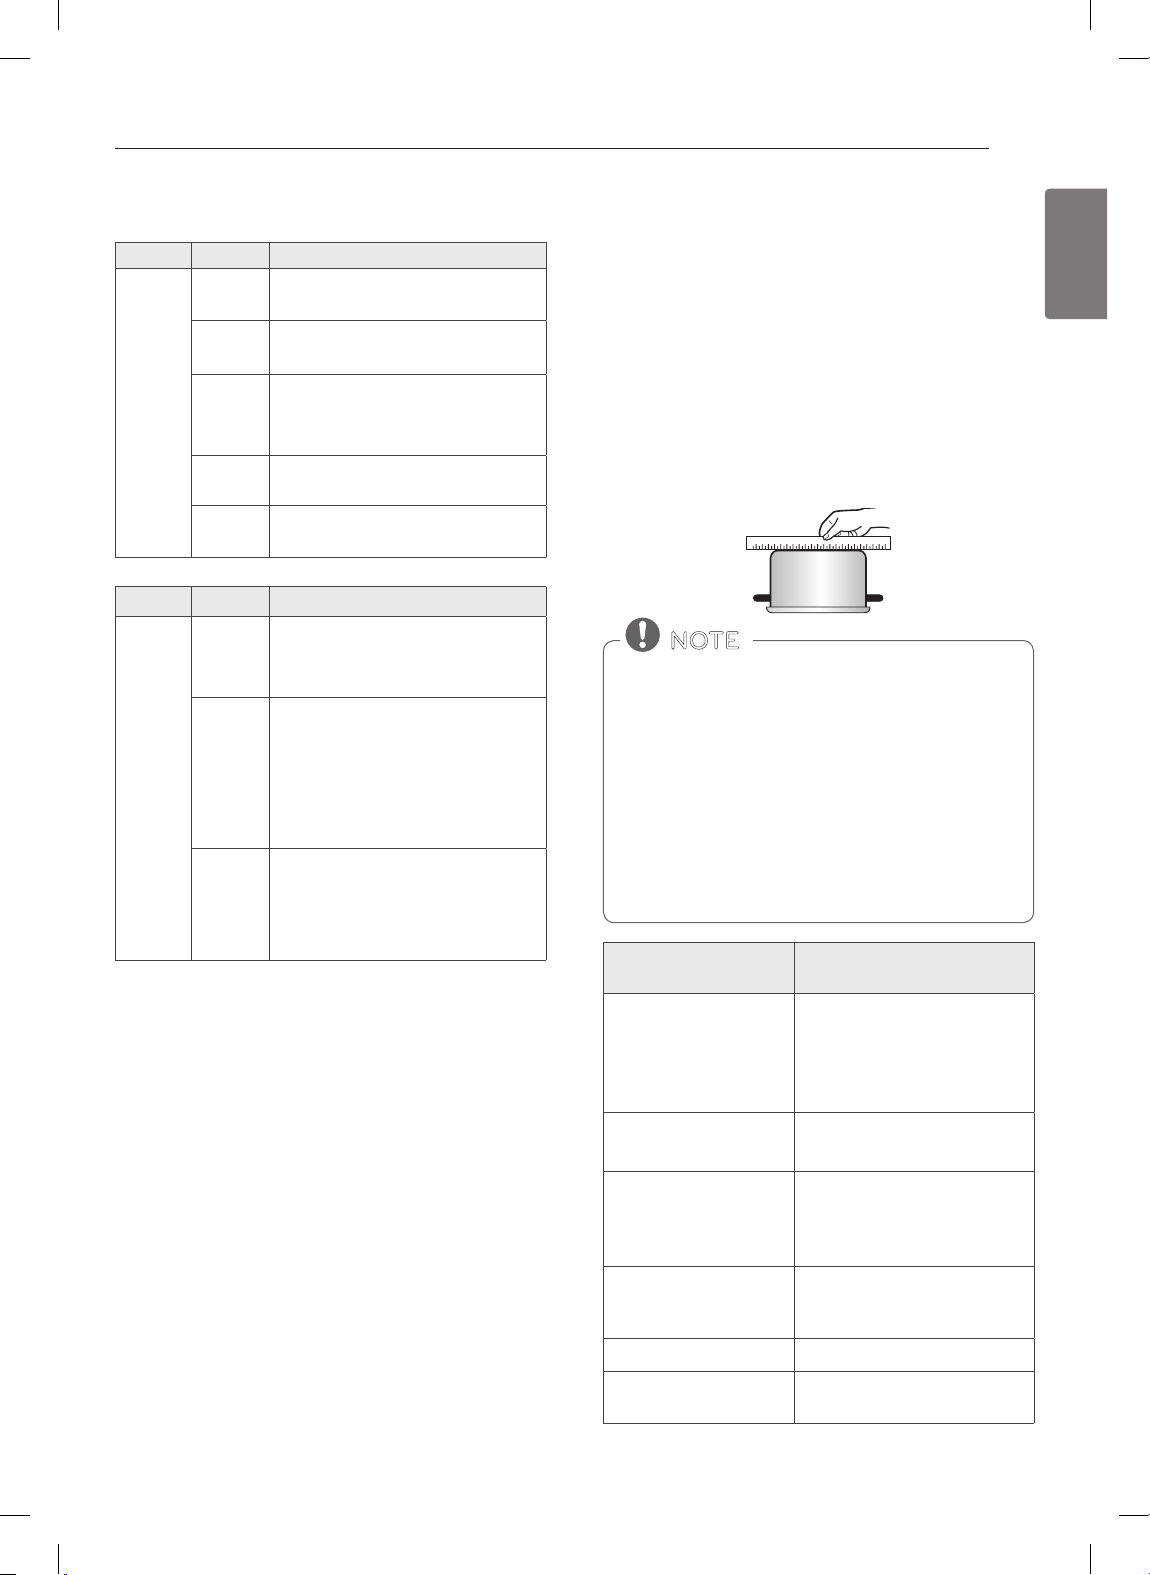
Check pans for flat bottoms by using
a straight edge or ruler
1. Place a ruler across the bottom of the pan.
2. Hold it up to the light.
3. No light should be visible under the ruler.
• Do not use a small pan on a large element. Not
only does this waste energy, but it can also result
in spillovers burning onto the cooking area.
• Only use flat bottomed cookware. Do not use
cookware that is oversized or uneven such as
round bottom woks, rippled bottom cookware, or
oversized canners and griddles.
• Do not use foil or foil-type containers. Foil may
melt onto the glass. Do not use the cooktop if
metal has melted on it. Call an authorized Servicer.
NOTE
Recommended
cookware
Do not use
Flat bottom and
straight sides.
Curved, grooved, or warped
pan bottoms. Pans with
uneven bottoms do not cook
eciently and sometimes may
not boil liquid.
Heavy-gauge pans.
Very thin-gauge metal or glass
pans.
Pan sizes that match the
amount of food to be
prepared and the size of
the surface element.
Pans that are smaller or larger
than the element.
Weight of handle does
not tilt pan. Pan is well
balanced.
Cookware with loose or bro-
ken handles. Heavy handles
that tilt the pan.
Tight-tting lids. Loose-tting lids.
Flat bottom woks.
Woks with a ring-stand bot-
tom.
Loading ...
Loading ...
Loading ...