Loading ...
Loading ...
Loading ...
English
46
Timer recording (manually)
A
Turn on the TV power. Select the
correct Video In channel at the TV.
If you are recording directly to a
DVD disc, insert the recordable DVD
disc before proceeding to step
B
.
B
Press TIMER on the remote control.
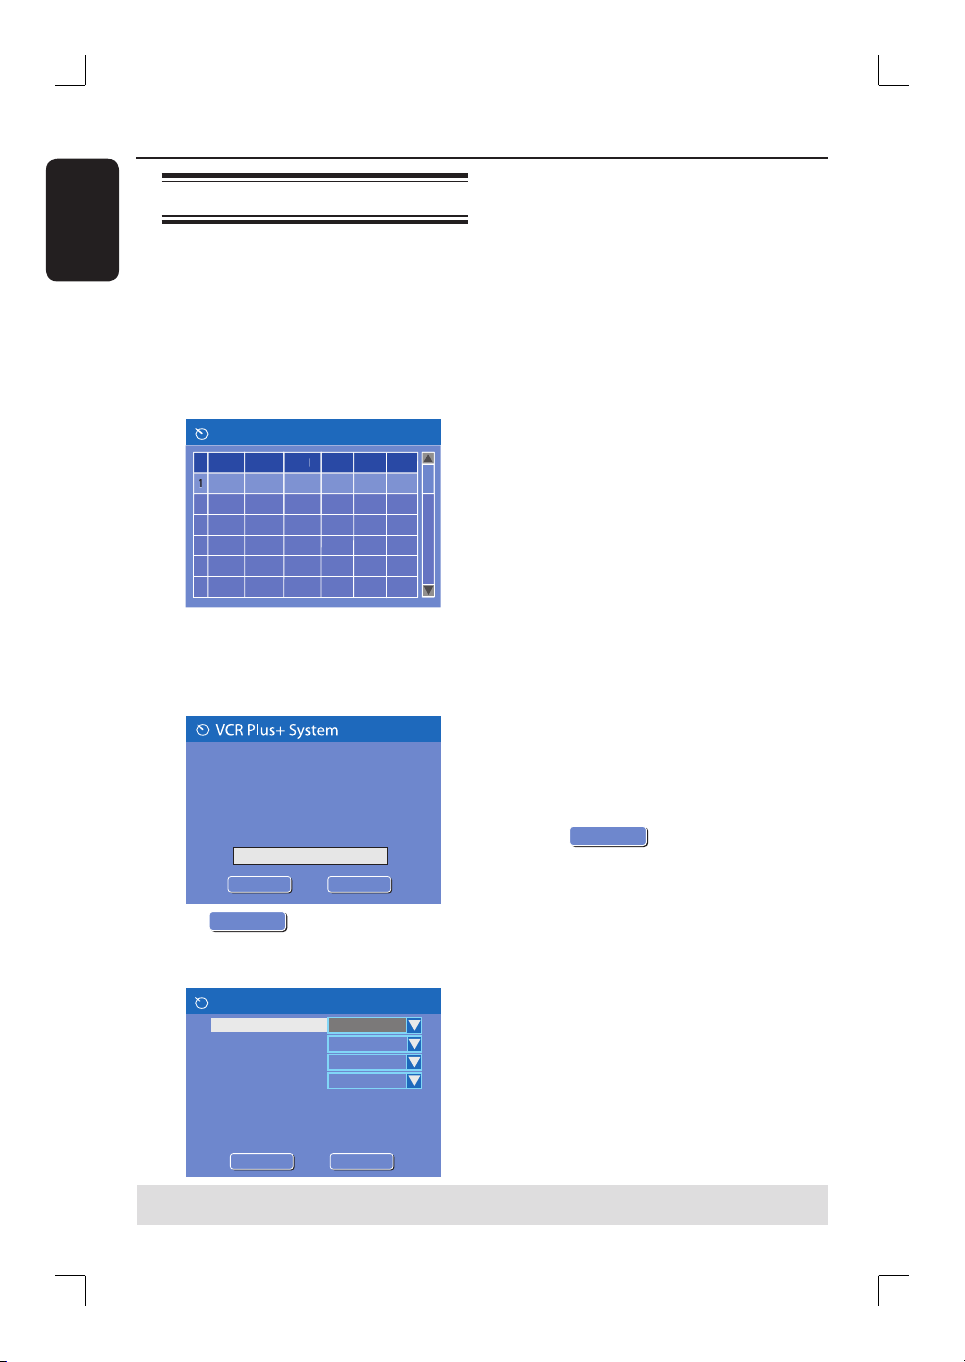
The timer schedule list appears.
1
2
3
4
5
6
Sourc
e
R
ec
M
ode
D
a
t
e
Star
t
En
d
R
ec
T
o
Timer Schedule
C
Use ST keys to highlight the next
available empty slot and press OK.
The VCR Plus+
®.
System setup menu
appears.
Enter the PlusCode programming
number for the show you wish to
record or select MANUAL for manual
timer recording. To go back to timer
schedule press [RETURN].
OK
CONFIRM
OK
MANUAL
D
Select
OK
MANUAL
in the menu and press
OK.
The timer editor menu appears.
Timer Editor
Rec To
Mode
Date
Start
End
HDD
Once
Source
Ch003
0 1 / 3 1 / 0 5
1 0 : 3 3 P M
1 1 : 0 3 P M
Title
M y T i t l e 0
Rec Mode
SP
OK
OK
OK
CANCEL
E
Use ST keys to select an entry in the
menu and press X to enter its options.
{ Source }
– Use ST keys to select the recording
input source.
{ Rec To }
– Use ST keys to select { HDD } or
{ DVD } to enter the recording destination.
{ Rec Mode }
– Use ST keys to select your option.
{ Mode }
– Use ST keys to select { Once },
{ Daily } or { Weekly } recordings.
{ Date }
– Use ST keys or the numeric keypad
0-9 to enter the date for recording.
{ Start }
– Use ST keys or the numeric keypad
0-9 to enter the start time of recording.
{ End }
– Use ST keys or the numeric keypad
0-9 to enter the end time of recording.
{ Title }
– Use STWX keys to select the
alphanumeric options to enter the title of your
recording.
F
Select
OK
OK
in the menu and press
OK.
The system will store the timer entry
and return to the timer schedule list.
To cancel the above timer setting, press
SELECT on the remote control.
TIPS: Set the appropriate mode of record quality for HDD recording, the same record quality will be transferred
from HDD to a recordable DVD.
Timer Recording (continued)
Loading ...
Loading ...
Loading ...