Loading ...
Loading ...
Loading ...
English
22
TIPS: Before making or changing any connections, make sure that all the devices are disconnected
from the power outlet.
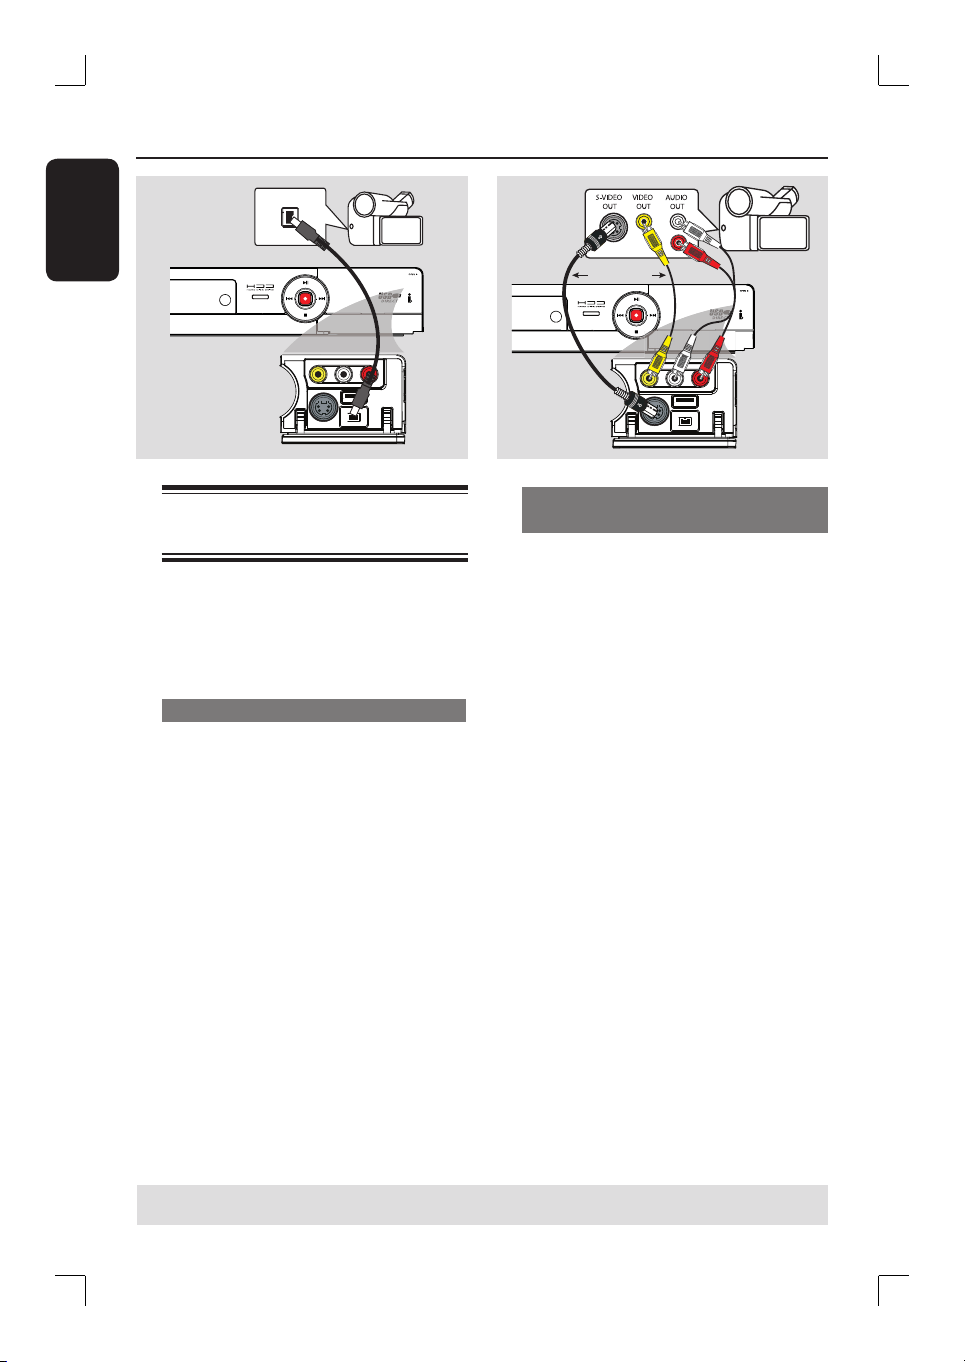
Step 2: Optional Connections (continued)
DV OUT
L
R
B
OR
A
Connecting a camcorder to
the front jacks
You can use the front jacks to copy
camcorder recordings. These jacks are
located behind the ap on the right hand
side and provides convenient connections
for a camcorder.
Option 1: Using the DV IN jack
Use this connection if you have a Digital
Video or Digital 8 camcorder. The DV
jack conforms to the i.LINK standard.
It provides the best picture quality.
Use an i.LINK 4-pin cable (not supplied)
to connect the DV IN jack on the
recorder to the appropriate DV OUT
jack on the camcorder.
Before you start operating, press
USB/DV on the remote control to
select ‘DV’ as the input channel. For
recording, see “Record on Hard Disk” or
“Record on DVD Recordable Disc”.
Helpful Hints:
– The DV IN jack does not support a
connection to a Personal Computer.
– It is not possible to record from the
recorder to your camcorder via the DV IN
jack on your recorder.
Option 2: Using the S-VIDEO In or
VIDEO In jack
Use the VIDEO (CAM1) connection if
your camcorder has only a single video
output (Composite Video, CVBS).
OR, you can use the S-VIDEO (CAM2)
connection if you have a Hi8 or S-VHS(C)
camcorder.
A
Connect the CAM 1 or CAM 2 jack on
the front panel of the recorder to the
corresponding Video or S-VHS output
jack on the camcorder.
B
Use an audio cable (red/white ends) to
connect the AUDIO L/R jacks on the
front panel of the recorder to the audio
output jacks on the camcorder.
Before you start operating, press
SOURCE on the remote control
repeatedly to select ‘CAM1’ or ‘CAM2’
as the input channel, depending on your
connections. For recording, see “Record
on Hard Disk” or “Record on DVD
Recordable Disc”.
Loading ...
Loading ...
Loading ...