Loading ...
Loading ...
Loading ...
English
17
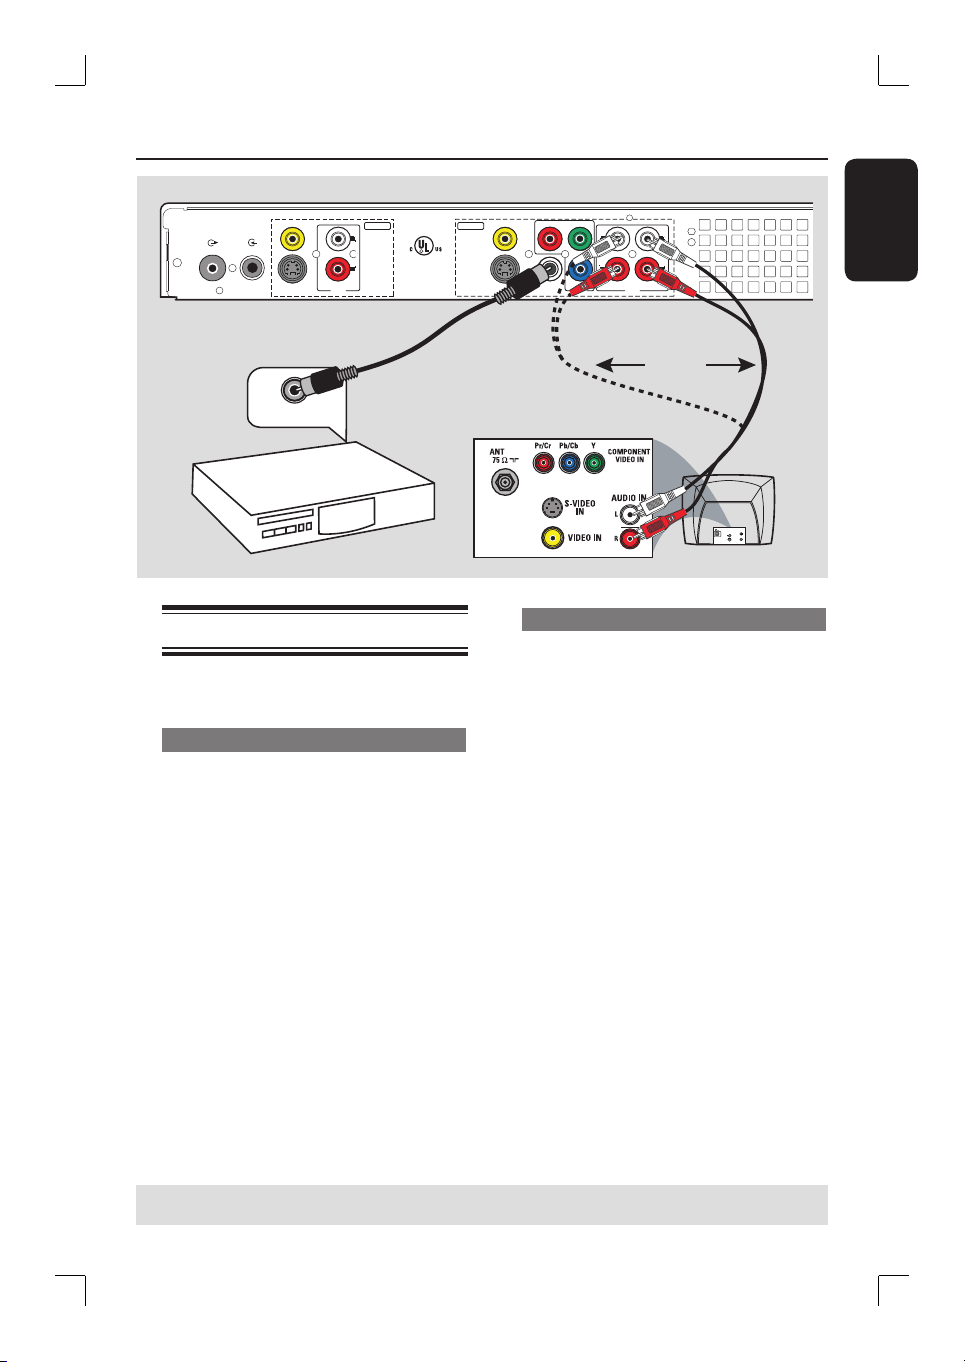
Connecting the audio cables
This connection enables you to listen to
the sound.
Option 1: Using an audio cable
You can connect the recorder to a two
channel stereo system or receiver in
order to enjoy the stereo sound system.
Use the supplied audio cable (red/white
plugs) to connect the AUDIO
OUTPUT jacks to these devices with
the same input jacks.
Step 1: Basic Recorder Connections (continued)
R
L
Y
P
B
P
R
VIDEO
(
CVBS
)
COMPONENT
VIDEO
EXT 2
S-VIDEO
(
Y/C
)
VIDEO
(
CVBS
)
S-VIDEO
(
Y/C
)
AUDIO
COAXIAL
R
L
R
L
OUT 3
(DIGITAL AUDIO)
INPUT
OUTPUT
OUT 2
OUT 1
EXT 1
DVD RECORDER 22F8
Complies with 21 CFR
1040.10 and 1040.11
R
LISTED
AUDIO
ANTENNA-IN
TV-OUT
AU D IO
OUT
S-V ID E O
IN
VIDEO IN
TV
DIGITAL IN
OR
AV ampli er/
receiver
Option 1
Option 2
Option 2: Using a coaxial cable
You can connect the recorder to an AV
ampli er/receiver in order to enjoy
multichannel surround sound.
Use a coaxial cable (not supplied) to
connect the COAXIAL (DIGITAL
AUDIO) jack to the digital input on the
AV ampli er/receiver (with a digital
multichannel sound decoder).
Before you start operating, set the audio
settings accordingly (see “Setup Menu
Options – AUDIO settings.)
If the AUDIO settings do not match your
ampli er’s capabilities, the ampli er may
produce a strong, distorted sound or no
sound at all.
Helpful Hint:
– Do not connect your TV’s audio output
jacks to the AUDIO L/R (IN-EXT) jacks on
this recorder, this may cause unwanted
noise.
TIPS: Before making or changing any connections, make sure that all the devices are disconnected
from the power outlet.
Loading ...
Loading ...
Loading ...