Loading ...
Loading ...
Loading ...
18
General Cleaning
IMPORTANT: Before cleaning, make sure all controls are
off andthe oven is cool. Always follow label instructions on
cleaningproducts.
Soap, water, and a soft cloth or sponge are suggested rst unless
otherwise noted.
STAINLESS STEEL AND BLACK STAINLESS STEEL
(on some models)
To avoid damage to stainless steel or black stainless steel
surfaces, do not use soap-lled scouring pads, abrasive cleaners,
cooktop cleaner, steel-wool pads, gritty washcloths, or abrasive
paper towels.
Cleaning Method:
Rub in direction of grain to avoid damaging.
■ Affresh
®
Stainless Steel Cleaner Part Number W10355016
(not included) or affresh
®
Stainless Steel Cleaning Wipes
PartNumber W10355049 (not included):
See the “Accessories” section to order.
OVEN DOOR EXTERIOR
Cleaning Method:
■ Glass cleaner and a soft cloth or sponge:
Apply glass cleaner to soft cloth or sponge, not directly on
panel.
■ Affresh
®
Kitchen and Appliance Cleaner Part Number
W10355010 (not included):
See the “Accessories” section to order.
NOTE: To clean the trough, the oven door must be removed rst.
See the “Oven Door” section.
OVEN DOOR INTERIOR
Cleaning Method:
■ Self-Cleaning cycle:
For optimal door cleaning result, wipe away any deposits with
a damp sponge before running cycle.
CONTROL PANEL
To avoid damage to the control panel, do not use abrasive
cleaners, steel-wool pads, gritty washcloths, or abrasive
papertowels.
Cleaning Method:
■ Glass cleaner and soft cloth or sponge:
Apply glass cleaner to soft cloth or sponge, not directly
onpanel.
■ Affresh
®
Kitchen and Appliance Cleaner Part Number
W10355010 (not included):
See the “Accessories” section to order.
OVEN CAVITY
Do not use oven cleaners.
Food spills should be cleaned when oven cools. At high
temperatures, foods react with porcelain. Staining, etching,
pitting,or faint white spots can result.
Cleaning Method:
■ Self-Cleaning cycle:
See the “Self-Cleaning Cycle” section rst. Remove racks or
they will discolor and become harder to slide. If this happens,
a light coating of vegetable oil applied to the rack guides will
help them slide.
OVEN RACKS
Cleaning Method:
■ Steel-wool pad
+POWERED ATTACHMENTS
To avoid damage to the nonstick surfaces, do not use abrasive
cleaners, steel-wool pads, gritty washcloths, or abrasive
papertowels. Food spills should be cleaned when the +Powered
Attachment cools.
Do not soak or immerse the Heating Element.
Cleaning Method:
■ Soap, water, and a soft cloth or sponge:
Wipe the Heating Element when it is cool. All attachments can
be cleaned with soap, water, and a soft cloth or sponge.
■ Dishwasher:
The Base Pan, +Grill Attachment, +Baking Stone Attachment,
and +Steamer Attachment are dishwasher-safe.
■ Affresh
®
Cooktop Cleaner:
Stubborn soils on the +Baking Stone Attachment can be
cleaned with baking soda and a non scratch heavy duty scrub
sponge. Rub cream into surface with a damp paper towel or
soft cloth. Continue rubbing until white lm disappears.
See the Smart Oven+ Powered Attachments User Instructions for
more detailed instructions.
Oven Lights
The oven lights are 120 V, 40 W maximum halogen bulbs. They
will come on when the oven door is opened. On double oven
models, both upper and lower lights will come on when either door
is opened. The oven lights will not work during the Self-Cleaning
cycle. When the oven door is closed, touch the appropriate Light
keypad to turn the selected oven light on or off.
To Replace:
Before replacing the bulb, make sure the oven is off and cool.
1. Disconnect power.
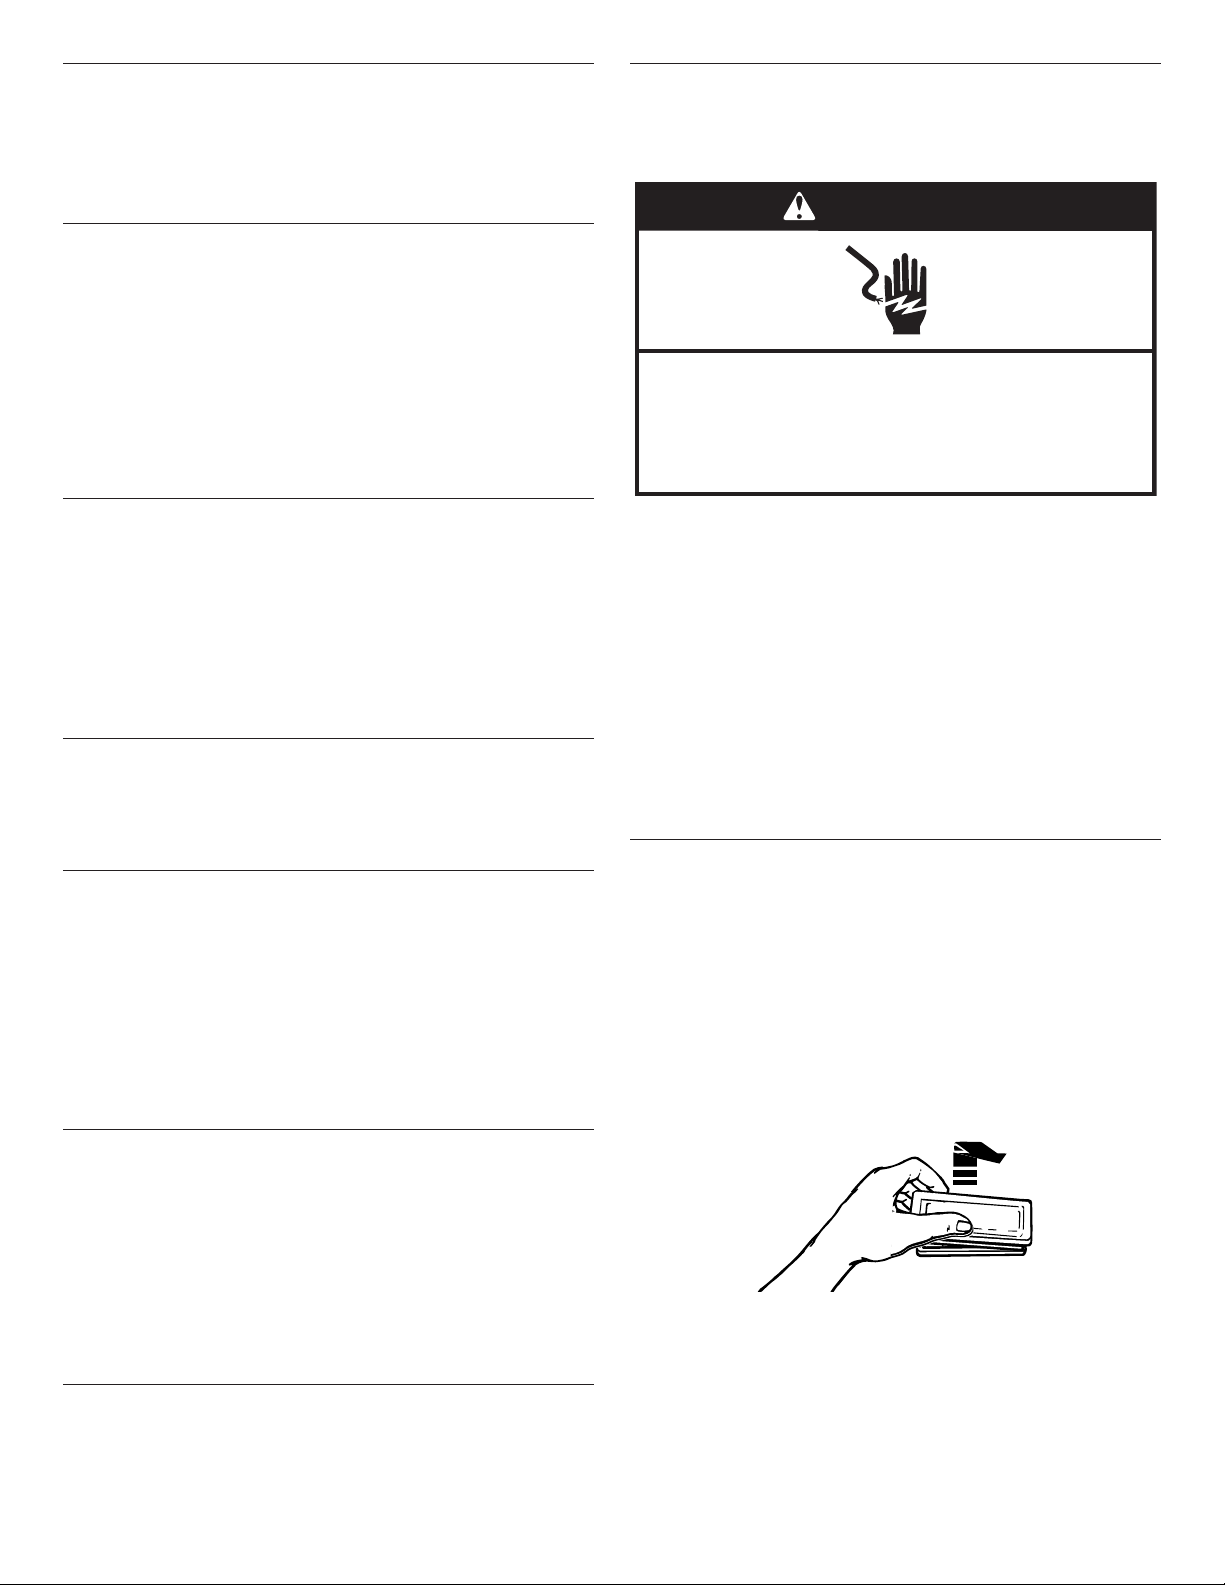
2. Remove glass light cover by grasping the front edge and
pulling away from oven.
3. Remove bulb from socket.
4. Replace bulb, using tissue or wearing cotton gloves to handle
bulb. To avoid damage to or decreasing the life of the new
bulb, do not touch bulb with bare ngers.
5. Replace bulb cover by snapping back into wall.
6. Reconnect power.
IMPORTANT: Do not use lamps rated higher than 40 W.
WARNING
Electrical Shock Hazard
Do not immerse heating element in water or place in
dishwasher.
Doing so can result in death or electrical shock.
Loading ...
Loading ...
Loading ...