Loading ...
Loading ...
Loading ...
17
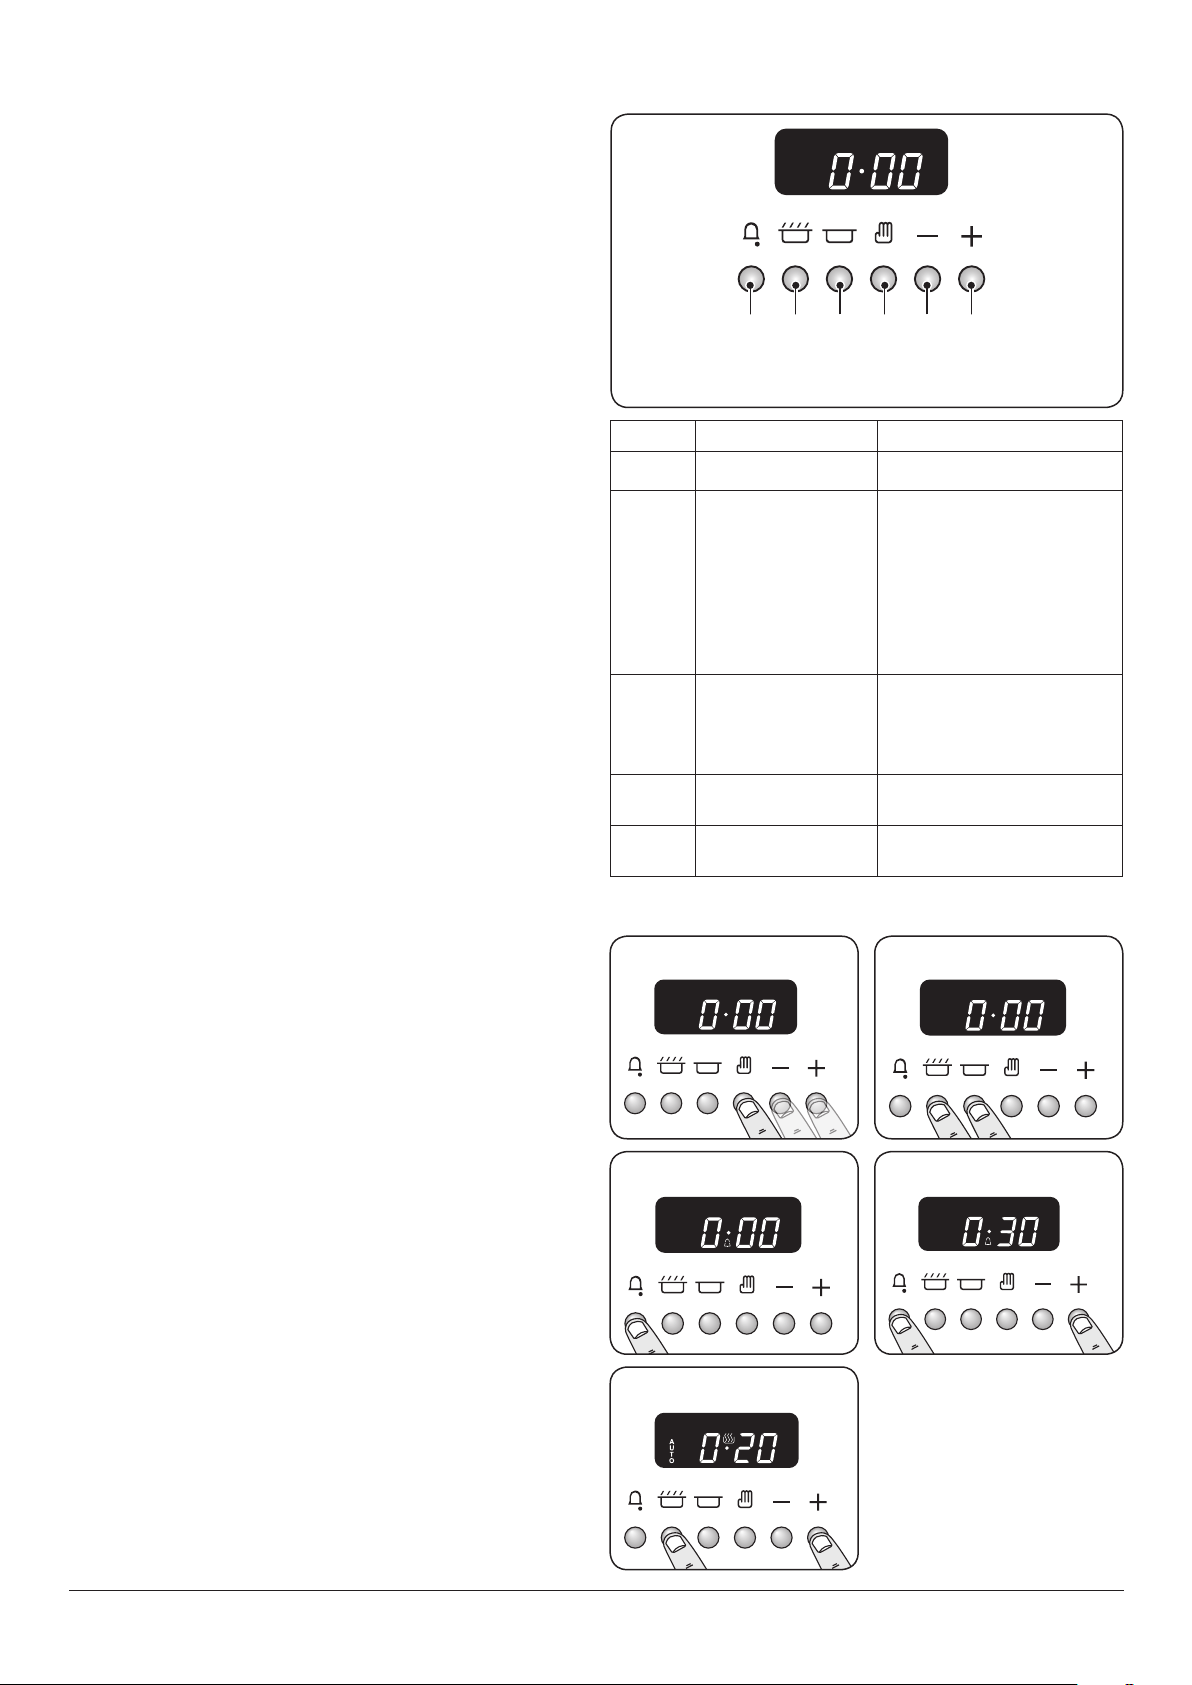
The 6-button Clock
You can use the timer (Fig. 3.17) to turn the oven(s) on
and o. The clock must be set to the time of day before the
oven(s) will work.
Table 3.1 describes the symbols shown on the digital display.
Setting the Time of Day
When the cooker is rst connected to the mains, or if there
has been a prolonged power interruption, the clock display
ashes [ 0.00 ] and [AUTO].
During the time setting process the centre dot will ash.
When the process is complete the dot will stop ashing and
the [
] symbol will be displayed.
The time of day can be set in two ways:
• Press and hold the [
] button. Now press the [+] or [-]
buttons to increase or decrease the time (Fig. 3.18).
Holding the [+] or [-] buttons for more than 2 seconds
will advance / decrease the set time quickly. Release the
buttons to set the time of day.
• Press and hold both the [
] and [
] buttons down
(Fig. 3.19). Now press the [+] button (or [–] button) until
the correct time shows.
Do not forget that it is a 24-hour clock.
If you need to reset the clock/cooker, turn o the power and
wait several minutes, then start again.
Automatic Dimming
Providing there are no automatic programs set, and the
minute minder is not active, your clock will automatically dim
during the hours between 22:00 and 06:00.
Minute Minder
Press and hold the [
] button (Fig. 3.20), and then press the
[+] button (or [–] button) until the length of time you want to
cook for is shown (Fig. 3.21).
You can check the time remaining by pressing [
]. When the
beeper sounds cancel it by pressing any button.
To reset the minute minder time; simultaneously press the [+]
and [-] buttons.
Note: this will clear all automatic programs.
• The ‘cook period’, which is the length of time you want
the oven to cook for.
• The ‘stop time’, which is the time of day you want the
oven to stop cooking.
Setting a Cook Duration
Press and hold the [
] button and set the required ‘cook
period’ by pressing the [+] button (or [–] button) (Fig. 3.22).
The clock will now control the cook period of your oven(s).
The [
] symbol and [AUTO] will be displayed.
Once the ‘cook period’ is reached, the beeper sounds and the
[AUTO] symbol ashes. Turn the oven control knob to 0 and
ArtNo.302-0002 - 6BC annotated
ArtNo.302-0002 - 6BC annotated
ArtNo.302-0002 - 6BC annotated
ArtNo.302-0002 - 6BC annotated
ArtNo.302-0002 - 6BC annotated
ArtNo.302-0002 - 6BC annotated
A B C D E F
A – Minute minder, B – ‘Cook’ time, C – ‘Stop’ time, D – Manual,
E & F – Time setting buttons
Fig. 3.17
Fig. 3.18 Fig. 3.19
Fig. 3.20 Fig. 3.21
Fig. 3.22
Symbol Function Notes
[
]
Minute Minder is active
[
]
Oven(s) can be operated
If the ‘cook’ [
] symbol is not
displayed the program has either:
ended and the oven(s) are non-
operational
the oven(s) are being controlled
by an automatic program that has
not started
[AUTO]
Oven(s) are being
controlled in semi-
automatic or automatic
mode
[P]
Self clean (pyrolytic)
mode has been enabled
Your cooker may not have this
pyrolytic function
[dot]
Flashes during setting
the time of day
Table 3.1
Loading ...
Loading ...
Loading ...