Loading ...
Loading ...
Loading ...
14
ArtNo.300-0005 2BC
minute minder setting
E
A B
ArtNo.300-0005 2BC
minute minder setting
A B
C D
The clock must be set to the time of day before the oven
will work.
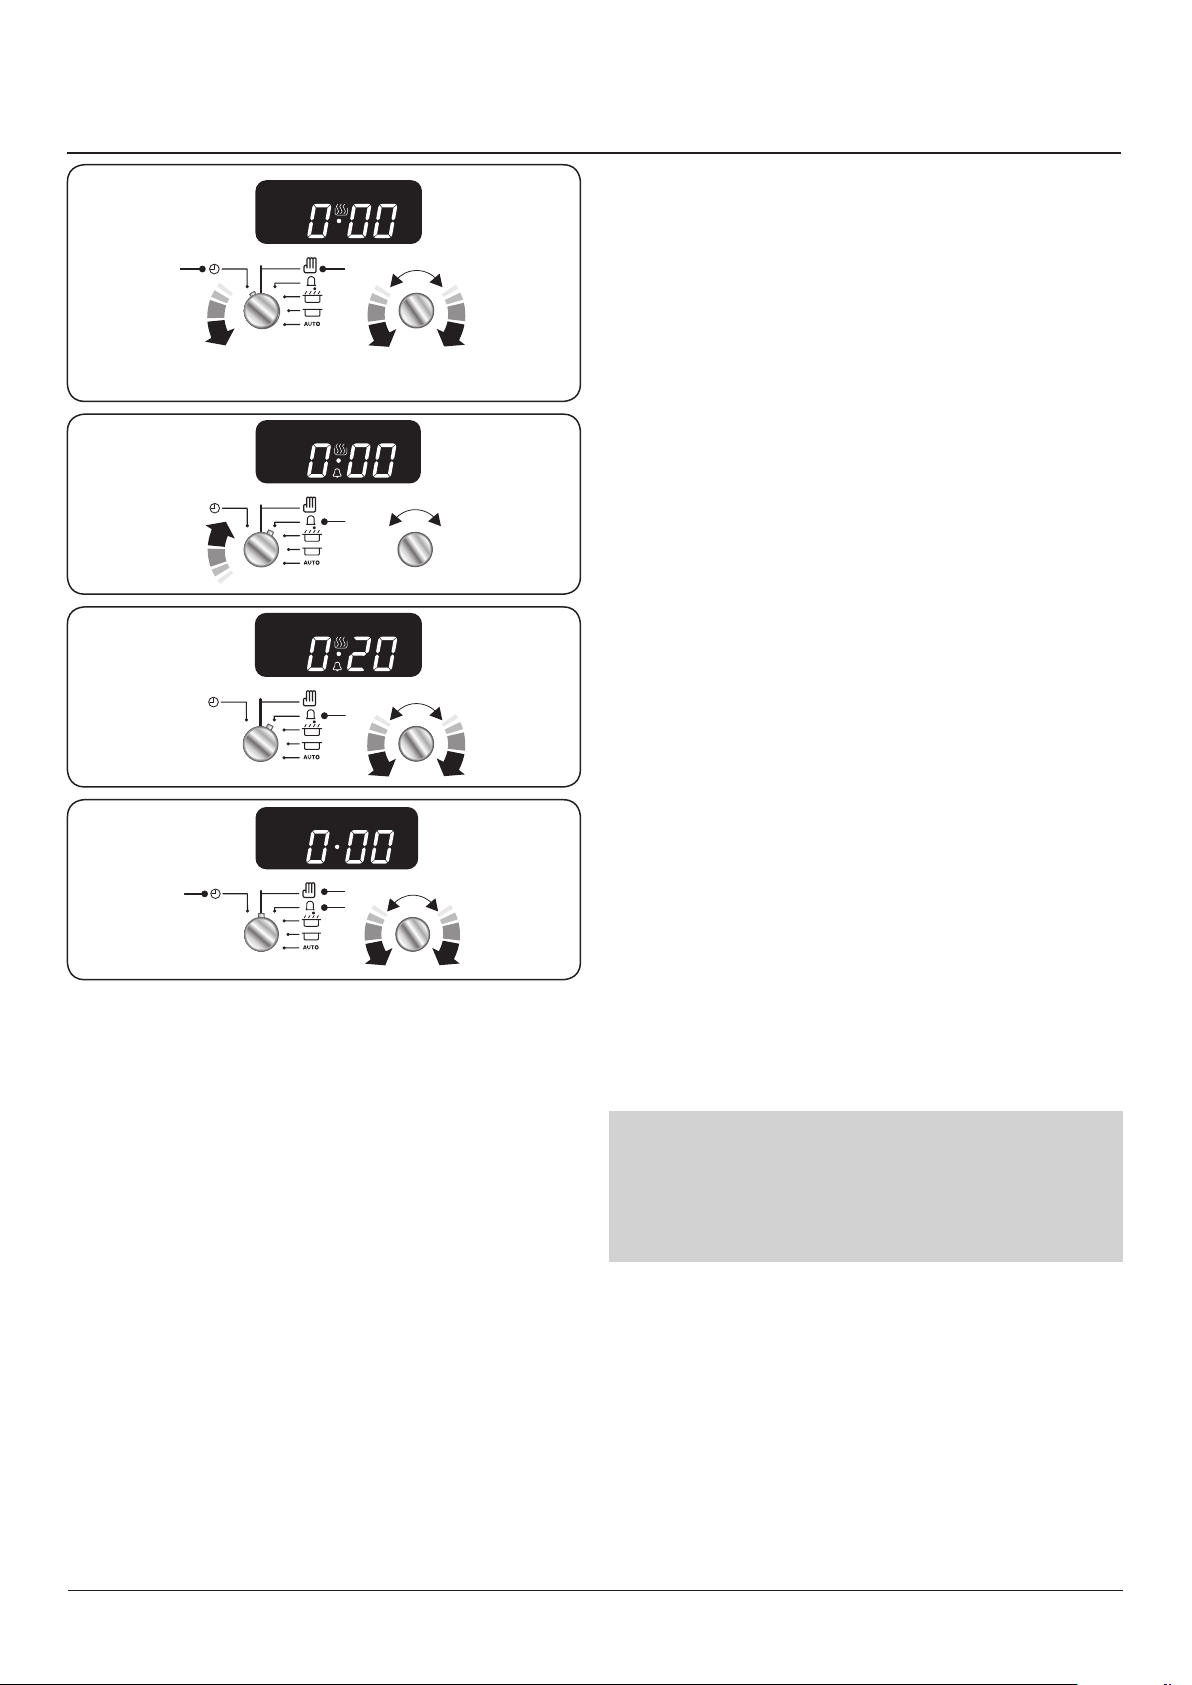
Setting the Clock
1. Once the cooker is connected and switched on, the
display will start to ash.
2. To set the time, turn the Timer (A) knob to the Clock
(C) setting and back to the Manual (D) position. The
centre dot will ash indicating the time can be set. Turn
the Adjusting (B) knob either clockwise or counter-
clockwise (Fig. 3.1) to set the time.
3. Once you have set the time, allow the centre dot to stop
ashing, the time is now set.
Setting the Minute Minder
A Minute Minder (E) is a feature that can be set for a number
of minutes and sounds an alarm once the specied amount
of time has elapsed.
1. Turn the Timer (A) knob to the Minute Minder (E)
setting – it should click into position (Fig. 3.2).
2. Turn the Adjusting (B) knob to set the amount of time
required. Minimum time 1 minute (Fig. 3.3).
3. Turn the Timer (A) knob back to the Manual (D) setting
to see the current time and the ‘Bell’ symbol on the
display.
Cancel the Timer Alarm
Once the specied time has elapsed it will emit an alarm.
There are two ways to cancel the alarm:
1. Turn the Adjusting (B) knob counter-clockwise or
clockwise (Fig. 3.4).
2. Turn the Timer (A) knob to the Clock (C) or the Minute
Minder (E) setting, and back to the Manual (D) mode,
to return to normal cooking (Fig. 3.4).
NOTE
If the alarm is not manually switched o it will stop after
approximately 2 minutes.
When the Minute Minder is active the clock will not dim
between the hours of 10 pm and 6 am
ArtNo.301-0007 2BC
Stopping the oven 1
D
A B
E
C
E
A B
Fig. 3.1
A – Timer knob, B – Adjusting knob
Fig. 3.2
Fig. 3.3
Fig. 3.4
3. The Clock
Loading ...
Loading ...
Loading ...