Loading ...
Loading ...
Loading ...
8
BEFORE SETTING OVEN CONTROLS
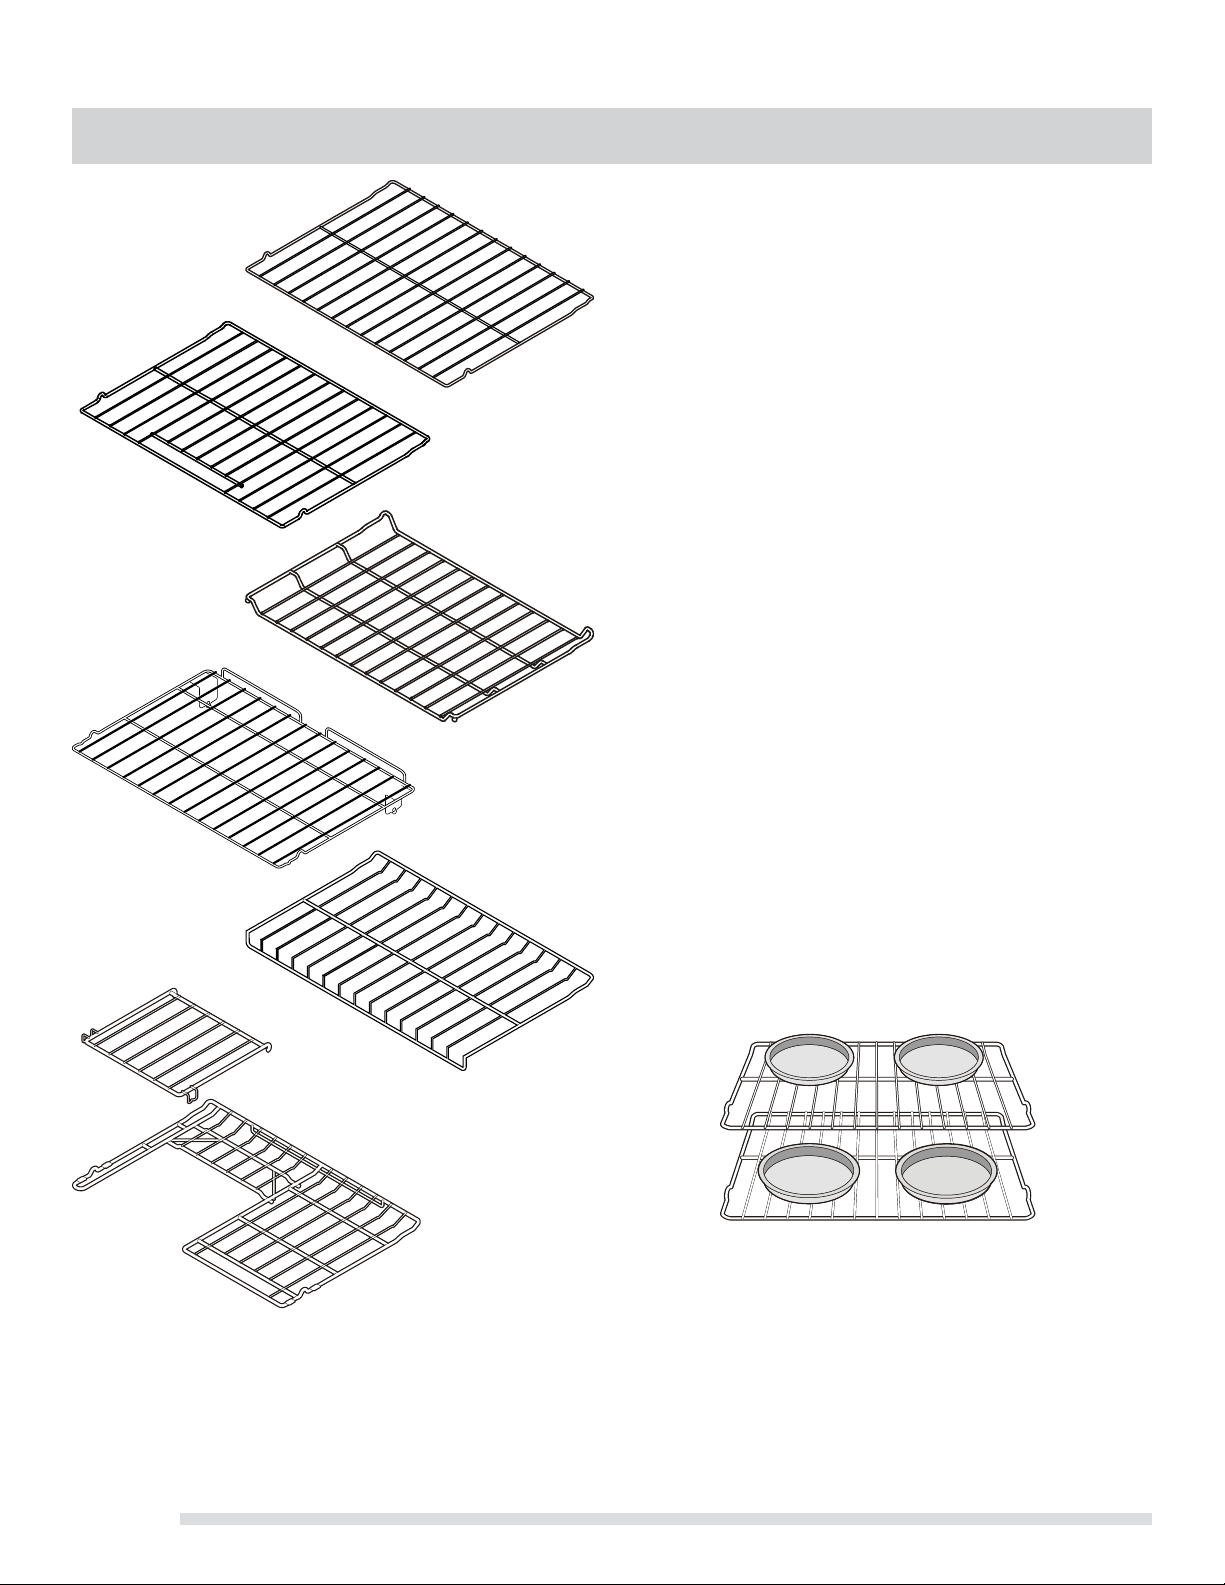
Types of oven racks
Your range may be equipped with one or more of the
following oven rack types listed below:
The at oven rack may be used for most cooking needs
and may be placed in all rack positions.
The at handle oven rack (some models) may be used
for most cooking needs and may be placed in all* rack
positions. Similar to the at rack but comes with a handle.
The offset oven rack (some models) provides additional
stepdown positions from the standard at rack design.
The offset design positions the base of the rack about 1/2
of a rack position lower than the at rack.
The half rack (some models) has a removable section
to allow for taller cooking utensils in the oven. When the
removable section is in place, the rack may be used like a
at rack.
The Effortless™ Oven Rack (some models) instructions
are provided later in this section. See important note
below.
The bottom oven rack (some models) should only be
used in the lowest oven rack position. This rack should be
used when placing large cuts of meat in the oven.
Fig. 1
at
oven
rack
at handle
oven rack
(some
models)
offset
oven rack
(some
models)
Effortless™
Oven Rack
(some
models)
half
oven rack
with
removable
shelf (some models)
bottom
oven rack
(some
models)
Baking layer cakes with 1 or 2 oven racks
For best results when baking cakes using 2 oven racks,
place cookware on rack in positions 3 & 5. For best
results when using a single or an offset oven rack, place
cookware on rack in position 2, 3 or 4.
Air circulation in the oven
For best baking results allow 2-4” (5-10 cm) around the
cookware for proper air circulation and be sure pans and
cookware do not touch each other, the oven door, sides or
back of the oven cavity. For even heating, hot air must be
able to circulate freely around the pans and cookware (See
Fig. 1).
Loading ...
Loading ...
Loading ...