Loading ...
Loading ...
Loading ...
144
2
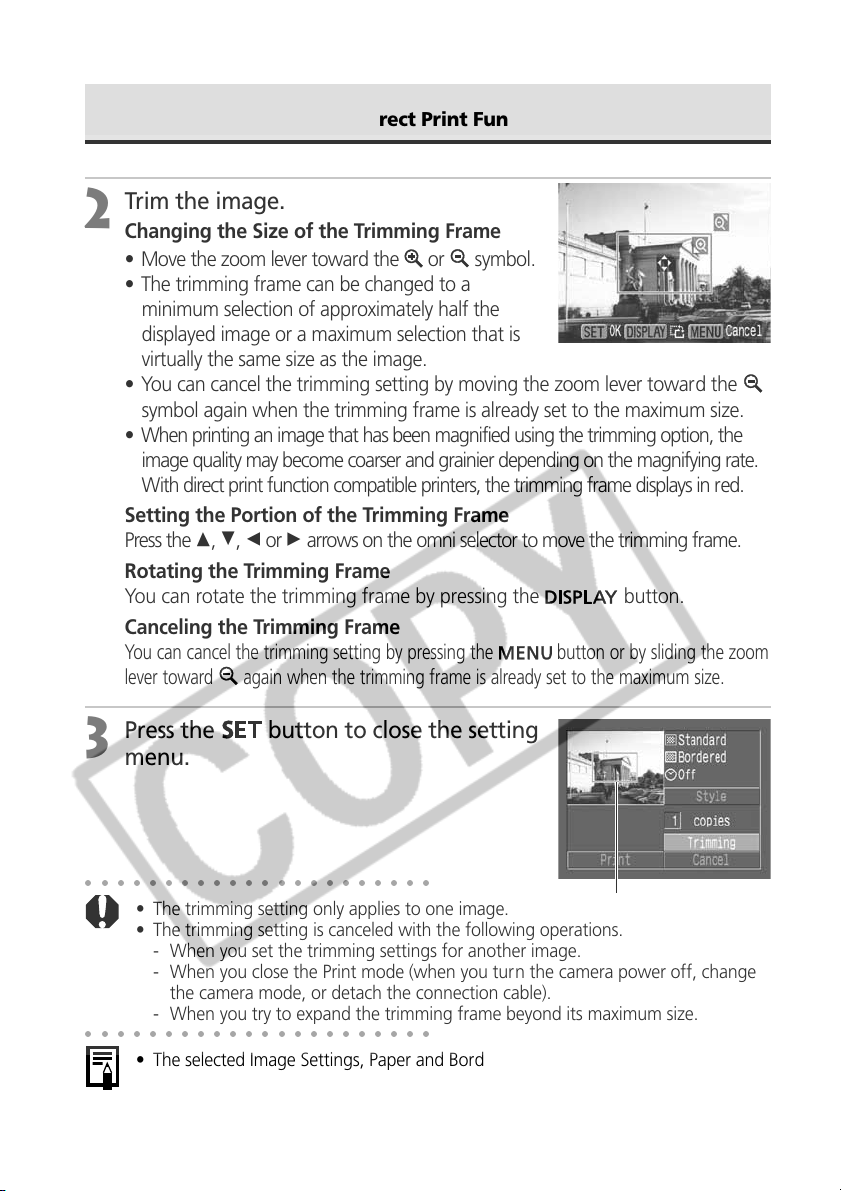
Trim the image.
Changing the Size of the Trimming Frame
• Move the zoom lever toward the
or symbol.
• The trimming frame can be changed to a
minimum selection of approximately half the
displayed image or a maximum selection that is
virtually the same size as the image.
• You can cancel the trimming setting by moving the zoom lever toward the
symbol again when the trimming frame is already set to the maximum size.
• When printing an image that has been magnified using the trimming option, the
image quality may become coarser and grainier depending on the magnifying rate.
With direct print function compatible printers, the trimming frame displays in red.
Setting the Portion of the Trimming Frame
Press the C, D, B or A arrows on the omni selector to move the trimming frame.
Rotating the Trimming Frame
You can rotate the trimming frame by pressing the
button.
Canceling the Trimming Frame
You can cancel the trimming setting by pressing the
button or by sliding the zoom
lever toward
again when the trimming frame is already set to the maximum size.
3
Press the
button to close the setting
menu.
○○○○○○○○○○○○○○○○○○○○○○
• The trimming setting only applies to one image.
• The trimming setting is canceled with the following operations.
- When you set the trimming settings for another image.
- When you close the Print mode (when you turn the camera power off, change
the camera mode, or detach the connection cable).
- When you try to expand the trimming frame beyond its maximum size.
○○○○○○○○○○○○○○○○○○○○○○
• The selected Image Settings, Paper and Border settings determine the shape of the
trimming frame.
• Please use the LCD monitor to set the trimming settings. The trimming frame may
not display correctly on a TV monitor.
Trimming Frame
Setting the Print Settings (Direct Print Function) (continued)
Loading ...
Loading ...
Loading ...