Loading ...
Loading ...
Loading ...
143
Printing, Transferring
Setting the Printing Area (Trimming)
You can specify which portion for an image gets printed.
○○○○○○○○○○○○○○○○○○○○○○
Prior to Trimming
Please set the Print Style (Image Settings, Paper, Borders and Date) first before setting
the trimming settings (p. 141).
1
In replay mode, press the
button
and the C or D arrow on the omni
selector to choose [Trimming] and press
the
button again.
The trimming frame will appear at the center of
the image. If a trimming setting has already been
selected for the image, the frame will appear
around the previously selected portion.
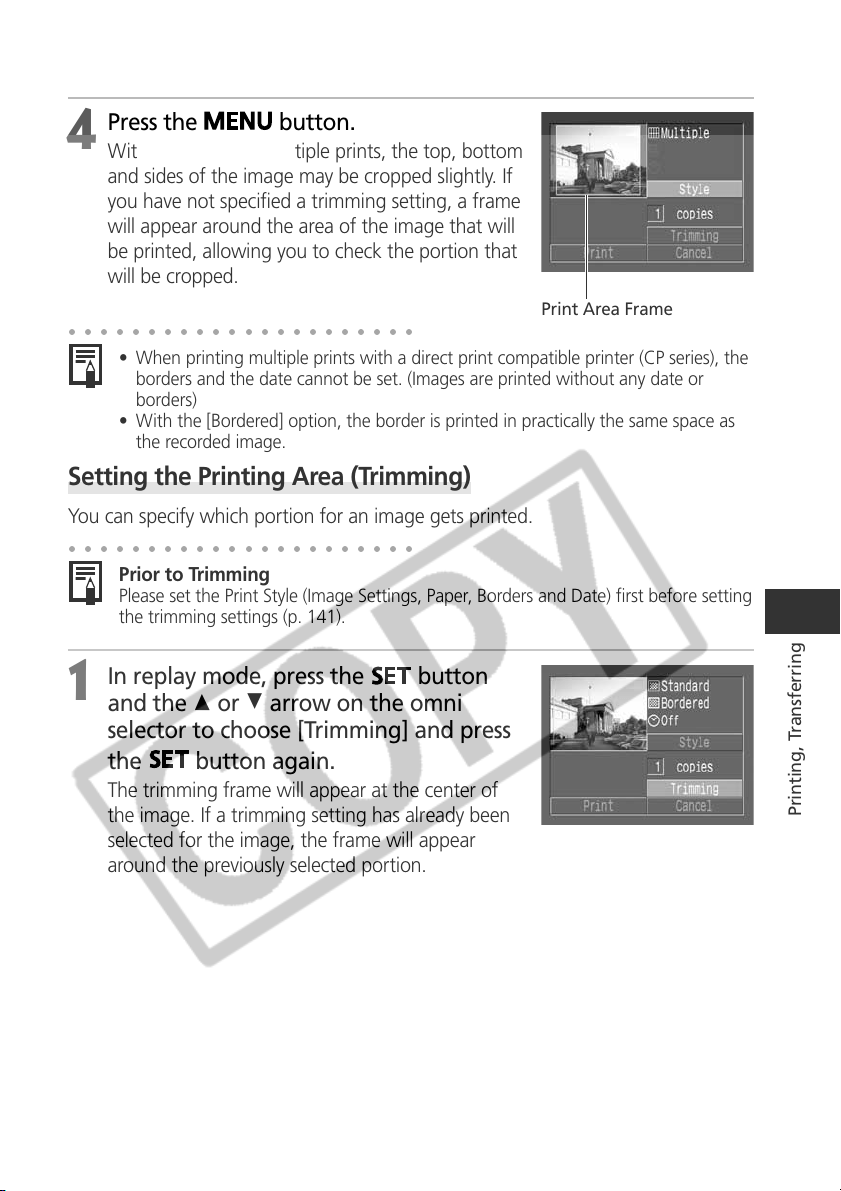
Print Area Frame
4
Press the
button.
With borderless or multiple prints, the top, bottom
and sides of the image may be cropped slightly. If
you have not specified a trimming setting, a frame
will appear around the area of the image that will
be printed, allowing you to check the portion that
will be cropped.
○○○○○○○○○○○○○○○○○○○○○○
• When printing multiple prints with a direct print compatible printer (CP series), the
borders and the date cannot be set. (Images are printed without any date or
borders)
• With the [Bordered] option, the border is printed in practically the same space as
the recorded image.
Loading ...
Loading ...
Loading ...